 Advanced Settings
 FAQ
FAQ Compatible Plugin & Themes
By default, when you install the Multistep Checkout for WooCommerce(Pro) plugin, it creates 3 steps: Billing Details, Shipping Details, and Confirm Order. These steps are created using the default sections from your WooCommerce checkout page. If you want to show a custom section created by the Checkout Field Editor for WooCommerce(Pro) plugin inside a custom step from the Multistep Checkout plugin, you have to follow the steps below;
- Create a new step using the Multistep Checkout for WooCommerce plugin.
- Navigate to Checkout Field Editor for WooCommerce(Pro) Dashboard: WooCommerce > Checkout Form > Checkout Fields.
- Click on +Add New Section
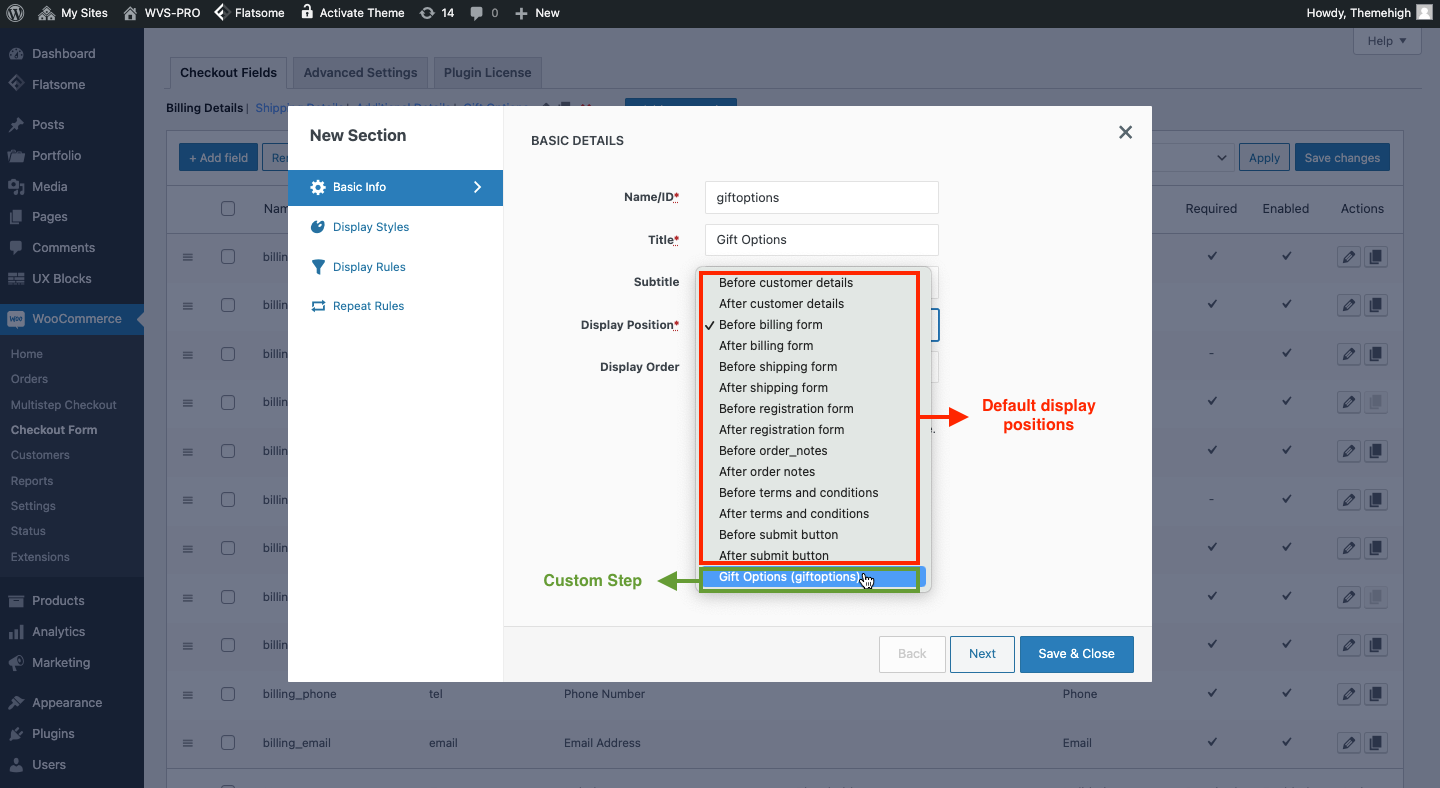
- Inside the Basic Info tab, you will find a Display Position field. (This option determines where the custom section that you are creating should be displayed on the checkout page.)
- Click on Display Position to see all the custom steps you created using the Multistep Checkout plugin in the dropdown list along with the default display positions.
- Choose the preferred step in which the custom section you create should be displayed.
- Click on the Save & Close button after the changes are confirmed.
Notes
- There should be at least one custom field present in the custom sections you create using the Checkout Field Editor for WooCommerce(Pro) plugin. Otherwise, the changes will not be visible on the front end.
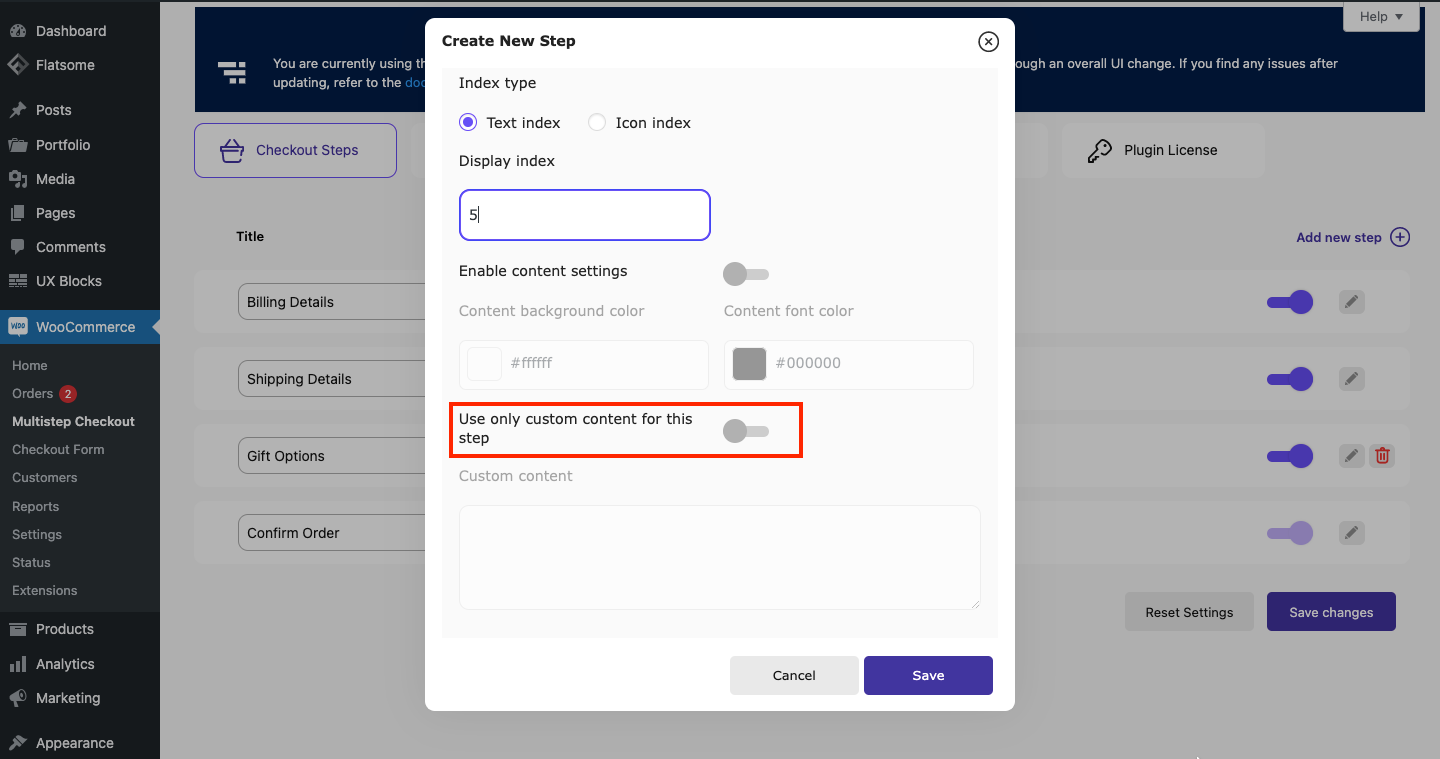
- Custom sections cannot be displayed inside new steps with Custom Content enabled. Make sure Custom Content is disabled for new steps if you are creating steps to display custom sections from Checkout Field Editor for WooCommerce(Pro).
-
All the steps you created(except the steps with custom content) using the Multistep Checkout for WooCommerce plugin will be listed along with the 14 default display positions available in Checkout Field Editor for WooCommerce(Pro) plugin.