 Advanced Settings
 FAQ
FAQ Compatible Plugin & Themes
To edit the next and previous buttons,
Navigate to WooCommerce > Multistep Checkout > Button Settings > Next and Previous Button Settings.
Customize the Next and Previous Buttons
The below options let you customize the Next and Previous buttons of your checkout steps.
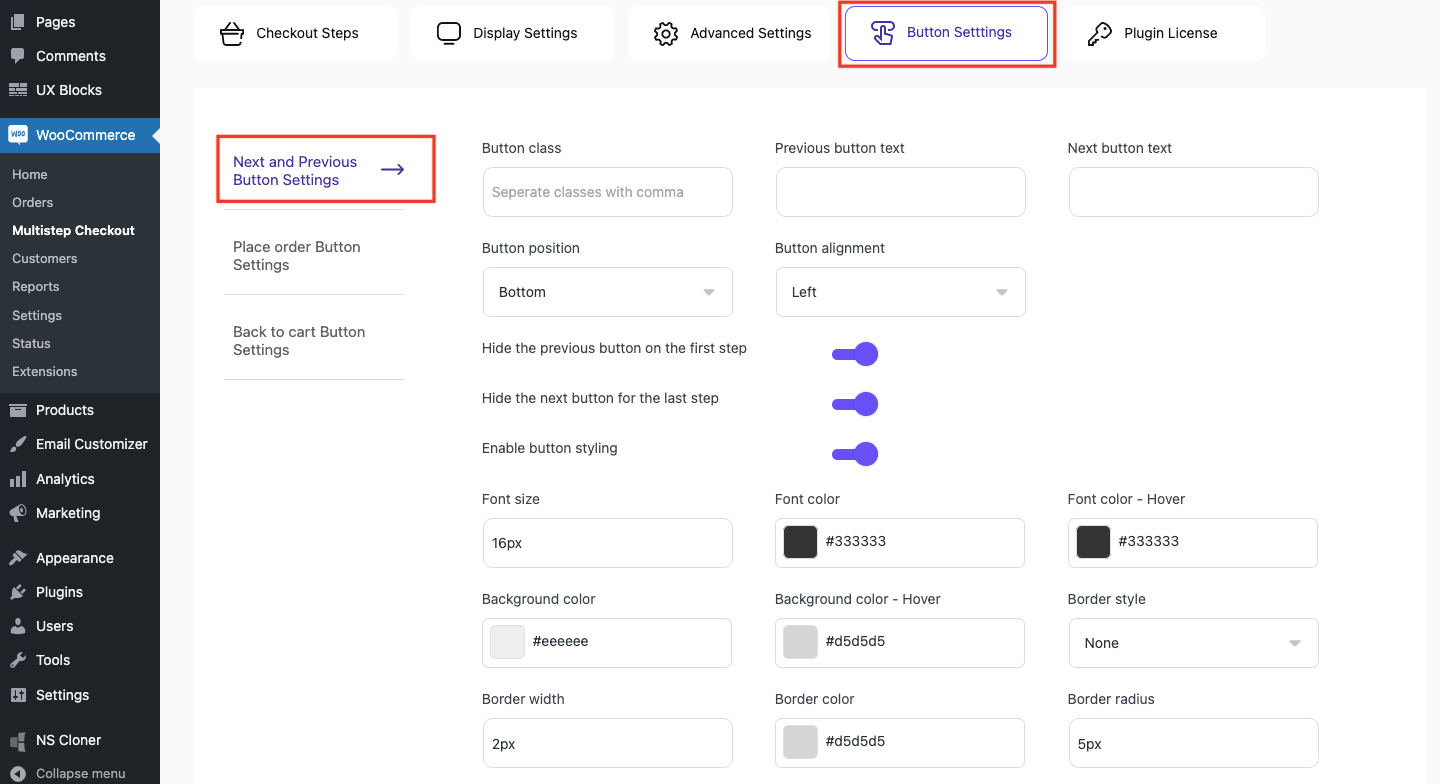
- Button class: Used for stying the button element. Multiple class names can be separated with commas.
- Previous button text: Enter the text to be displayed on the previous button.
- Next button text: Enter the text to be displayed on the next button.
- Button position: Choose the position of the buttons from the corresponding dropdown.
- Button alignment: Choose a specific alignment for the buttons from the corresponding dropdown.
Show/hide the next & previous buttons
- Hide the previous button on the first step: Enable the option to hide the Previous button from the first step of the checkout process.
- Hide the next button for the last step: Enable the option to hide the Next button from the last step of the checkout process.
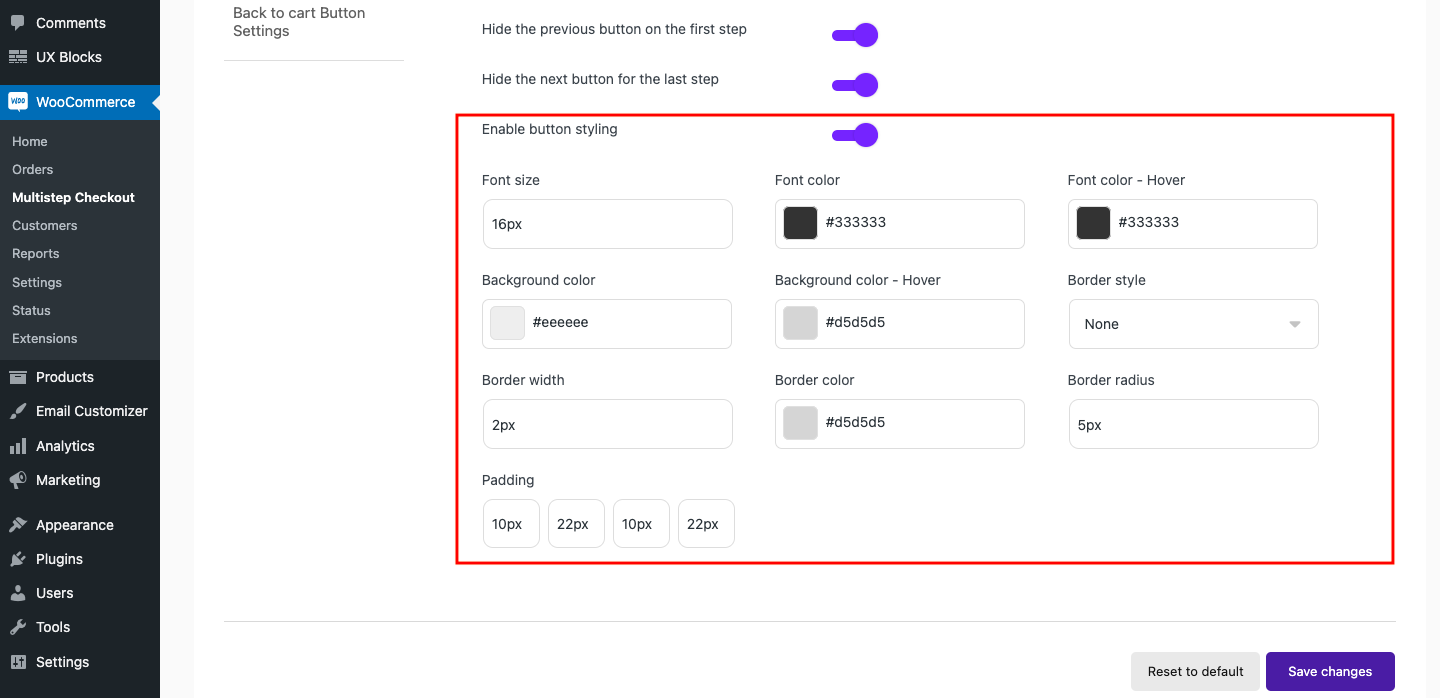
Enable button styling: Enable the option to edit the button style.
|
Button Styling |
|
|---|---|
|
Enable button styling |
Enable the option, if you need to edit the button style. |
|
Font size |
Enter the required font size for the button text. |
|
Font color |
Select an apt font color for the button text. |
|
Font color – Hover |
Select an apt font color for the button text on hover. |
|
Background color |
Select a background color for the next and previous buttons. |
|
Background color – Hover |
Select a background color for the next and previous buttons on hover. |
|
Border style |
Choose a border style for the buttons from the dropdown. |
|
Border width |
Provide a specific width required for the button border. |
|
Border color |
Select an apt border color for the buttons. |
|
Border radius |
Enter the required size for the border radius. |
|
Padding |
Provide the required padding size on the corresponding fields. |