

Shipping is a crucial component of any e-commerce store. It is the final and most crucial step for a customer. If their experience has been excellent up to this point, the entire transaction’s success depends on this phase.
Table of Contents
WooCommerce has built-in settings to customize shipping options for your store. It’s vital to configure this before launching your store. In this blog, we’ll cover everything you need to set up a proper and satisfying shipping experience for your customers.
Shipping Zones
The shipping zone is the geographical area/region to which your items will be shipped. If a customer’s shipping address doesn’t match the shipping zone you have set up, then the shipping options will not be displayed, and they won’t be able to buy the product.
So, let’s get started with setting up your shipping zones.
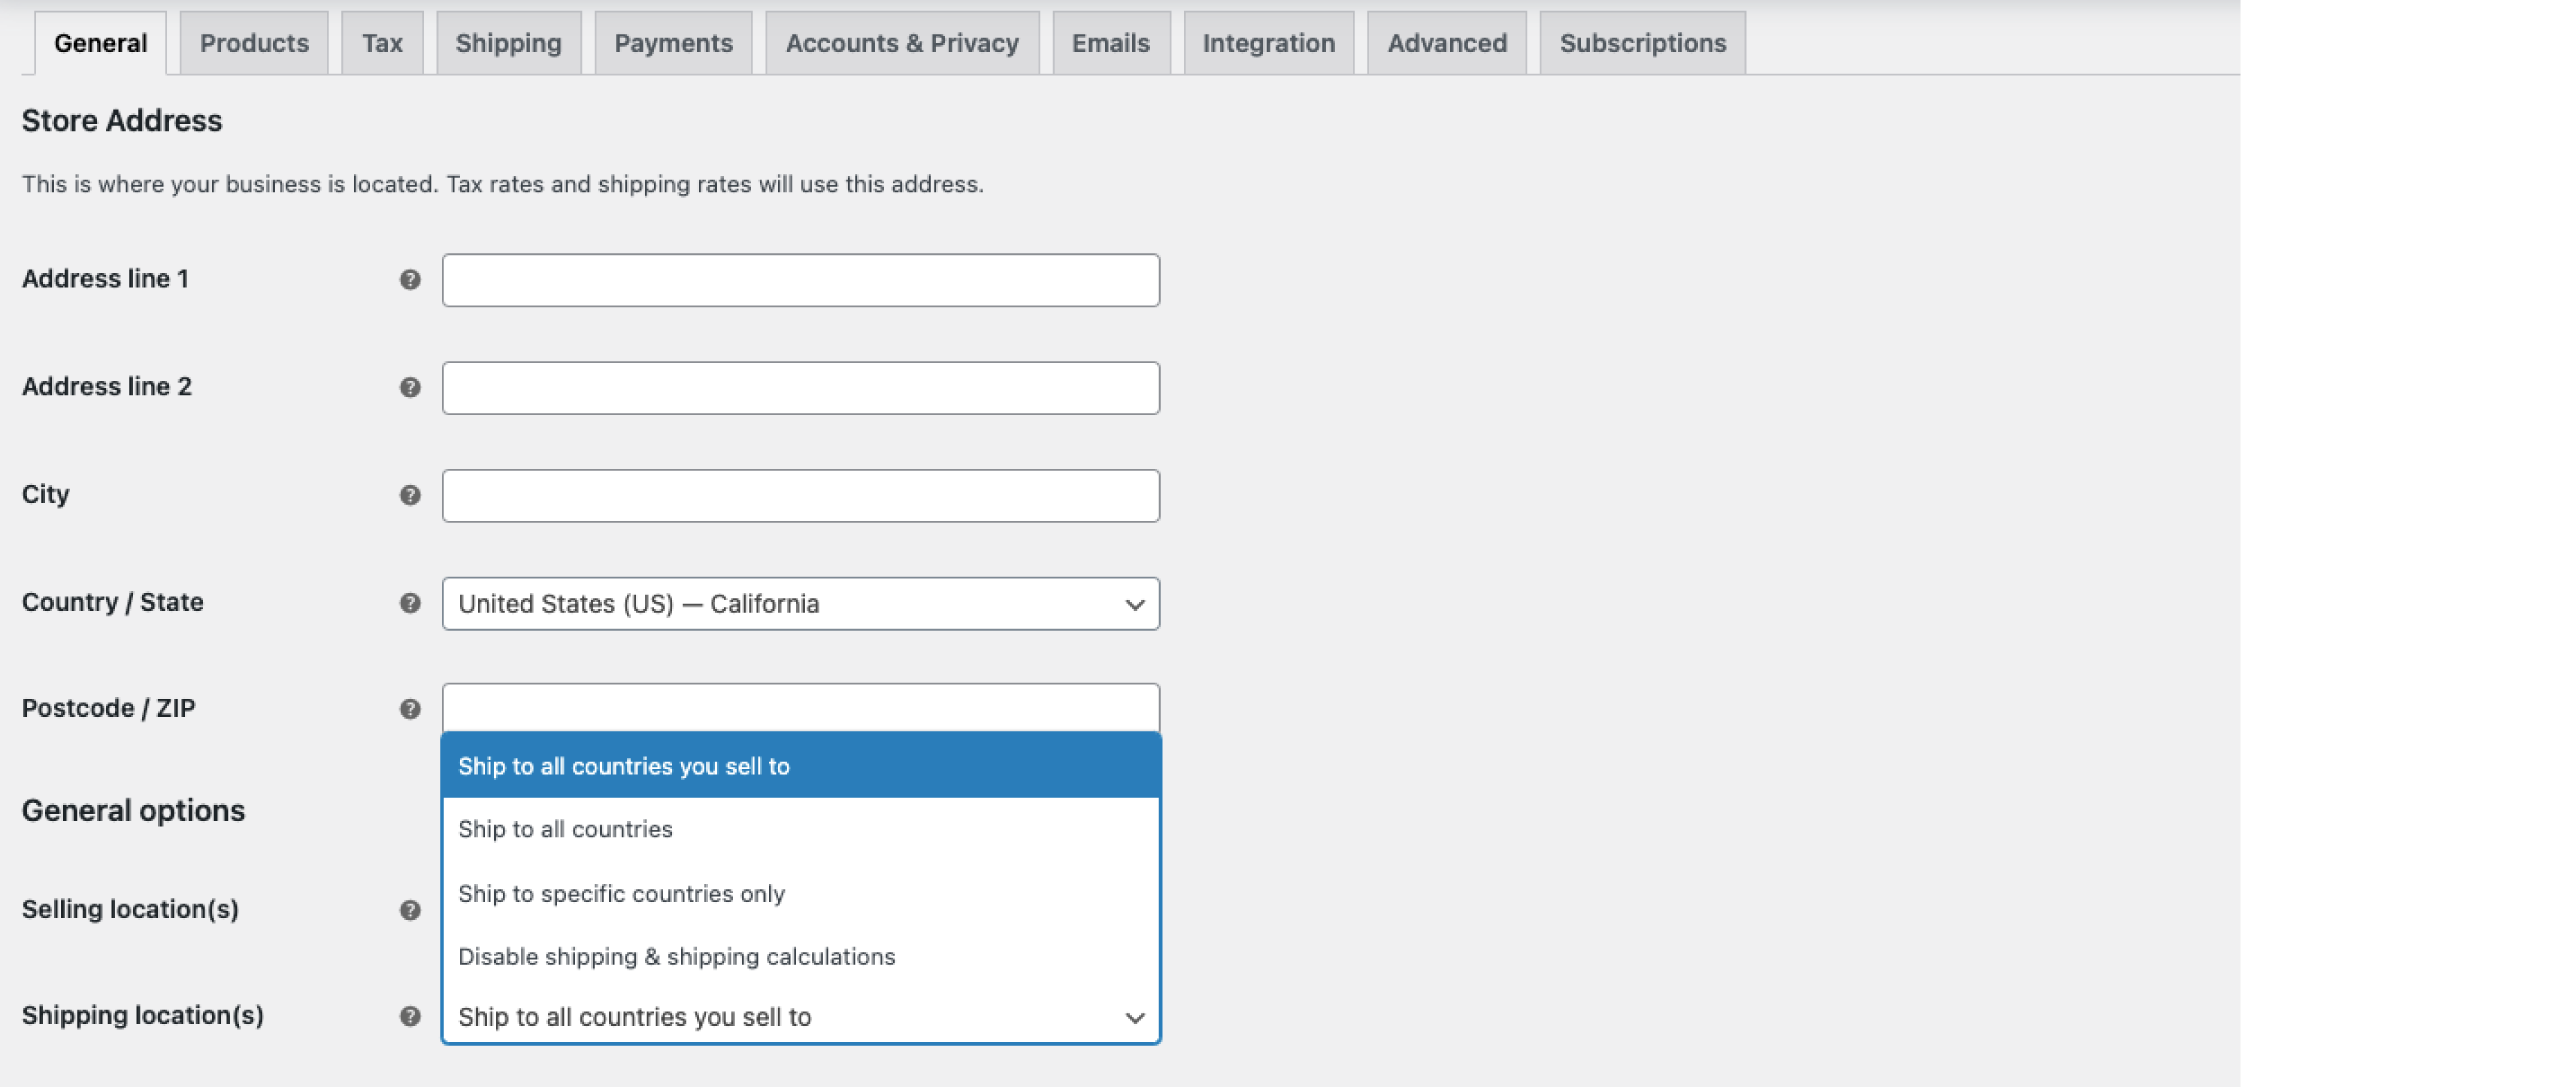
- Access the Shipping Tab from Woocommerce Settings in your WordPress Dashboard.
 If you can’t find the Shipping section in the WooCommerce settings, check out the WooCommerce General Settings, where you have to enable the Shipping Settings.
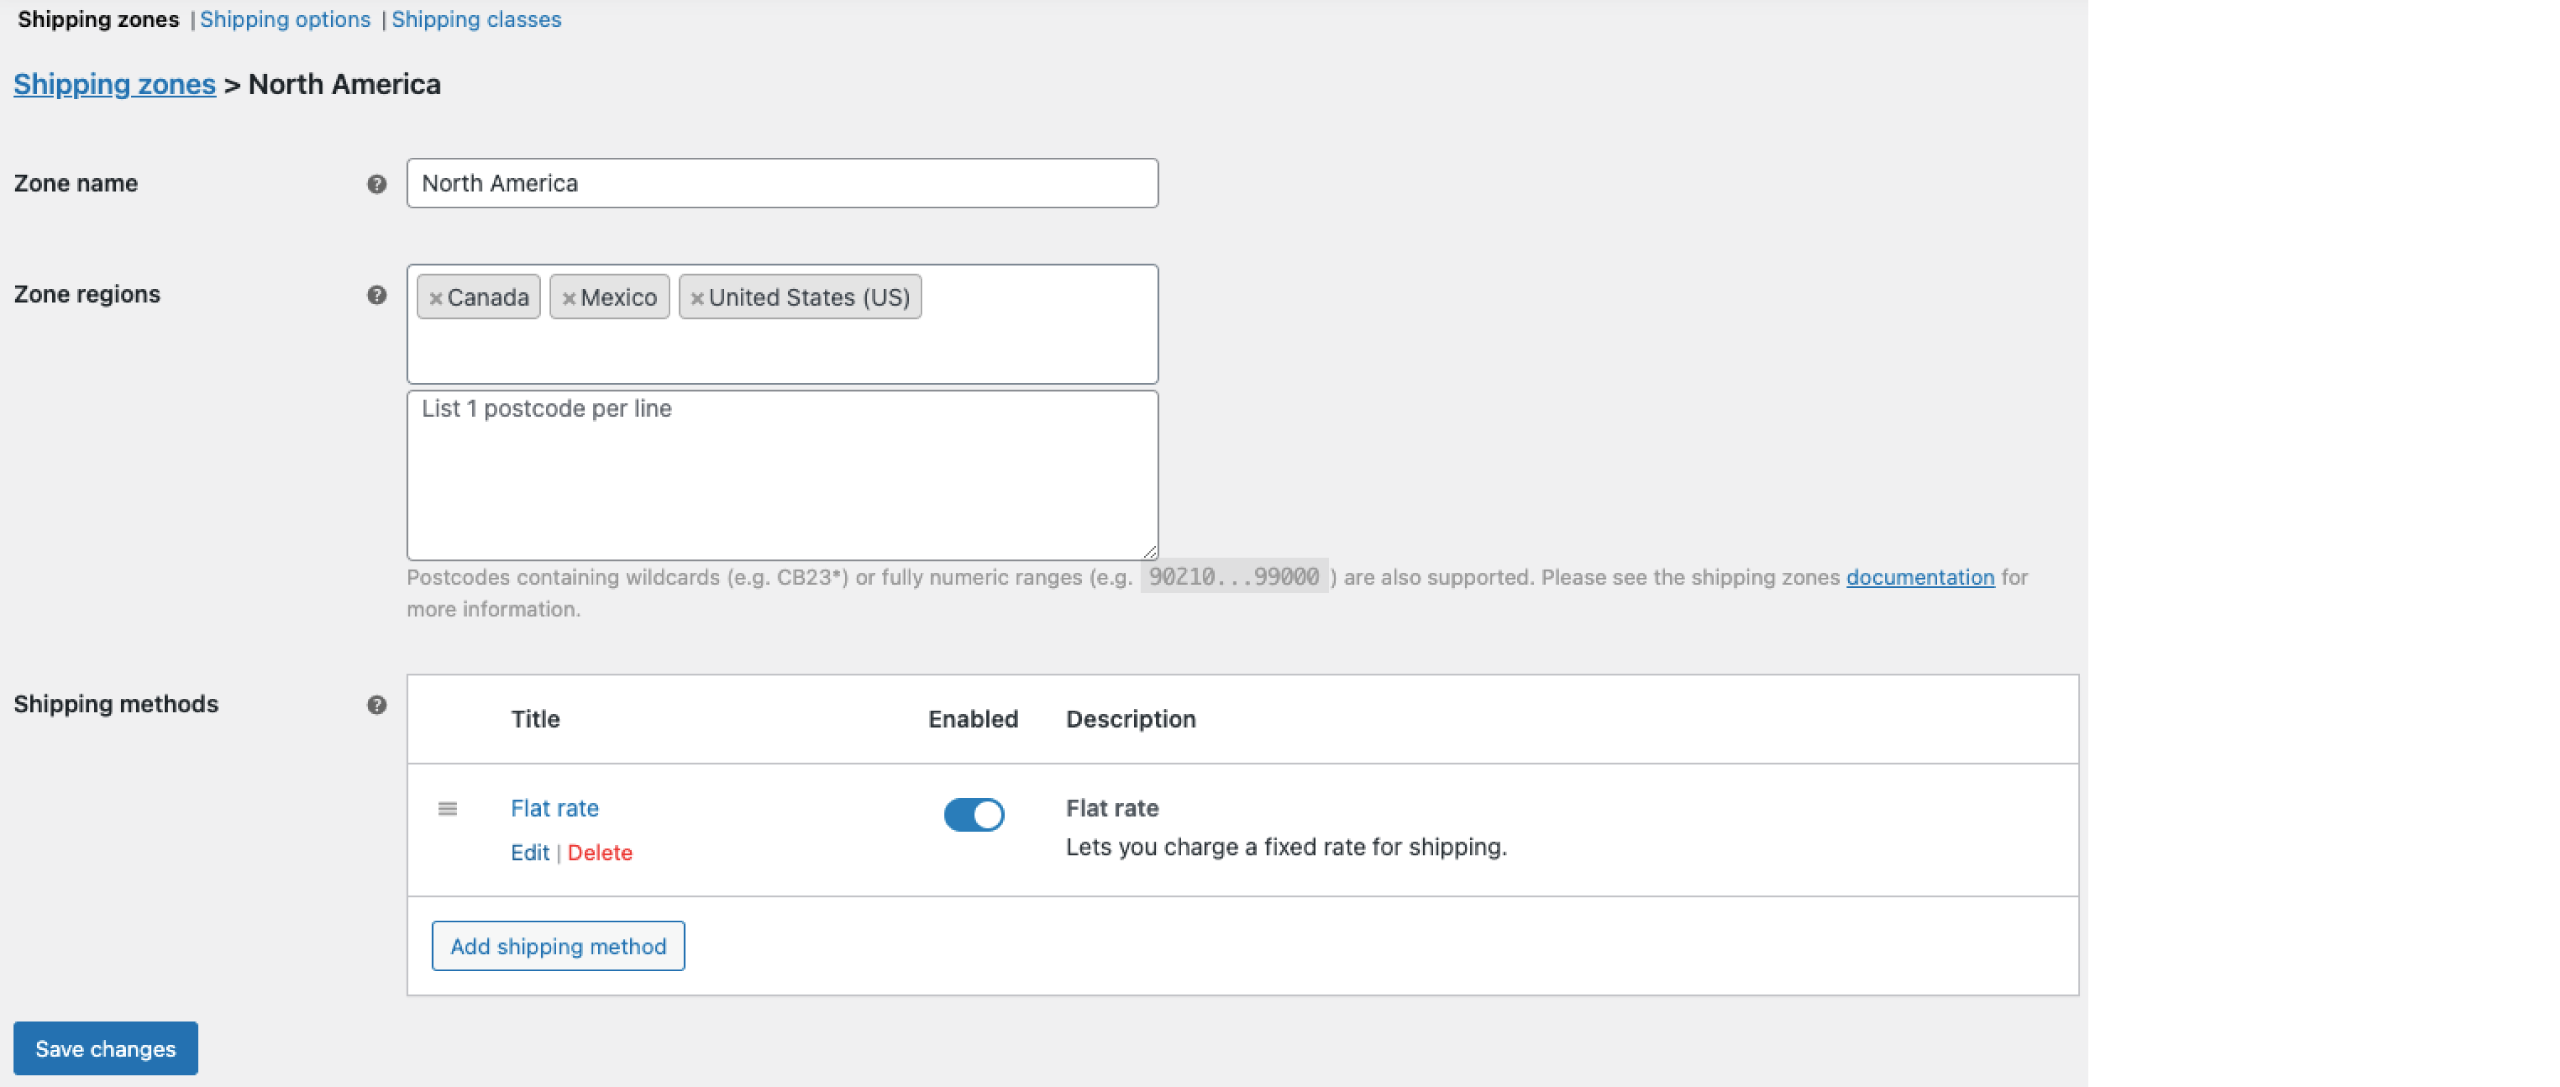
2. To add a shipping zone, select the ‘Add Shipping Zone’ option under the Shipping Zones tab.

3. After you select the ‘Add Shipping zone’ tab, you’ll find three fields to fill: Zone Name, Zone Region, and Shipping Methods.
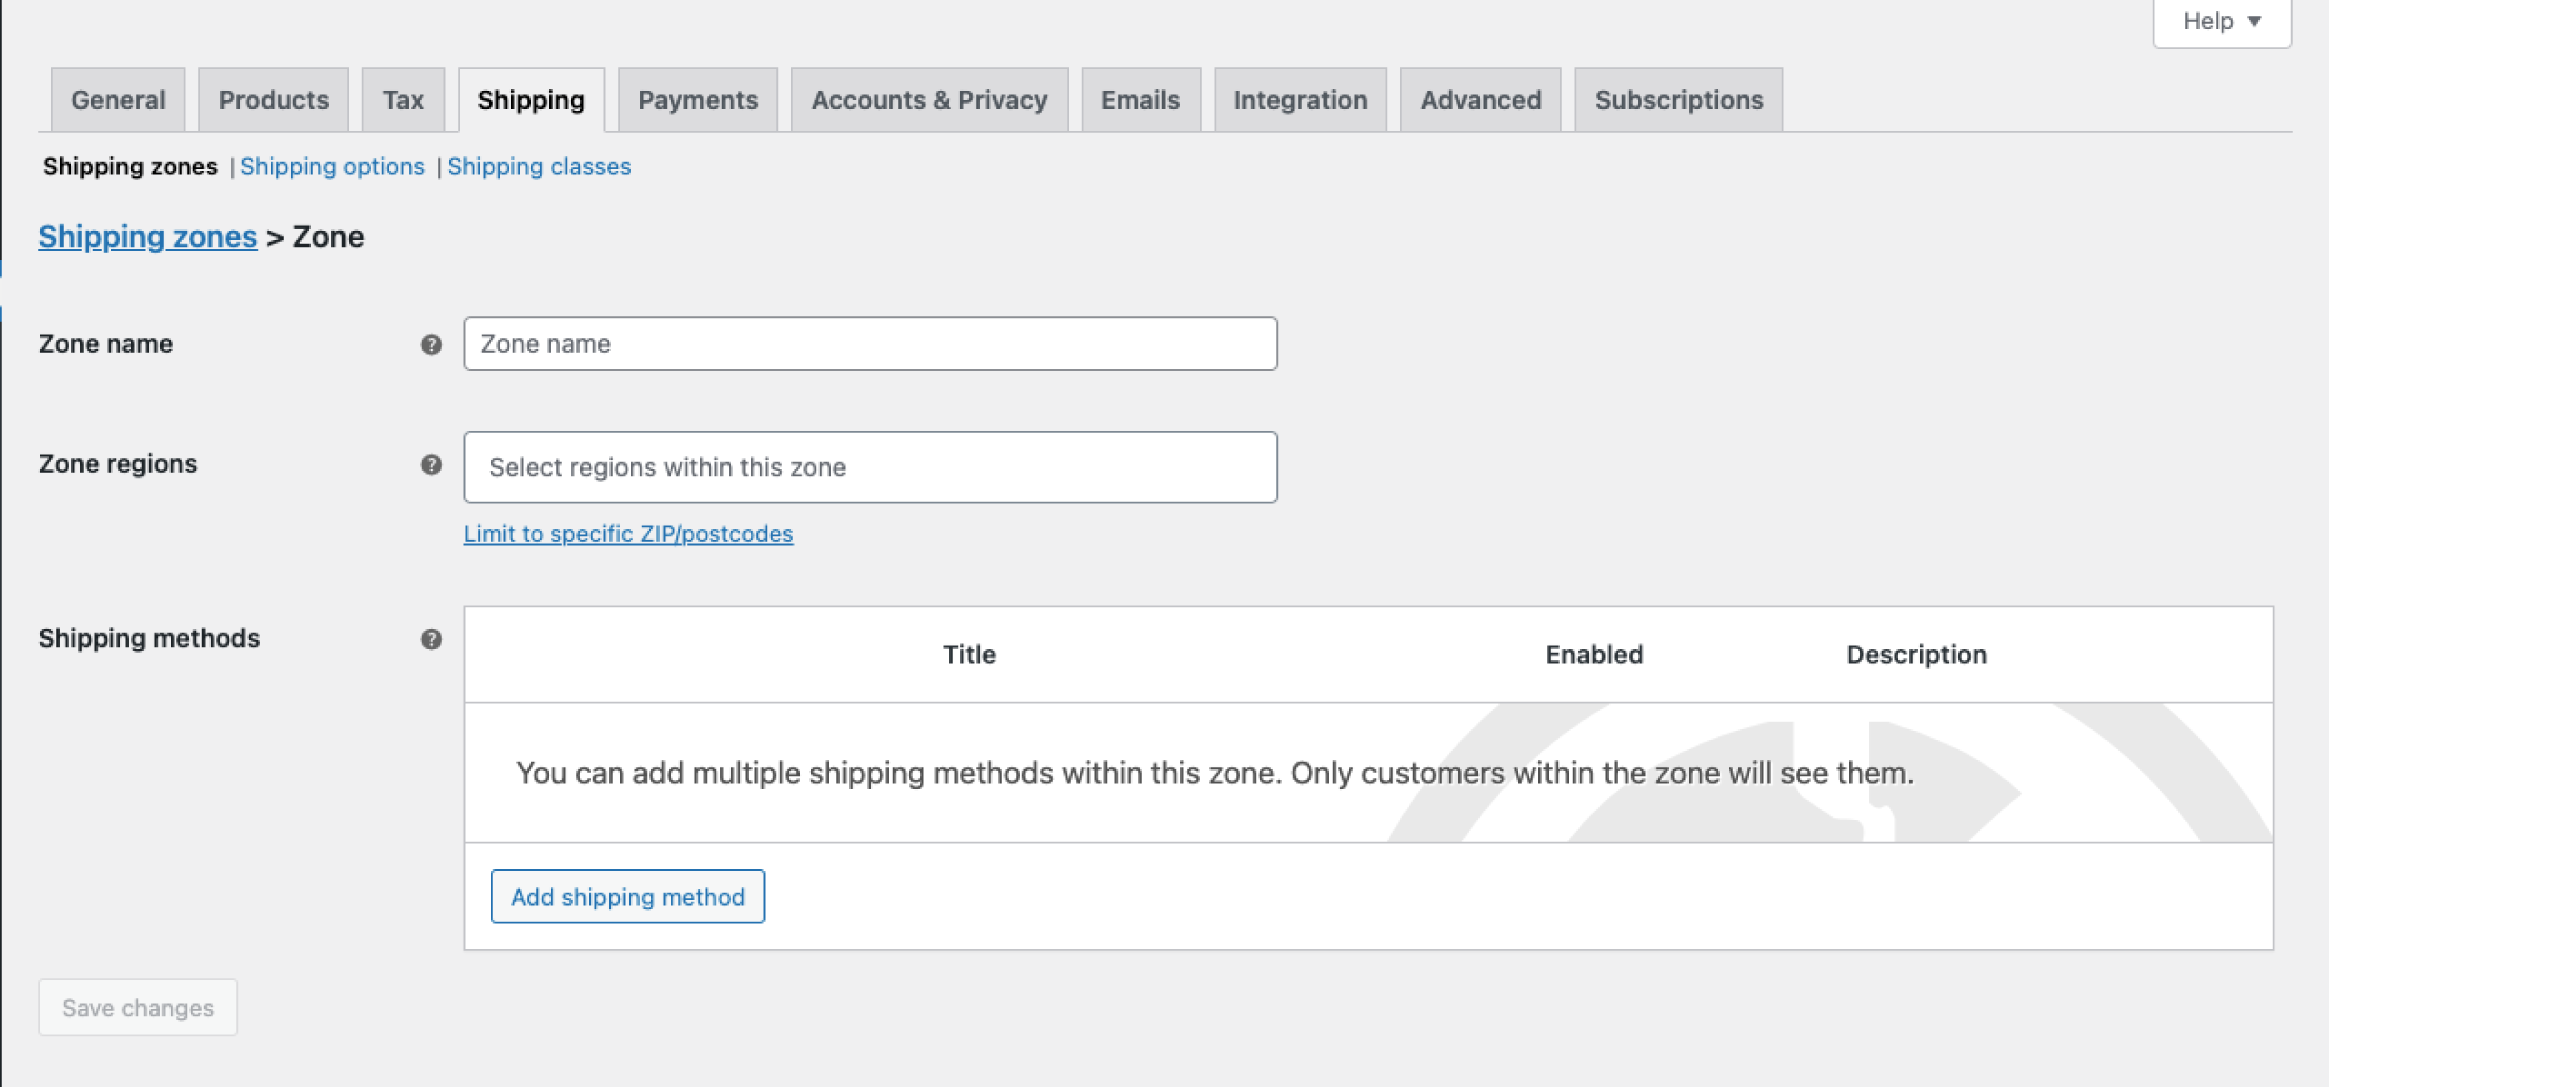
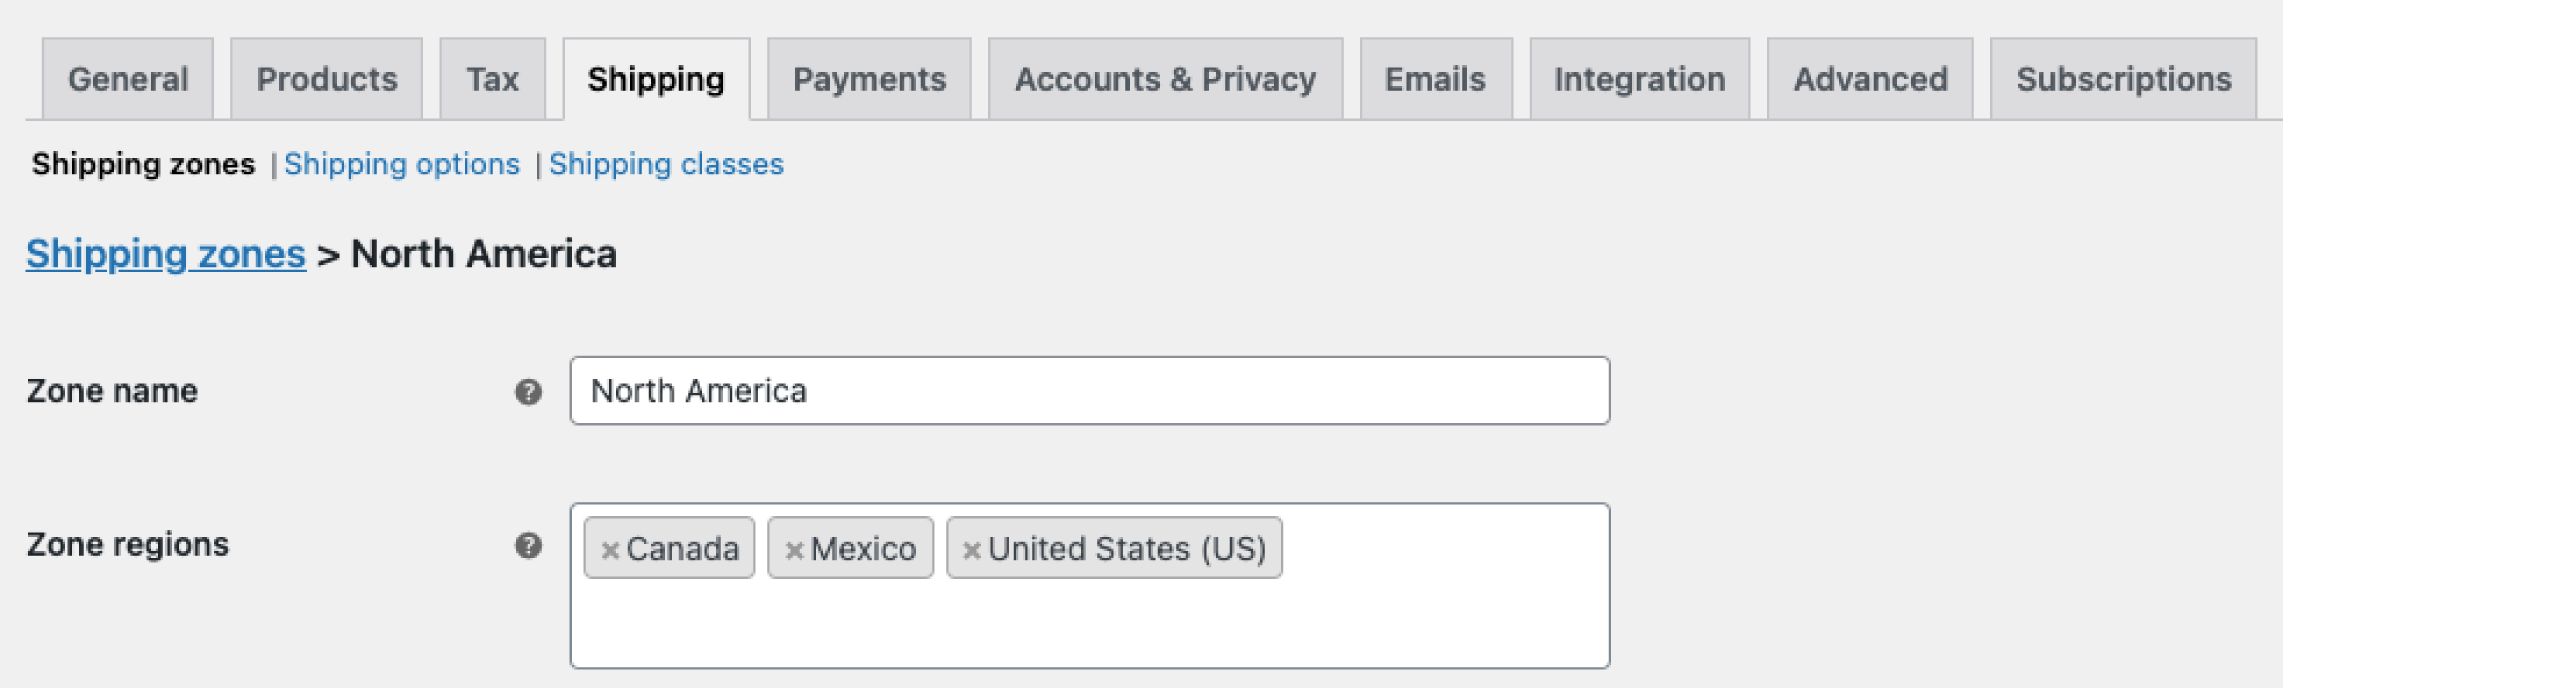
Choose a Zone Name and Zone Region. A friendly piece of advice: select a Zone name that you can use as a reference. For example, we chose North America for our Zone name with respect to our zone regions.
There are three types of Shipping Methods you can choose from:
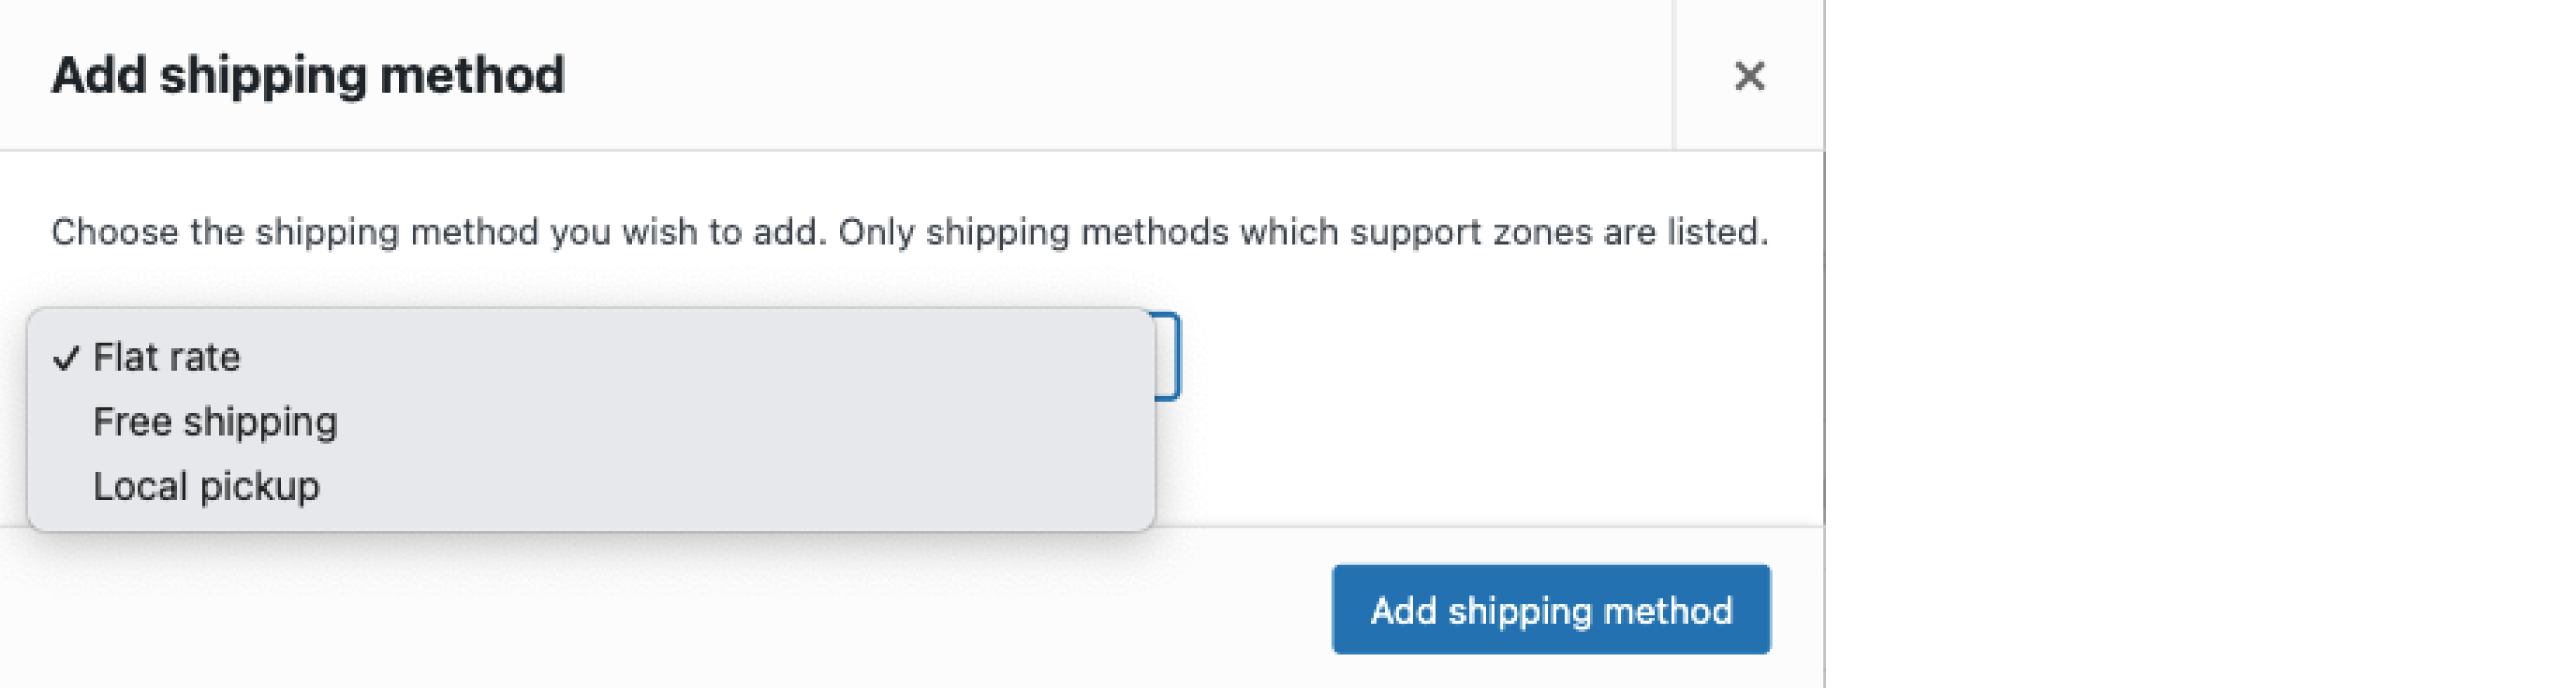 a) Flat Rate
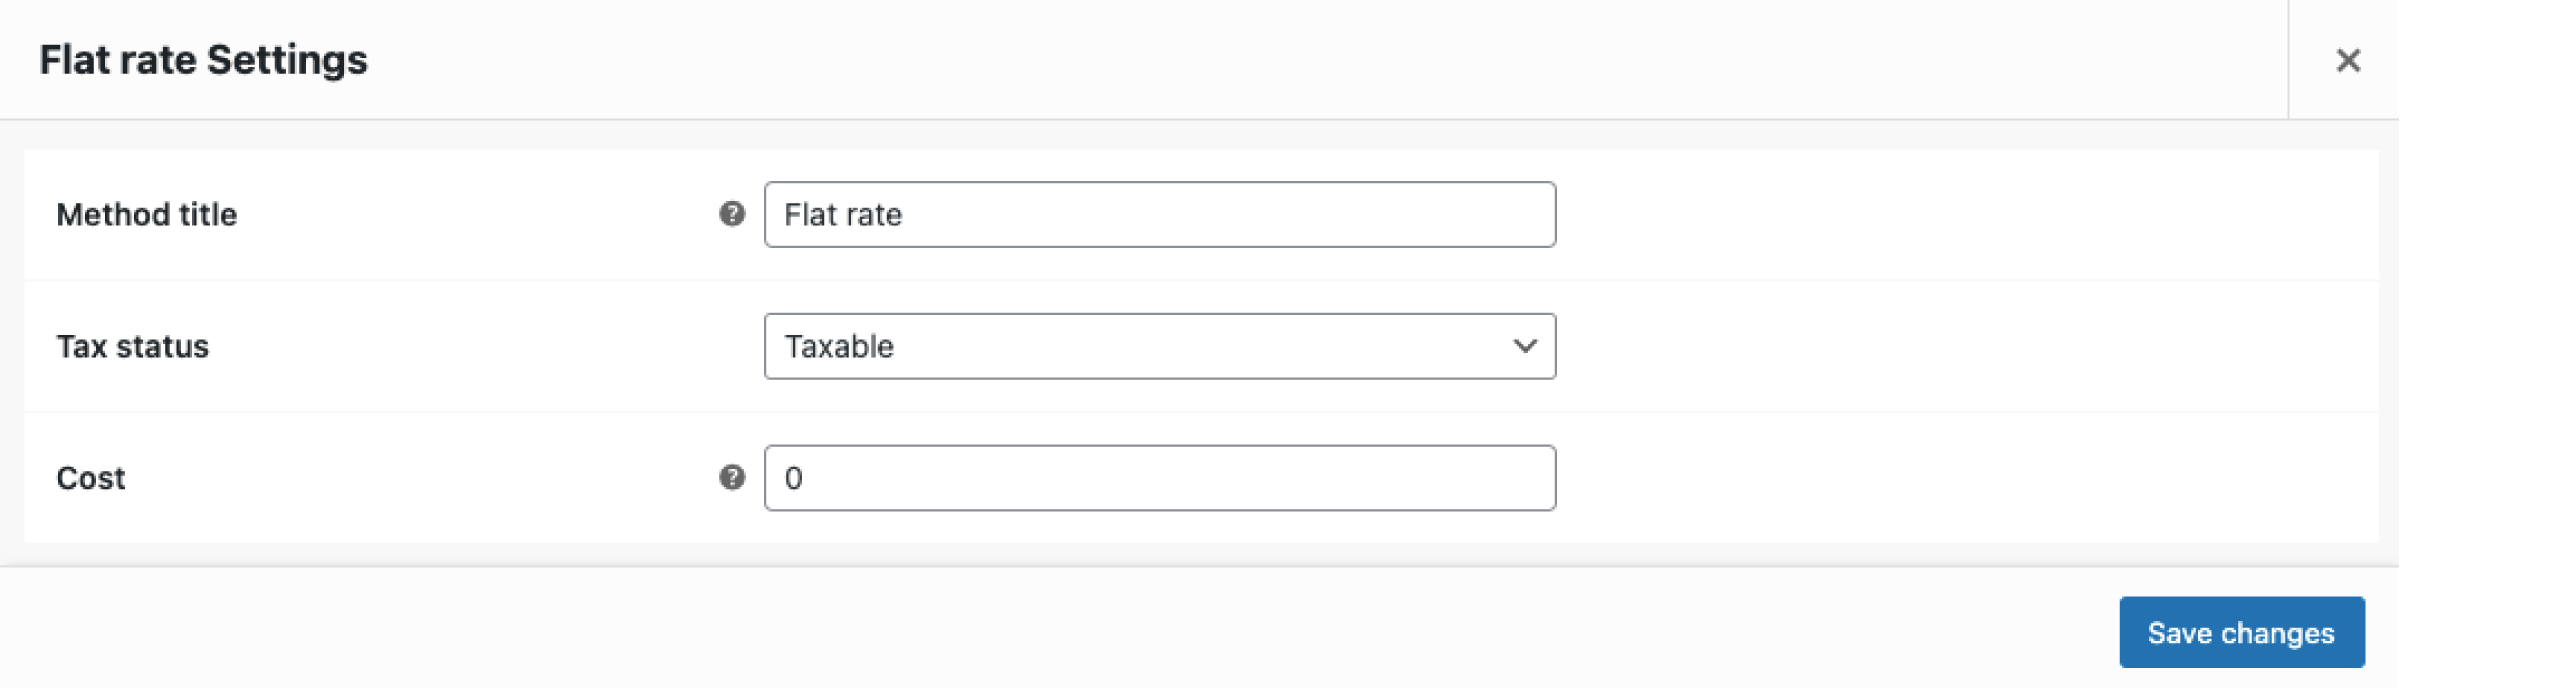
It lets you charge a uniform rate for all shipments. After selecting it, you can modify the specifications by clicking on the ‘Edit’ option under the ‘Add Shipping Zones’ tab.
In Flat Rate settings, you can change the method title (the title the user sees), the tax status, and the cost. After the configuration of Shipping classes, more options will appear.
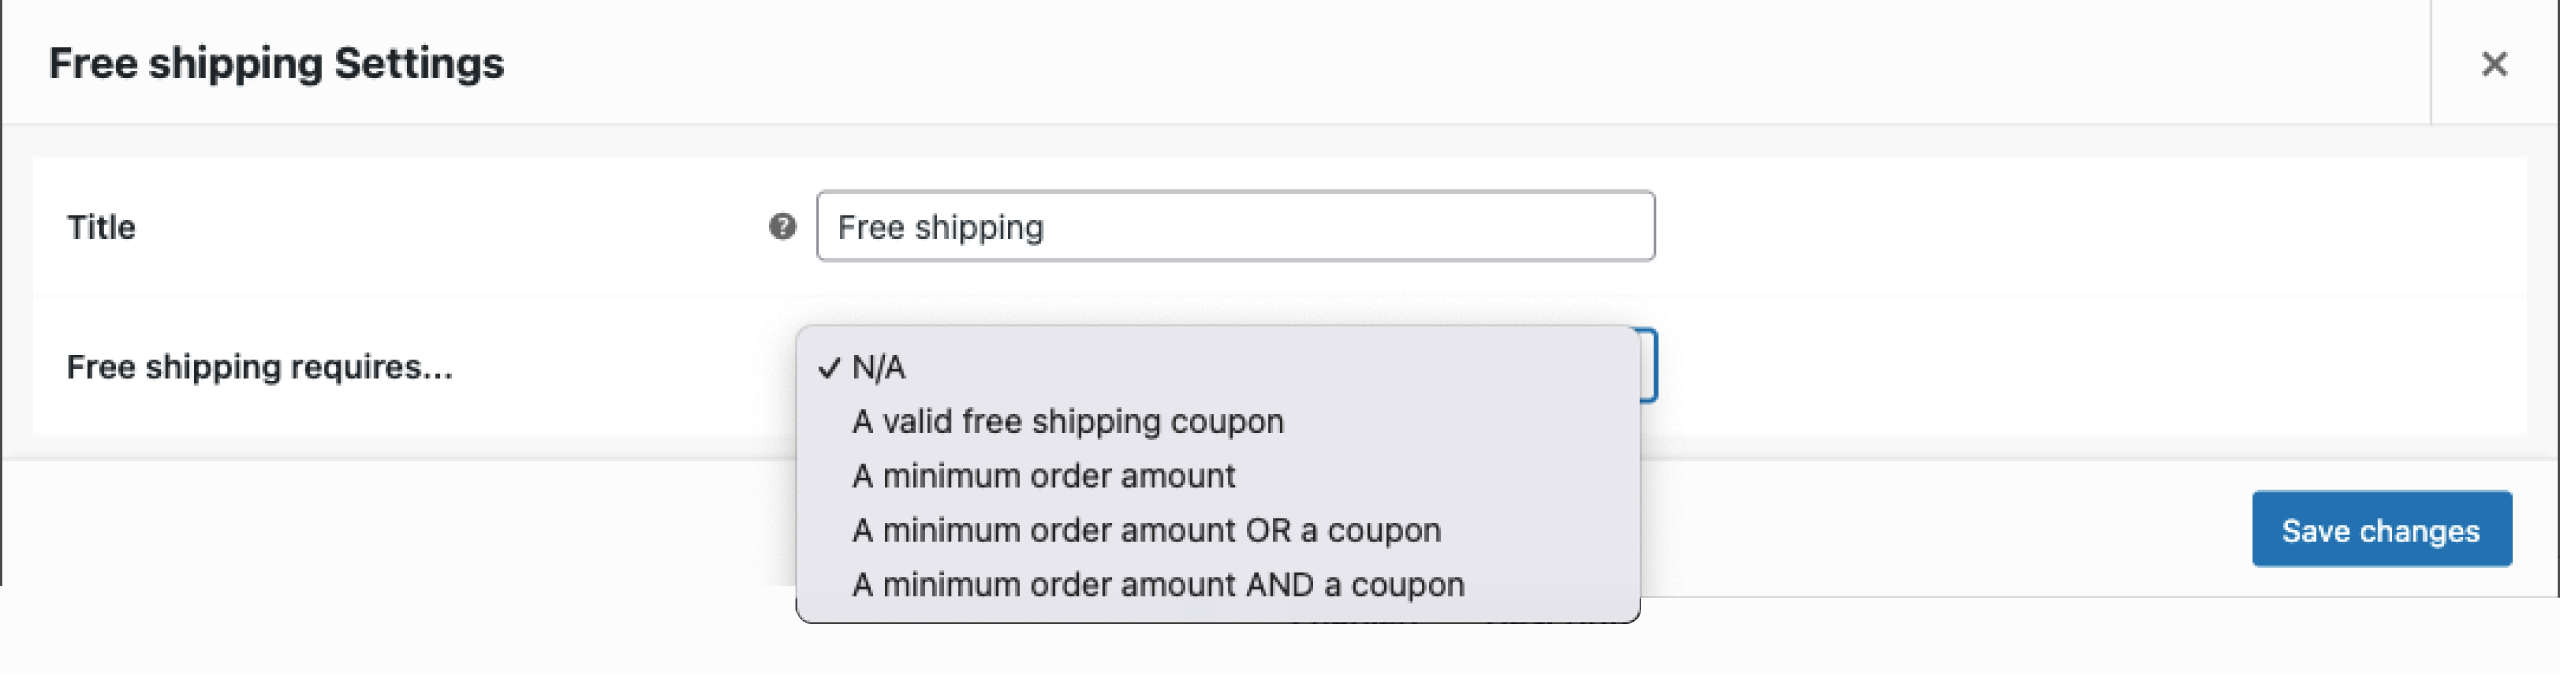
It’s exactly what it sounds like. This method allows the customer to avoid paying any shipping fees. You can set a precedent for the feature to be available. For instance, some companies require customers to make a minimum purchase before being eligible for free shipping. This option is in the “Add Shipping Zones” section under the “Free Shipping” tab, just like flat-rate shipping.
You are not limited to just one precedent. You can choose either a coupon, a minimum amount, or both.
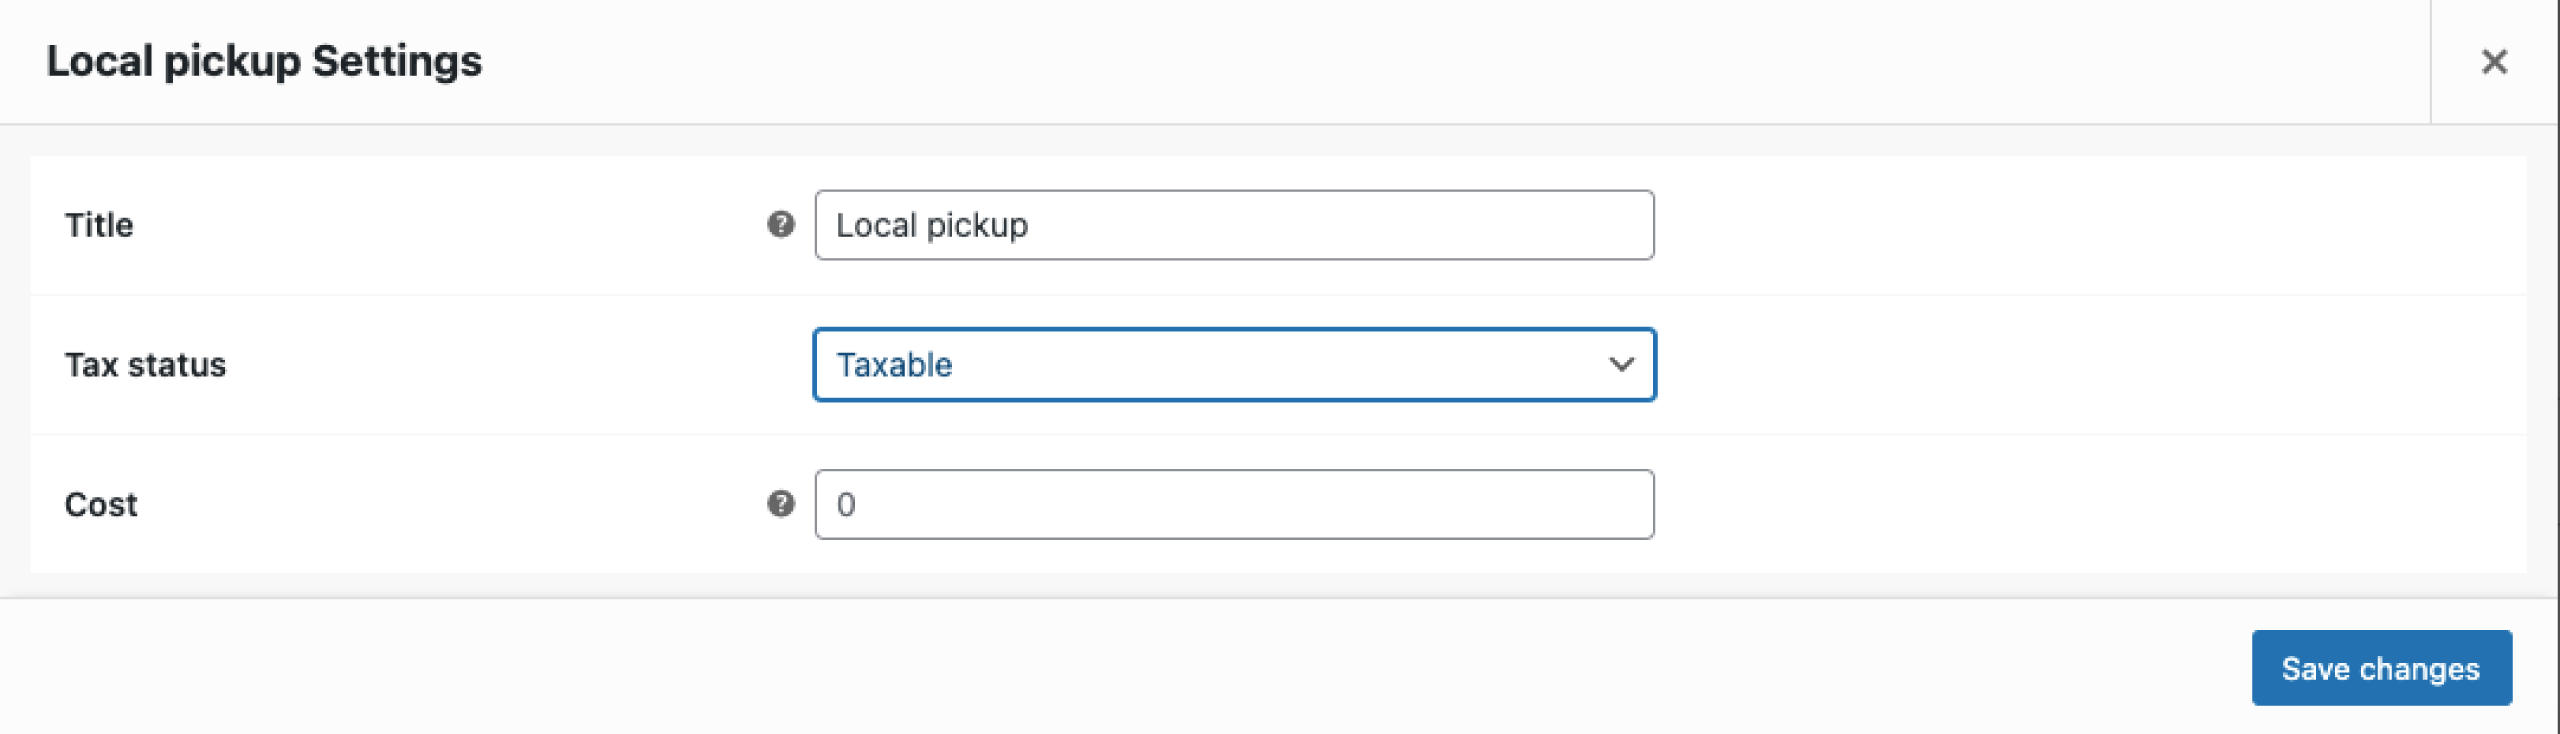
c) Local Pickup
Customers can avoid shipment delays by picking up their products from the nearest store. But it requires the presence of a physical store. Optional costs can also be added for local pickup.
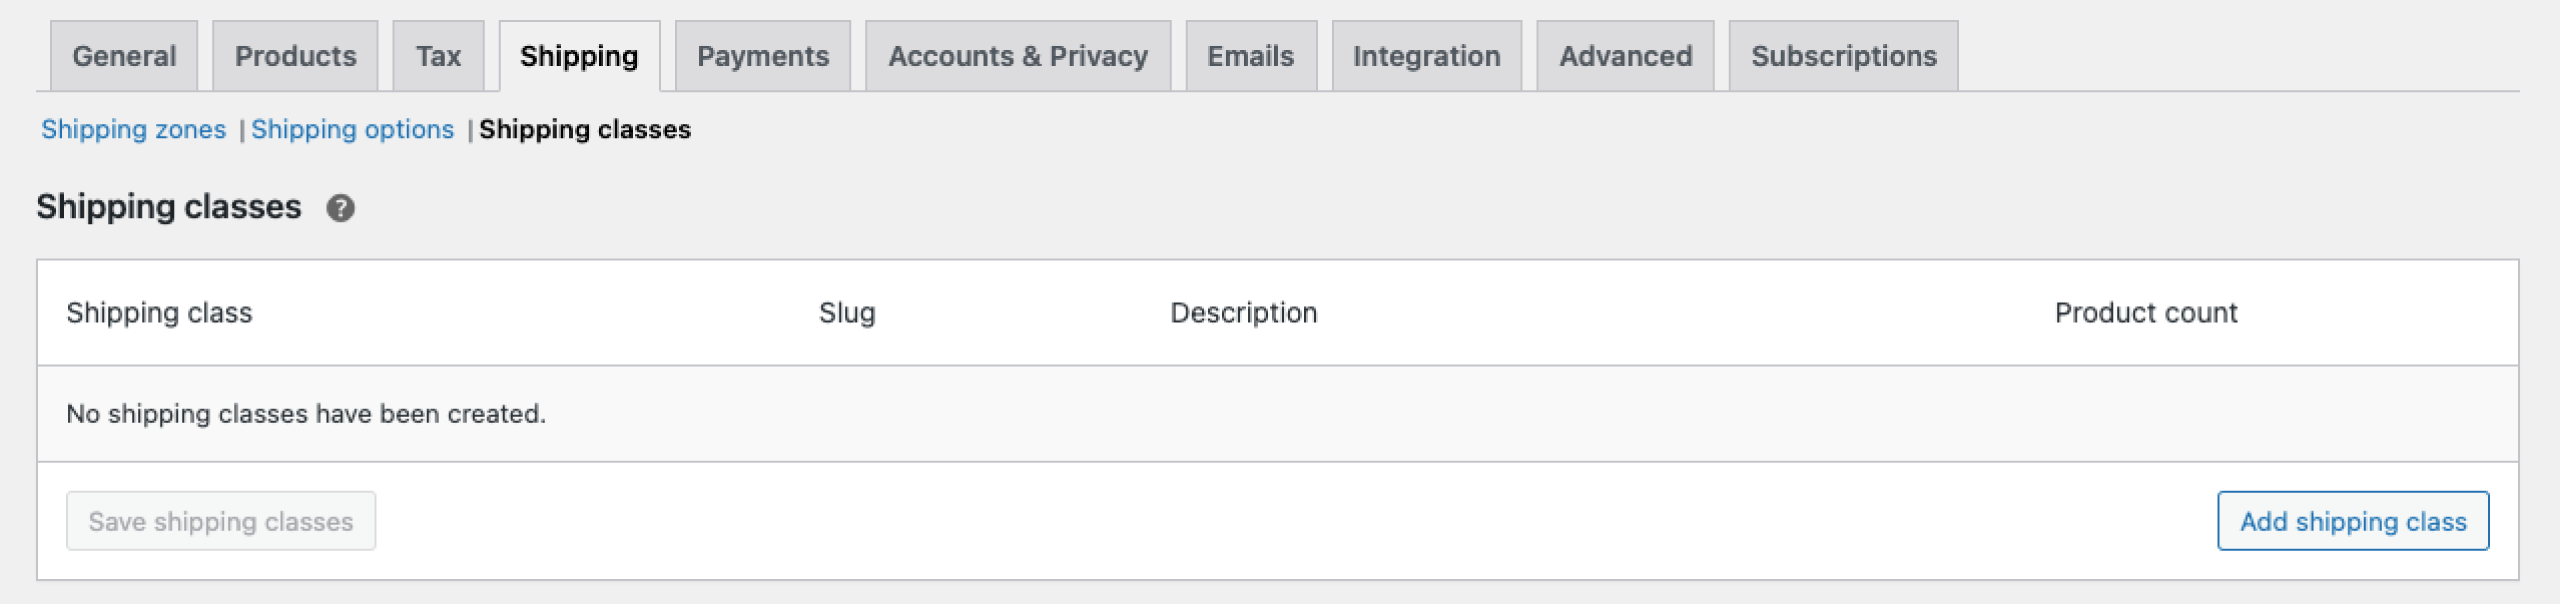
Shipping Classes
Shipping classes are used to group similar types of products together. They are also used by different shipping methods to assign rates based on each class.
Creating a Shipping Class
- Switch to the Shipping Zones tab and click ‘Add Shipping Zone’.
2. Three fields will be displayed on the screen.
a) Shipping Class Name: Choose a name for your shipping class.
b) Slug: It is a unique identifier. It can be left blank, or one will be auto-generated.
c) Description: This brief description defines the shipping class to use as a reference.
3. Once you have filled all three fields, you can save the changes. Now, you have successfully created a shipping class.
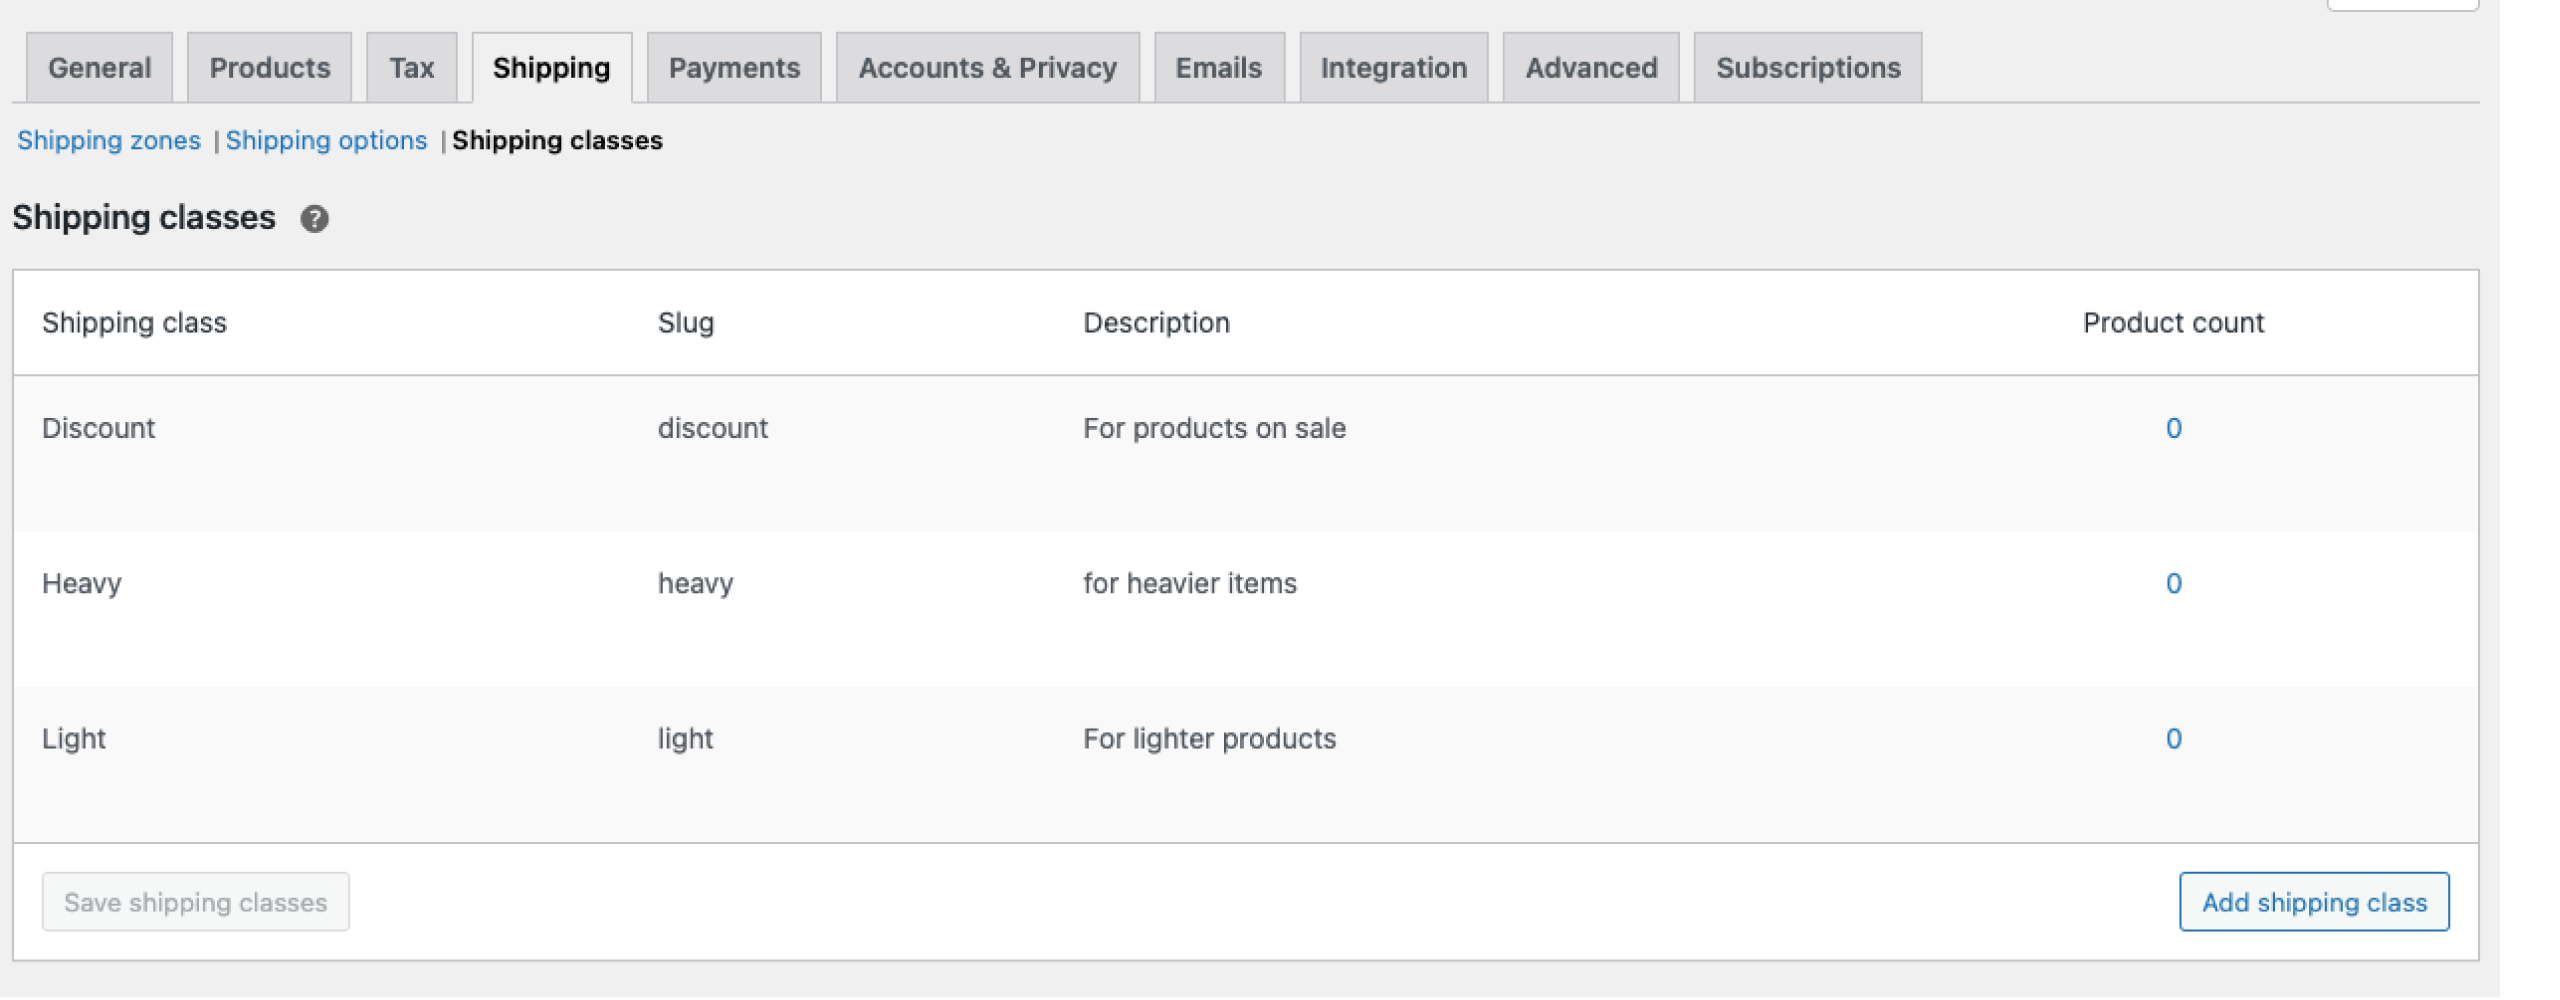
The following image is an example of the shipping classes we’ve created.
Note: You can modify your shipping classes by hovering over each class and selecting the ‘Edit’ option below the Shipping Class Name.
Assigning Shipping Classes to Products- Single
- From the Dashboard, select Products and choose the product you want to assign a particular class by clicking the Edit button while hovering over the product.
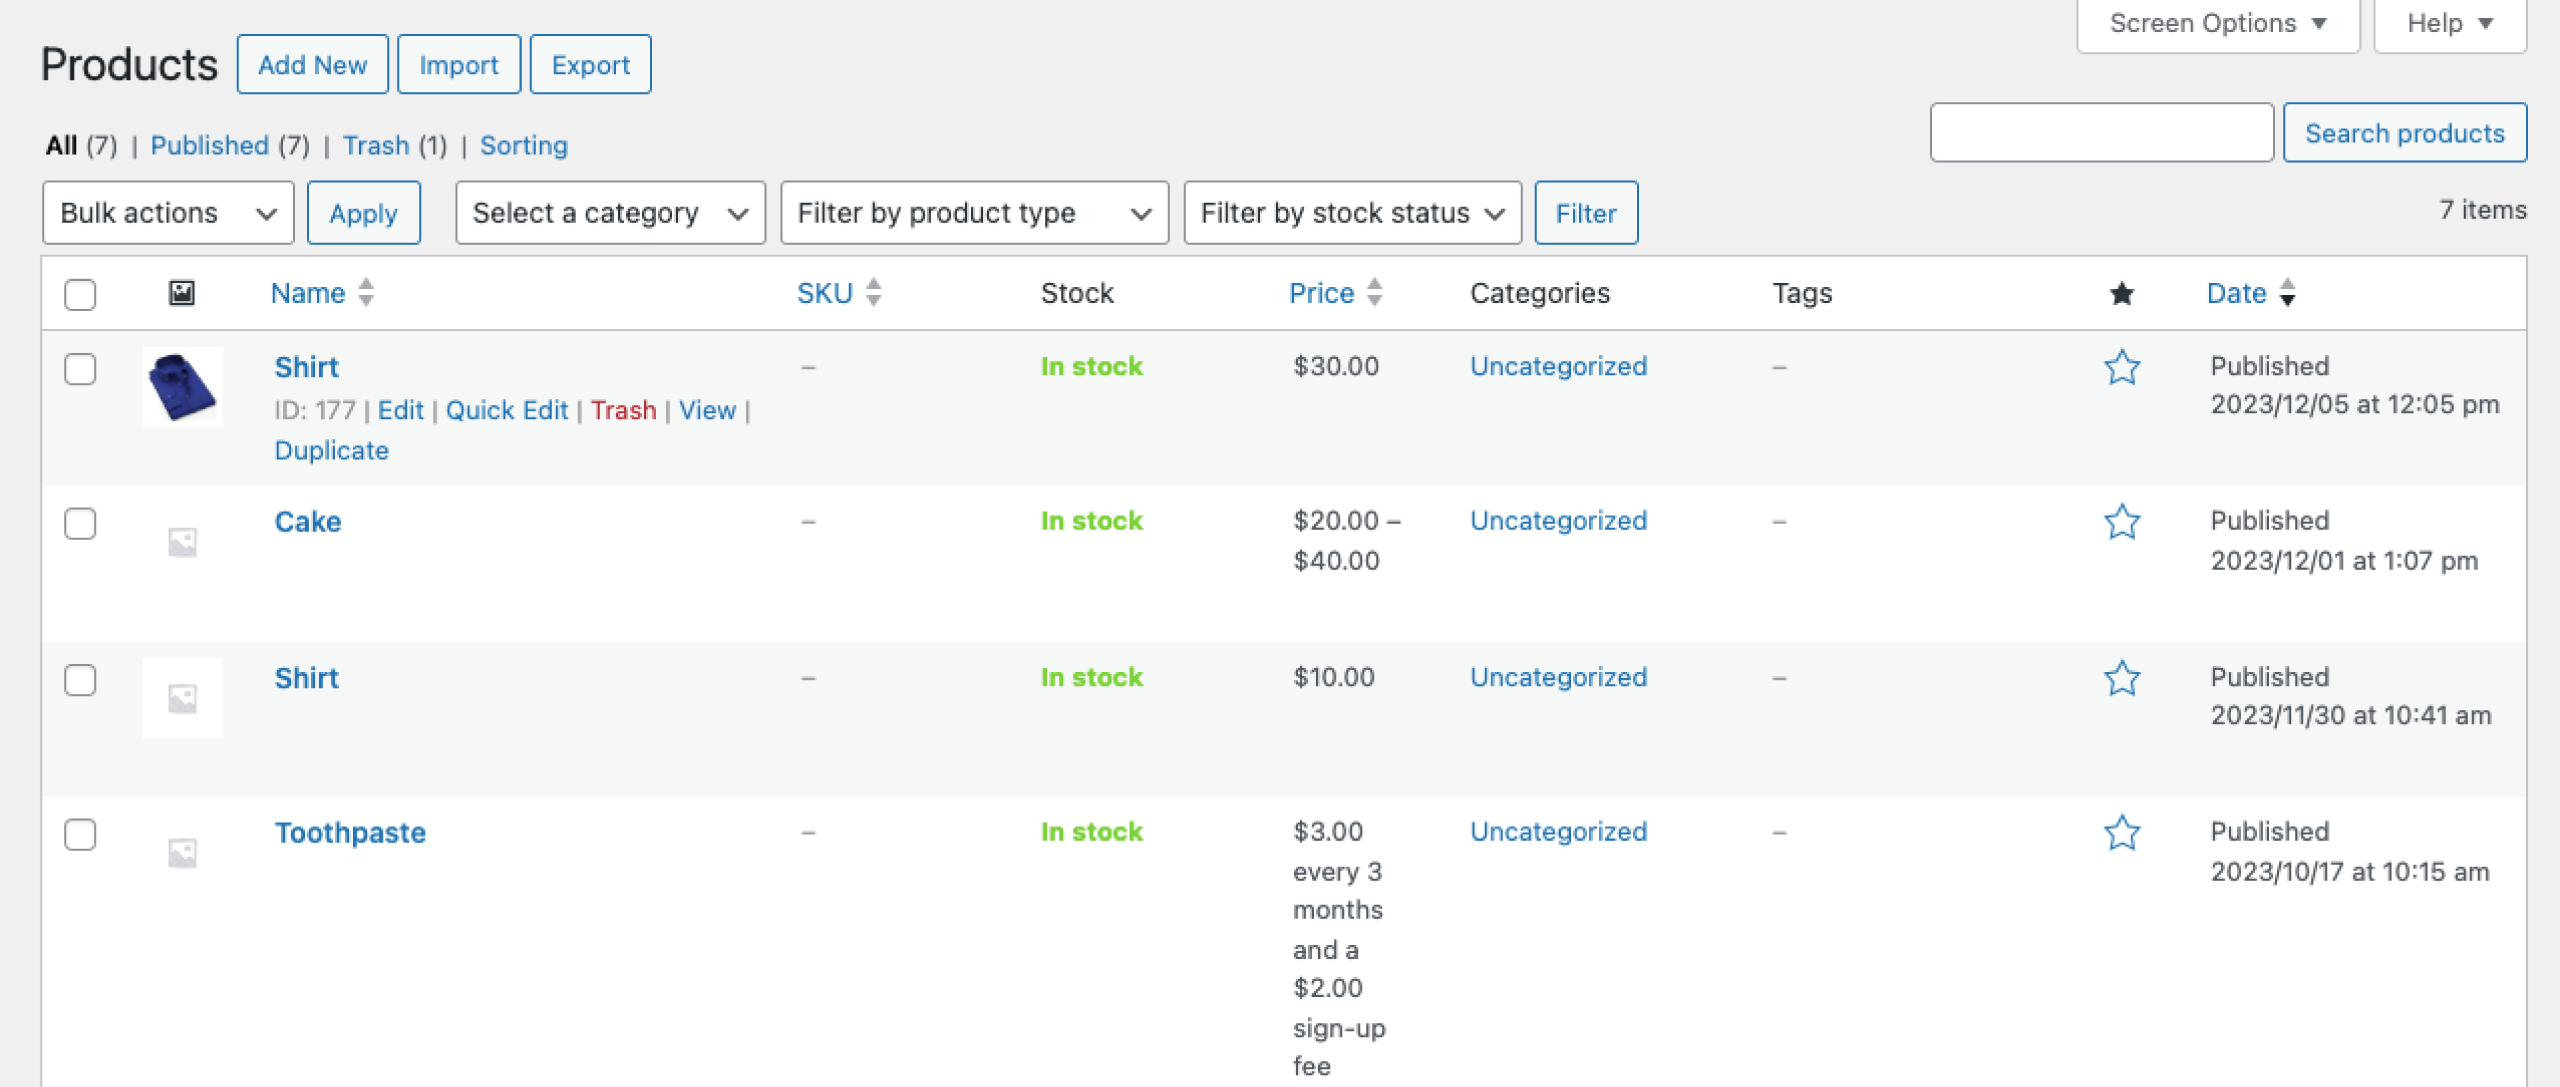
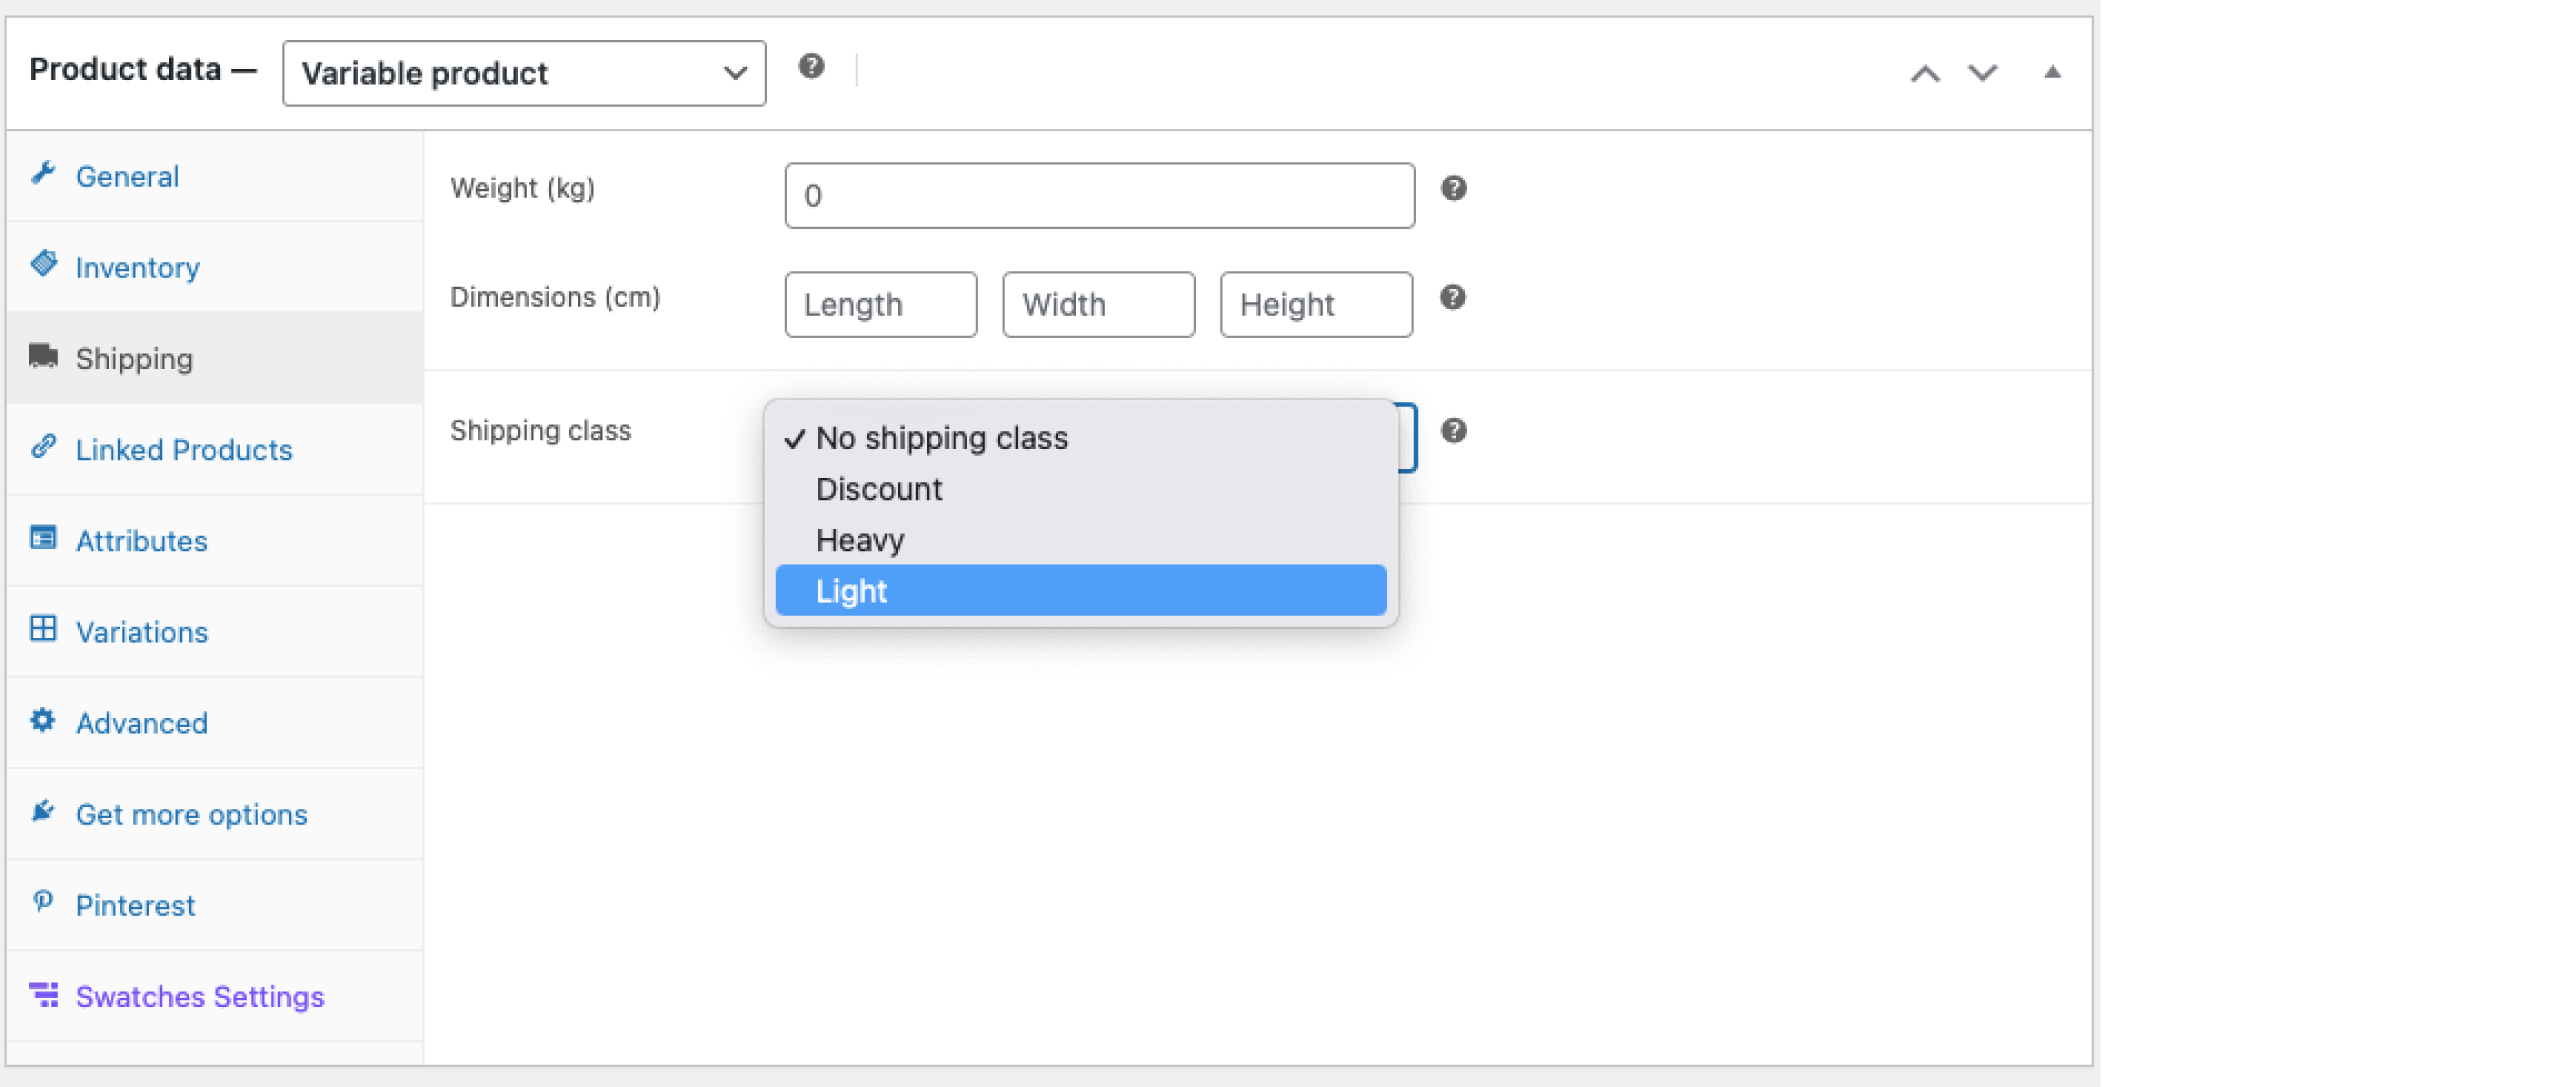
2. Choose your preferred shipping class under the Product Data tab in the Shipping section.
Assigning Shipping Classes to Products- Bulk
- Dashboard>>Products.
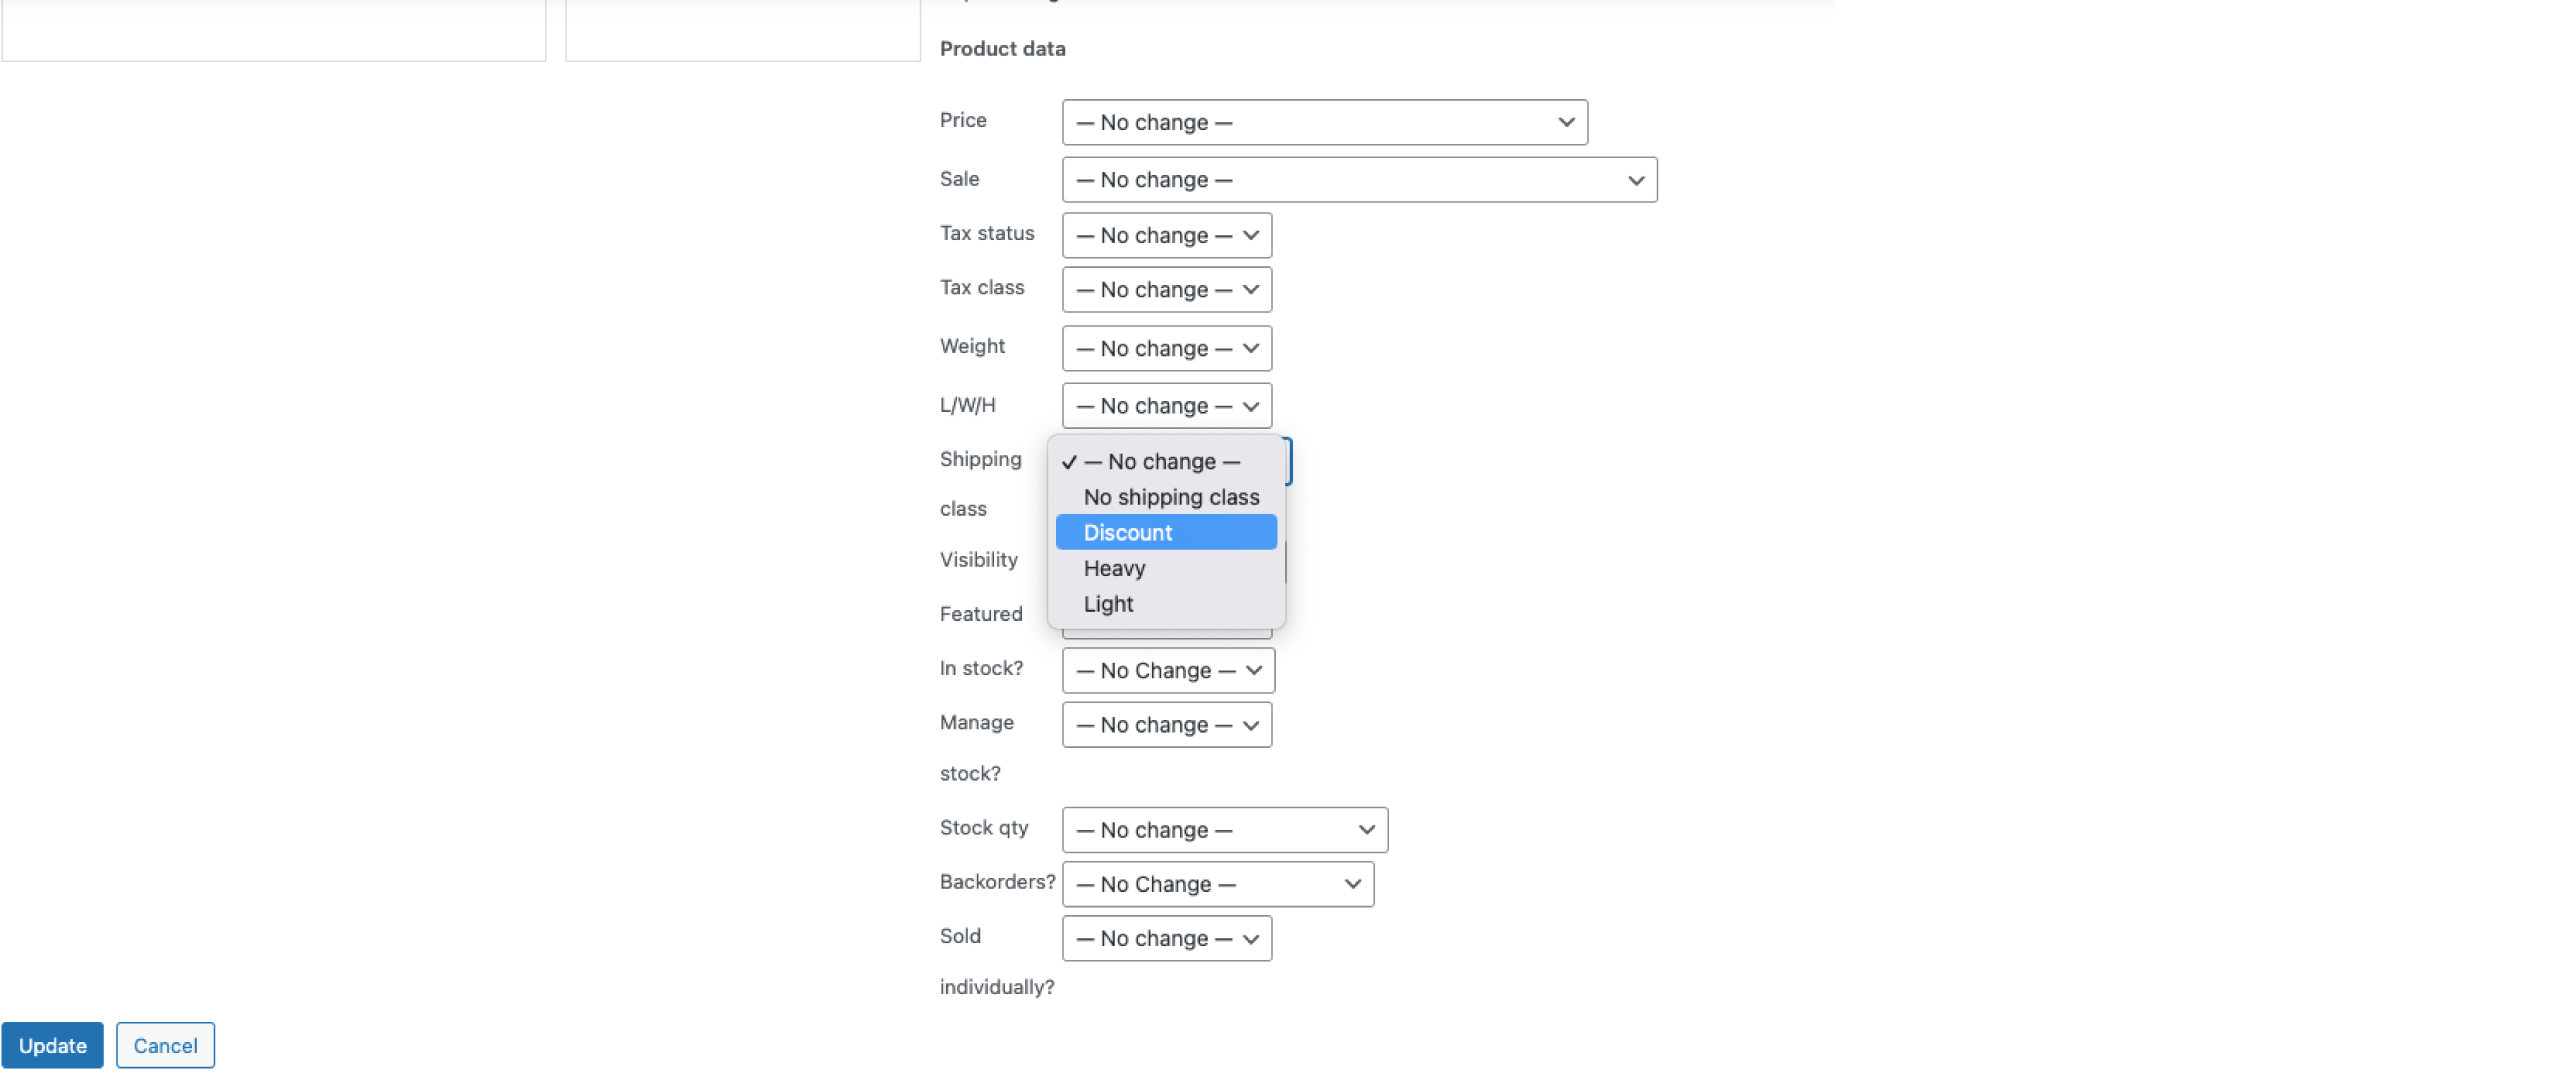
2. Tick the boxes on the right of all the products to be added to a particular shipping class.
3. Under Bulk Actions, select Edit and click on Apply.

4. An extensive dropdown menu appears. Under the Product data section, change the Shipping Class field to your preferred shipping class and update the changes.
Shipping Classes in Shipping Methods
You can assign different costs to each shipping class in shipping methods such as Flat Rate.
1. Once Shipping Classes are added, go back to the Flat Rate settings. (refer to the Flat Rate section.)
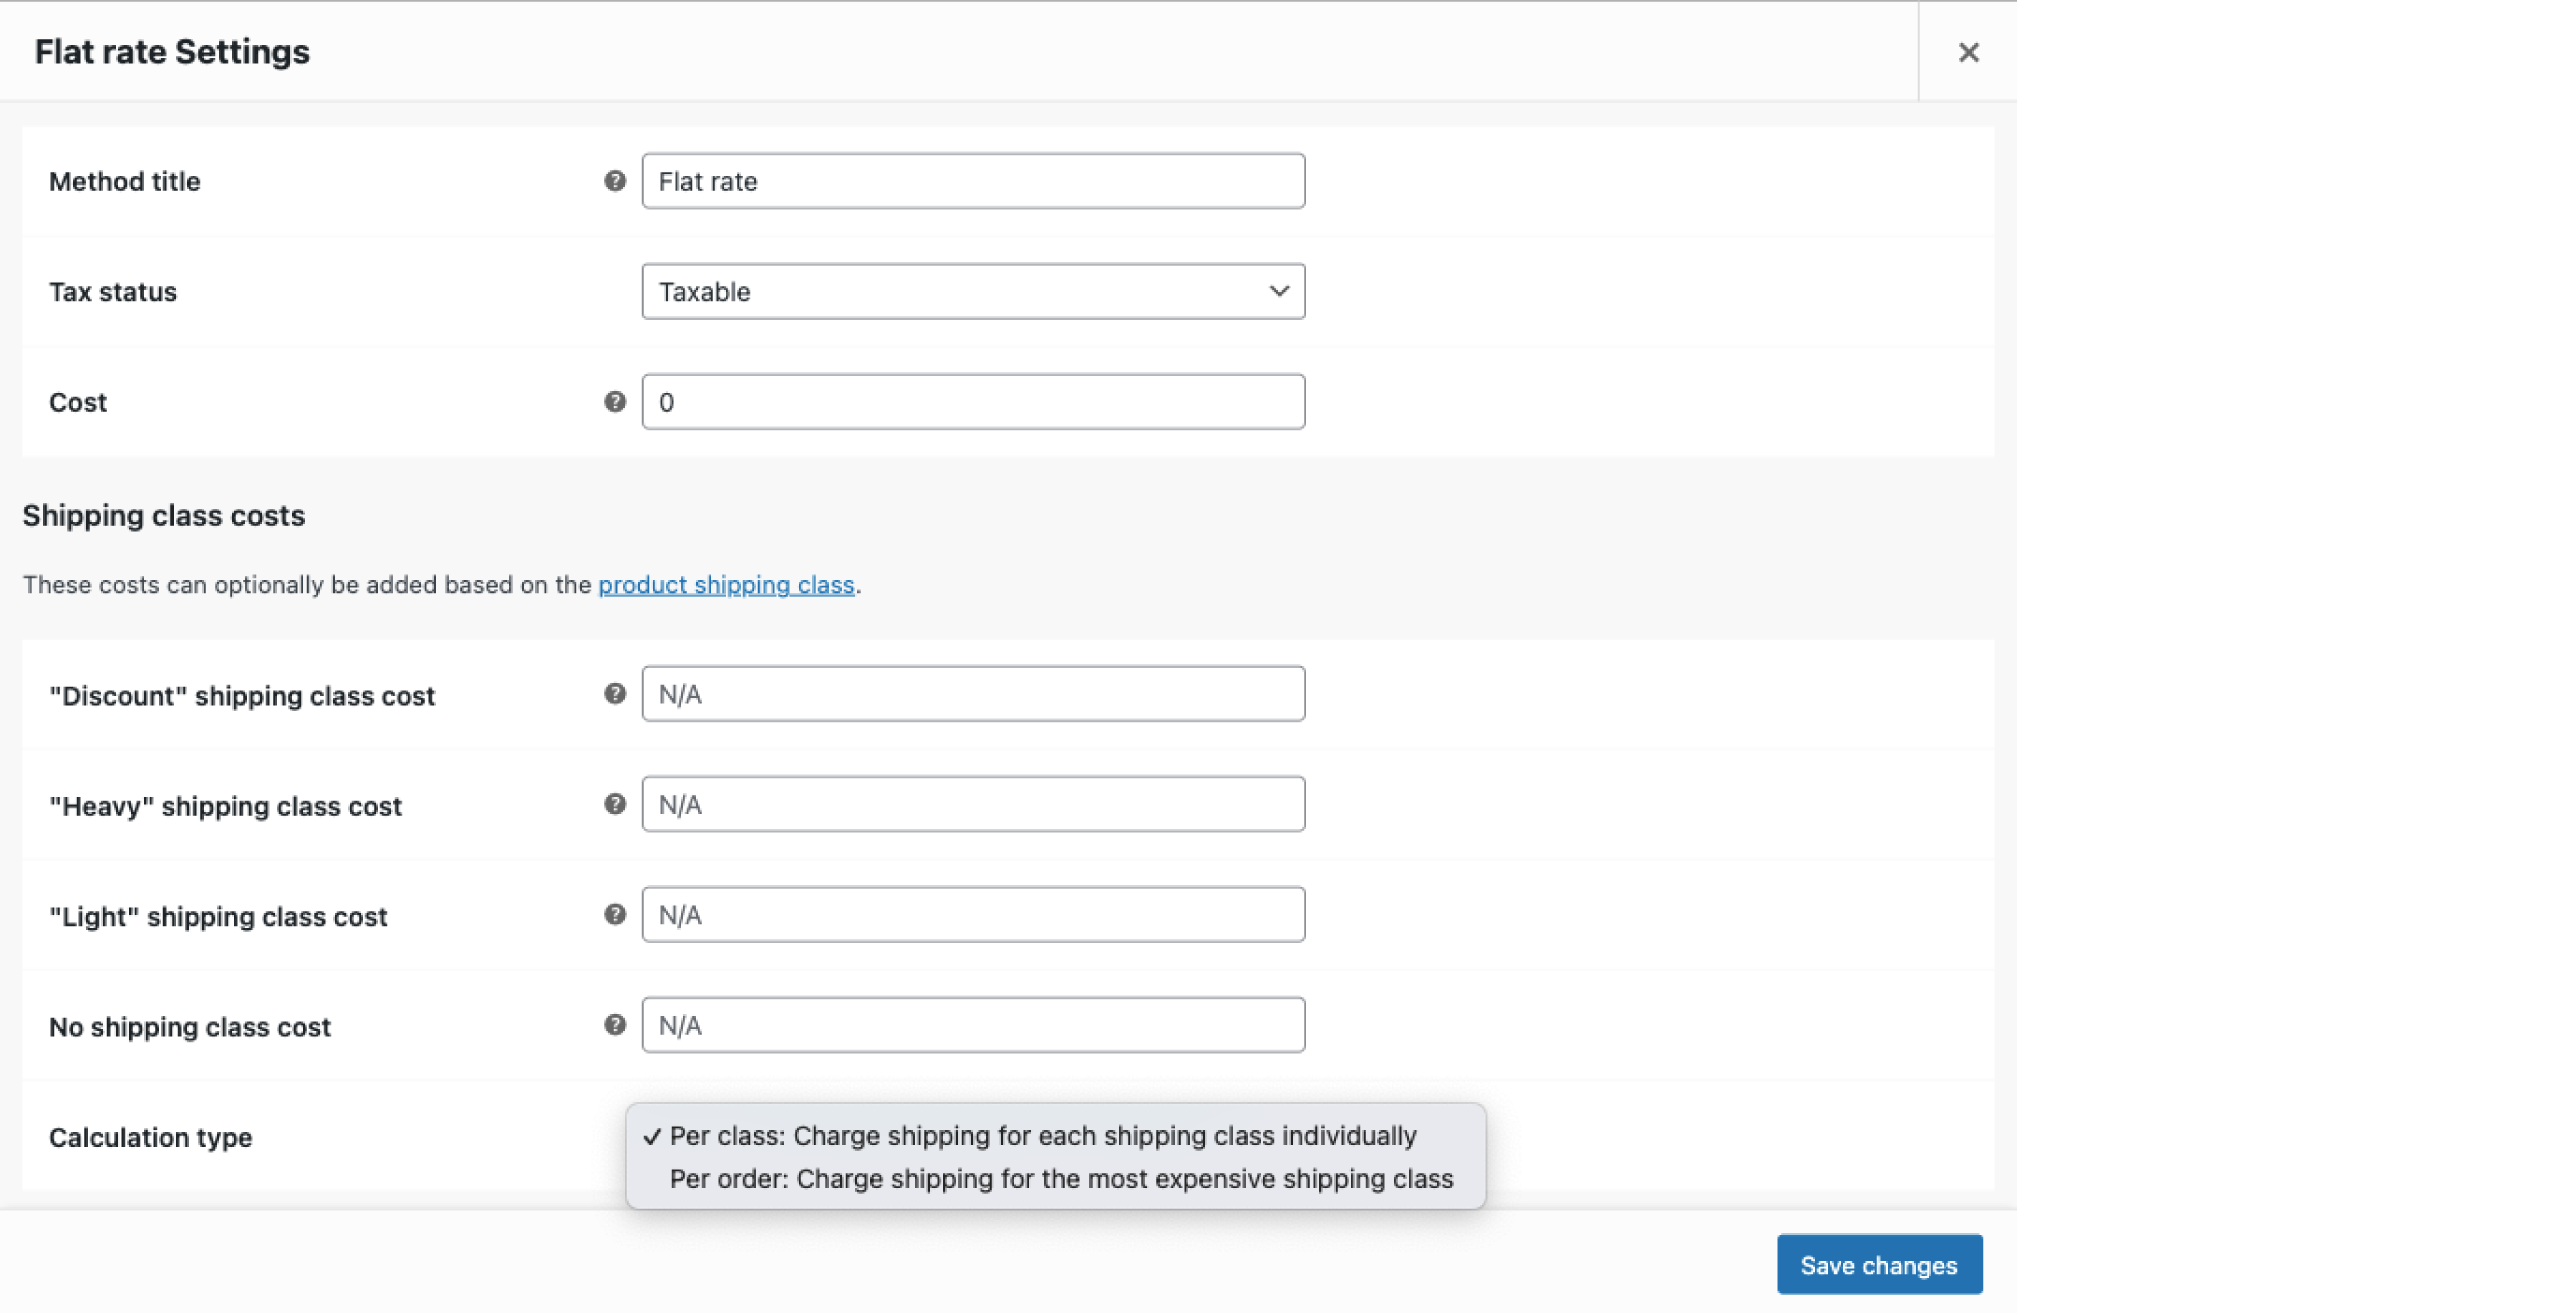
As you can see, a new section called ‘Shipping class costs’ has been added. Here, you can assign the costs for each shipping class and modify the calculation type.
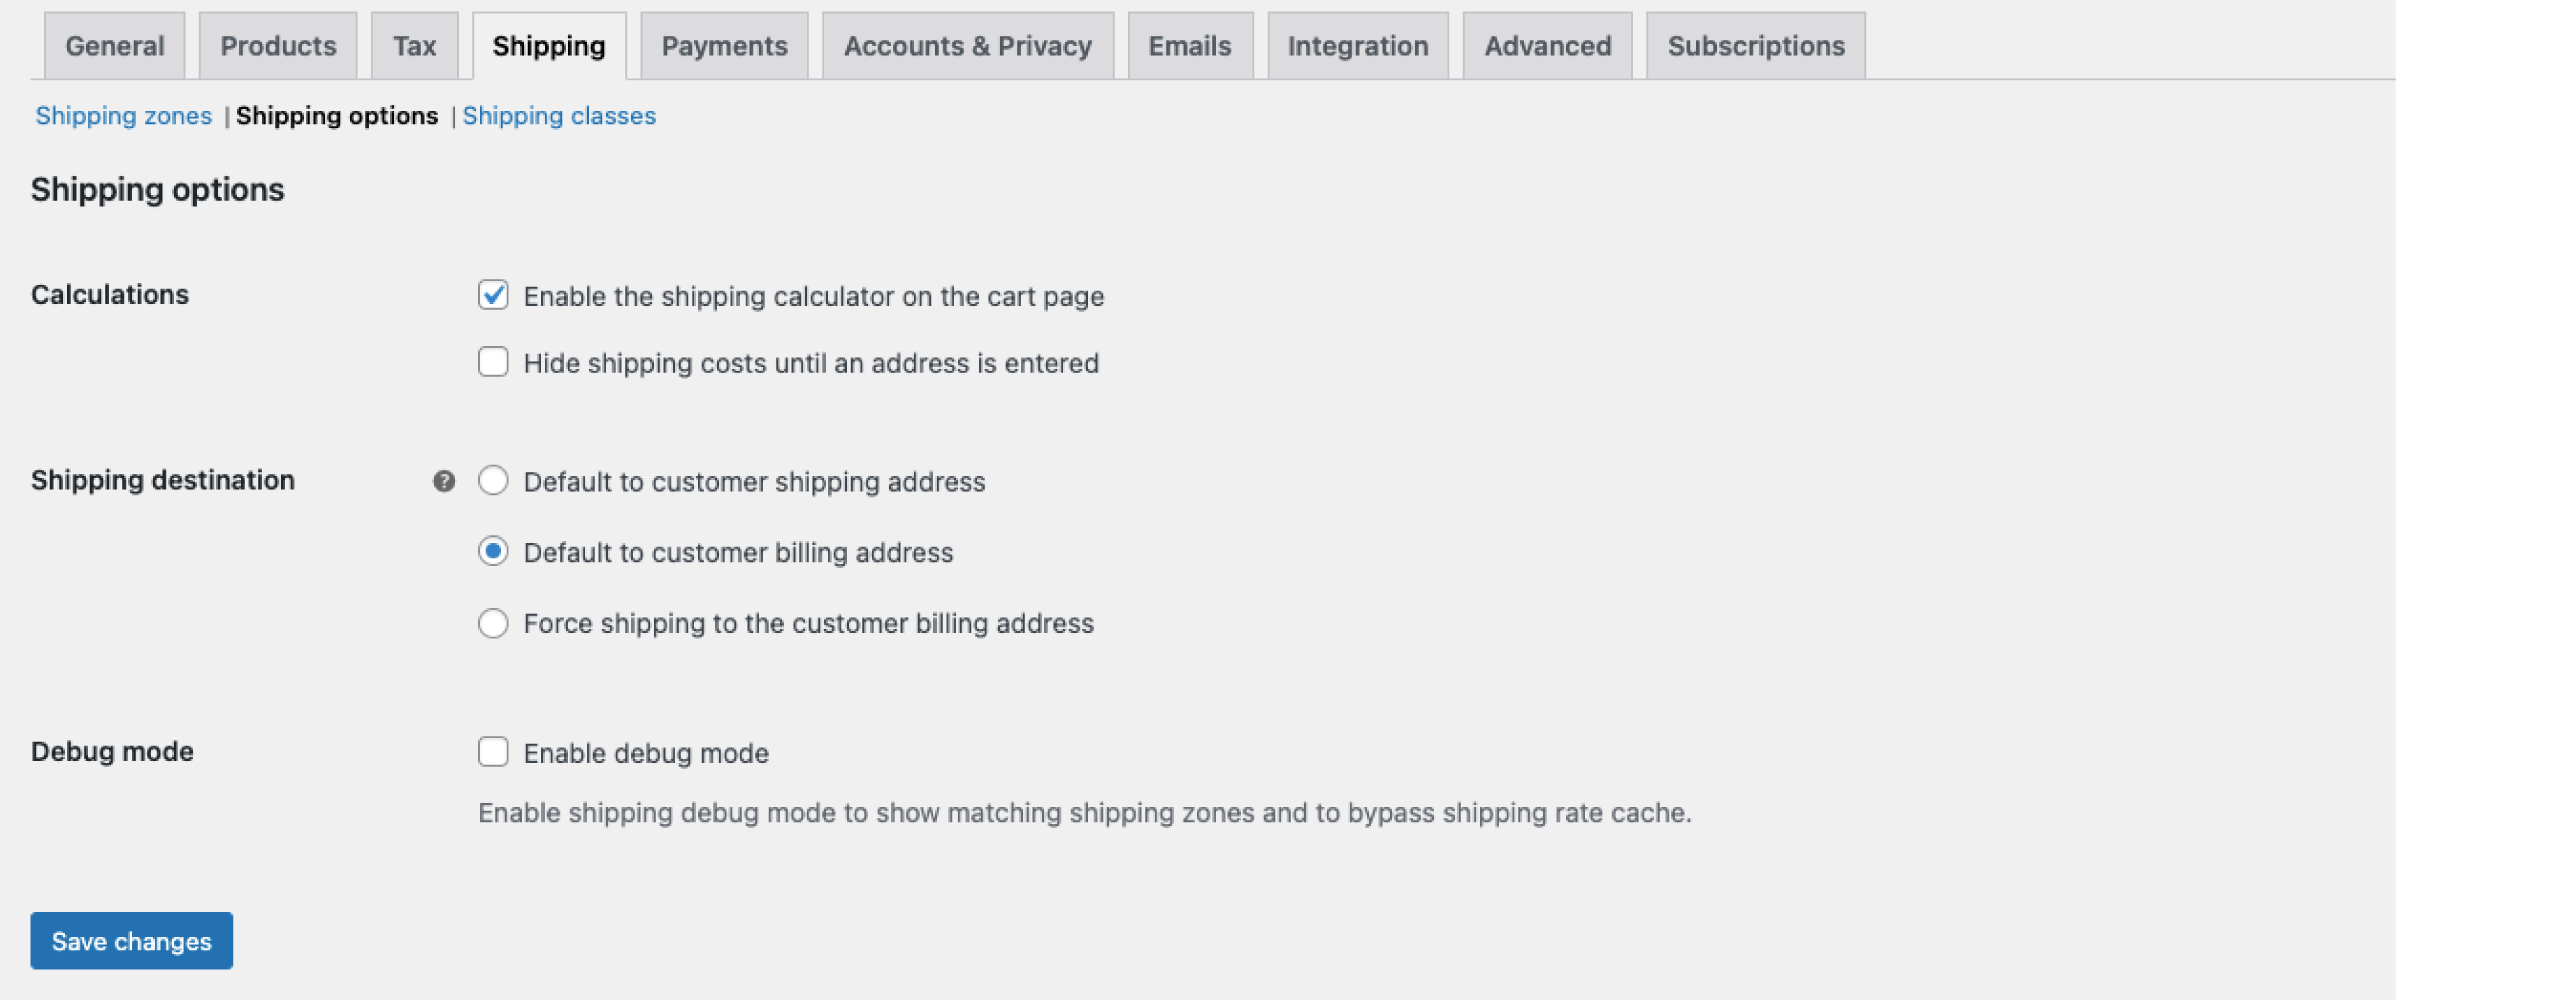
Shipping Options
You can modify the shipping calculations and destination in this section. It involves enabling or disabling the shipping calculator or specifying the shipping destination. Please refer to the WooCommerce documentation for more information about shipping options(Debug mode).
This is the End
We’ve covered all the basics of WooCommerce Shipping. However, you can also make use of other extensions and plugins, which will help in several conversions and new shipping methods. To find strategies to optimize your shipping strategies in real-time operations, you can check out our blog for helpful tips. In conclusion, as we’ve said in the beginning, shipping is a crucial and decisive phase in your e-commerce store. Follow all the steps outlined in this blog, and you are good to go.


 THANK YOU!