


Table of Contents
A checkout page is one of the most crucial aspects of a WooCommerce Store. Making a checkout page effortless to use has become an essential aspect in recent times. Every single day, a new website pops up, and let me give you a reality check: we are all fighting for the same customer. To have a front foot among the competitors, you have to work more on personalizing and optimizing your checkout. When it comes to the checkout process, the primary purpose is that you need to collect the data you require to process the customer order. Introducing “Conditionally display fields” on the Woocommerce checkout page is a terrific way to curate the checkout process as it makes the user experience for the customer quicker, more efficient, and seamless while making a purchase.
What are Conditionally Display Fields?
So, display rules refer to a set of conditions that can be applied to control the display of fields on the checkout page. It implies that you can set a particular condition for showing and hiding fields based on your preference inside the checkout page.
Who would require Conditionally Display Fields On WooCommerce?
Conditionally display fields can be set for any eCommerce store using Checkout Field Editor for WooCommerce from themehigh. Now, if your store usually sells customized products or items that require additional customization info before the customer completes a purchase. Using conditional displayed fields, you can hide and show the fields based on certain conditions.
If your store is selling customized or curated sets as a product, you might want a particular field that should be added to the checkout page based on the product the customer chose. However, if the customer’s cart doesn’t include a customizable product, avoid confusing them with unexpected fields on the checkout page.
If you sell products often gifted, like flowers or gift boxes, consider prompting customers to include a personal note for the recipient. You can do this by setting a prompt for customers to write a note when purchasing standard gift products.
How to Conditionally display fields on the WooCommerce Checkout Page?
First, let’s dive into some general steps that are prerequisites to setting display rules.
- Firstly, in the left side panel, navigate towards WooCommerce → Checkout Form → Checkout Fields page.
- If you are creating a field to which you are setting display rules to the field, then click on the Add Field button to open the pop-up form.
- If you are Editing an existing field to which you are setting display rules to the field, click on the Edit Field button to open the pop-up form.
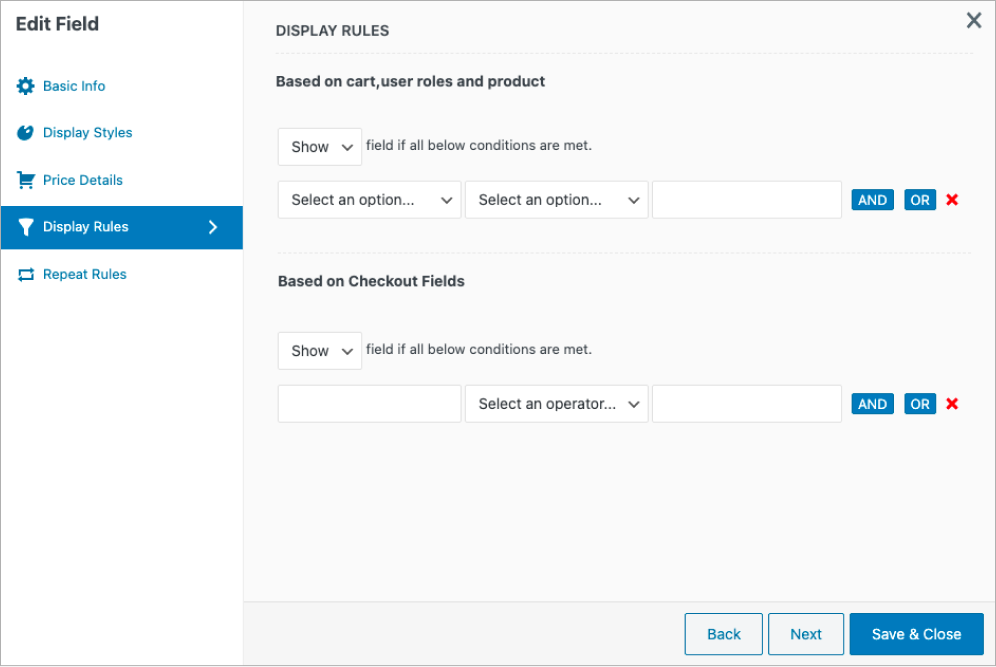
- Next, you have to select the Display Rules tab from the pop-up.
- In the Display Rules tab, you can set two types of rules, one which is validated before the loading of the checkout page and the other which will be triggered once the field value is updated. Even though the rule types are limited to two, you can add multiple conditions to each rule.
- Click on AND or OR operator button to add multiple conditions and utilize these operators adequately based on your necessity.
- Select the Save Field button to save the settings once the required conditions are added.
Conditions Based On User Role
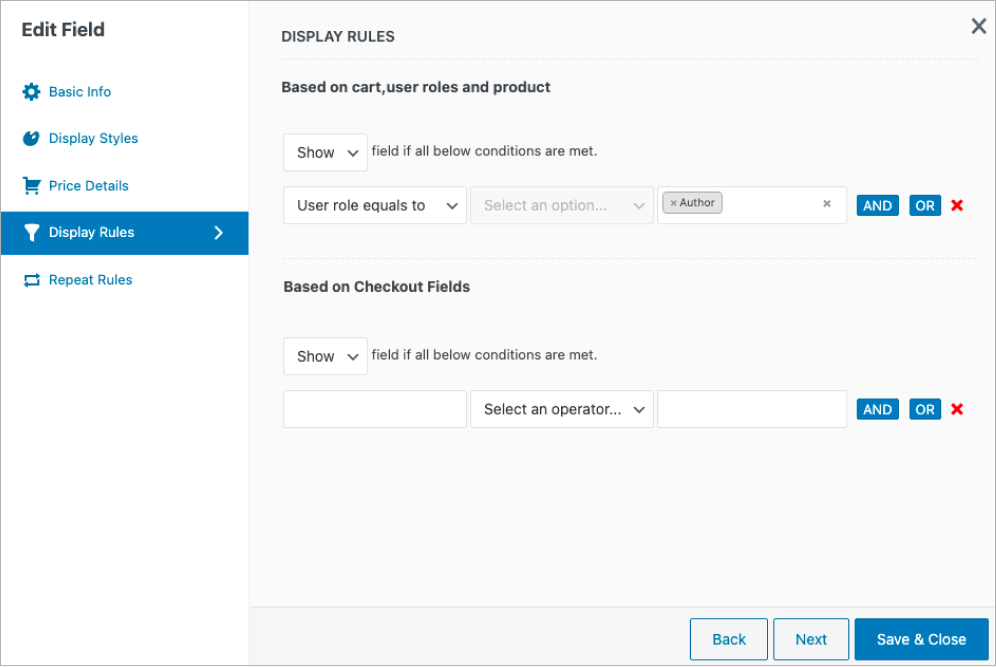
You can typically show and hide a field based on the user role using “Conditions Based On User Role. ” So if you are running a shoe store, there are certain fields that you can add that will be visible to the store manager and hidden to the sales associates. At times you do need fields that should be visible to stockroom associates, store managers, and the sales associate but hidden to the customer service representatives.
Here is a checklist of conditions available to display fields based on the user role.
- User role equal to
- User role not equal to
Conditions Based On Cart Totals
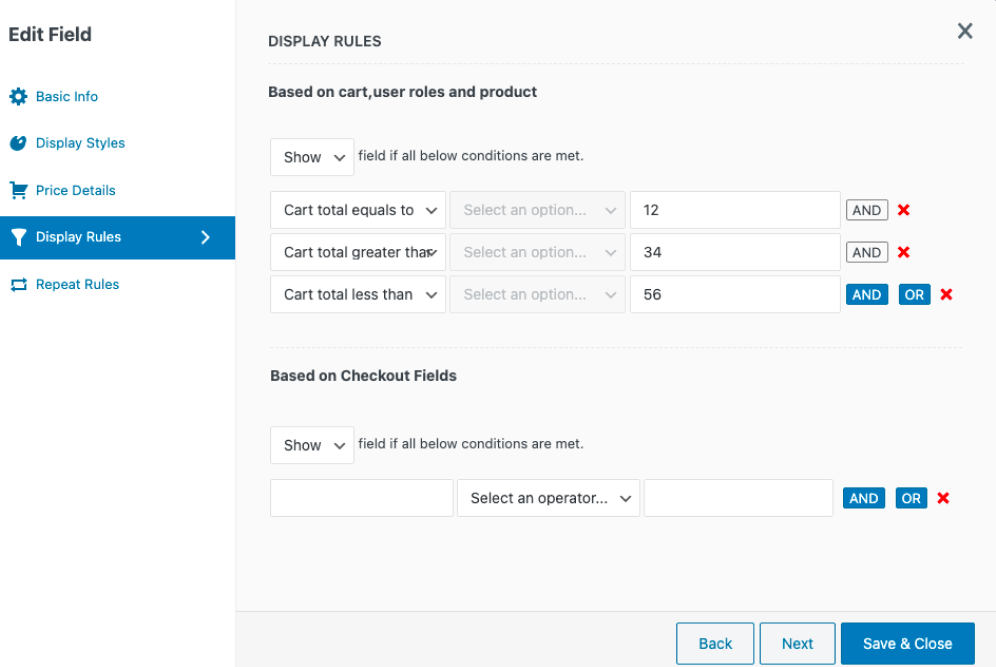
This is usually based on the cart total you can show and hide fields. A relatable situation is if a customer completes a purchase and a cart total is equal to or greater than the value set by the store owner, they can give a discount. Given below is the list of conditions available to display fields based on the cart total.
- Cart total equal to
- Cart total greater than
- Cart total less than
- Cart subtotal equal to
- Cart subtotal greater than
- Cart subtotal less than
Conditions Based On Shipping Weight
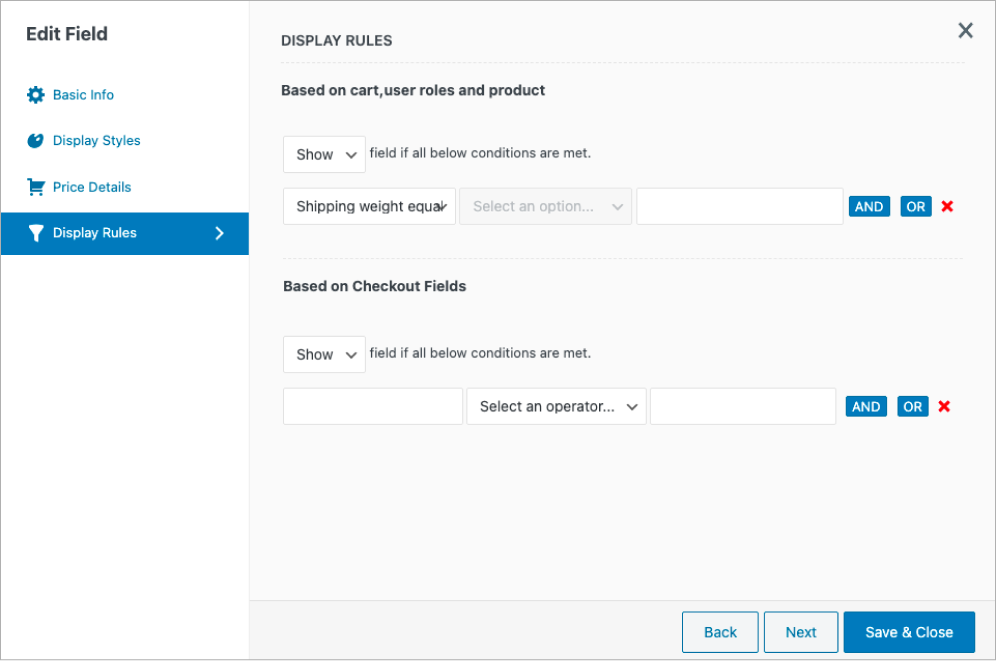
As the name suggests, this is specifically based on the shipping weight. So if you’re store is selling exotic fruit or nuts from estore and depending on the weight, you can set a shipping price. Here is a list of conditions available to display fields based on shipping weight.
- Shipping weight less than
- Shipping weight equal to
- Shipping weight greater than
Conditions Based On Products & Product Variations
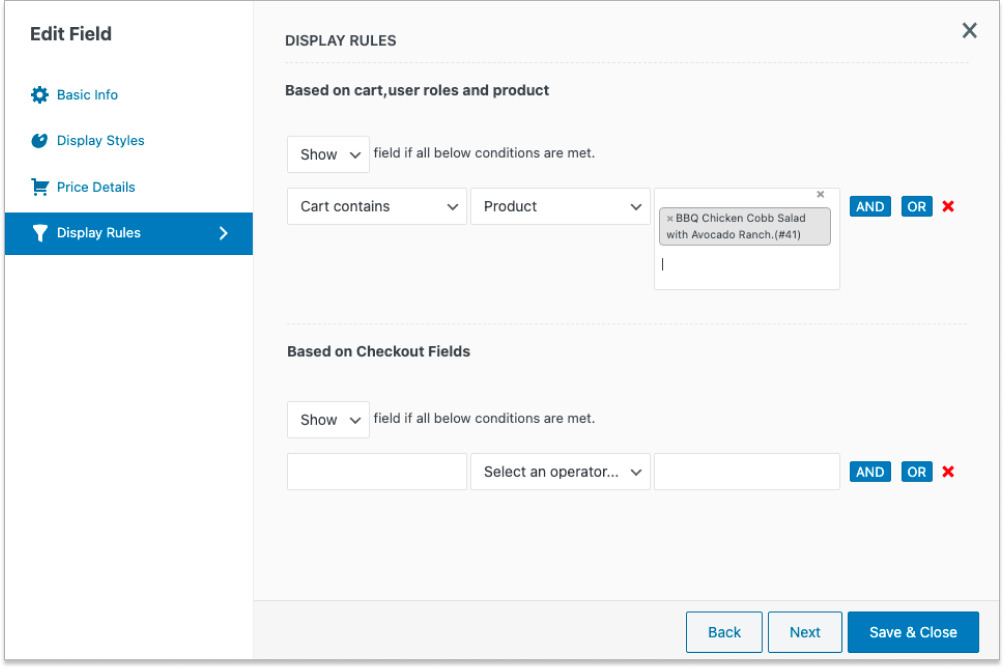
Based on the products and their variations, you can hide and show fields. So, if you run a shoe store and you have to set a rule for a specific shoe model and its variants, this Conditions Based On Products & Product Variations is your answer. The following conditions are available to display fields based on products and product variations.
- Cart contains
- Cart not contains
- Cart only contains
Conditions Based On Product Categories
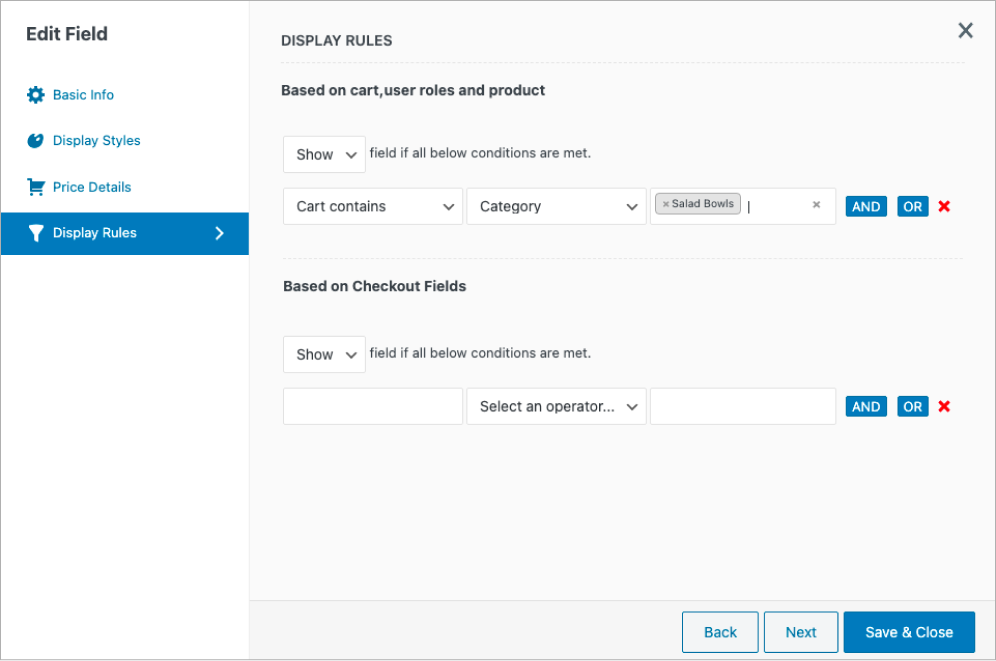
You can show and hide the fields based on product categories. This condition ideally works well if the owner wants to set a condition for a specific category alone. A better way to explain is if you own a gadget store and if you want to set a field for computers and accessories alone, you can set this condition. Here are a few conditions available to display fields based on product categories.
- Cart contains
- Cart not contains
- Cart only contains
Conditions Based On Option Value
“Conditions based on option value” are based on the select and radio button fields. You can use the option value to show and hide the specific field. So, for example, if your store owner wants to give discount codes to their customer based on the country, where the discount code will be visible through a select prompt, this can be done in a jiffy by condition based on option value.
Conditions Based On The Country Field
Enabling conditional rules based on Country selected in the checkout is similar to enabling it for other fields. However, it’s important to note that this option is disabled by default. You’ll need to manually enable it to take advantage of this feature. Here are some conditions to display fields based on the country field values.
- Value equal to
- Value is not equal to
Before you jump ahead, to enable the Country Field value. For that:
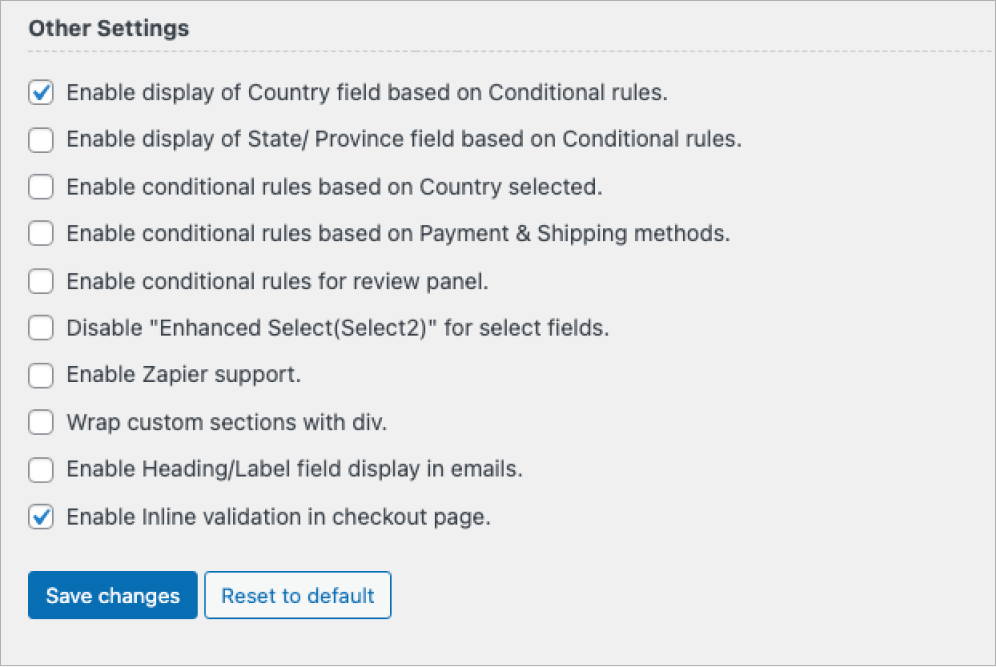
- Open the “Advanced Setting tab”.
- Head to the “Other Setting “section
- Check the box “Enable conditional rules based on country selected.”
Conditions Based On Payment & Shipping Methods
Based on payment and shipping methods, you can show and hide fields. This feature allows you to allocate conditions based on specific product shipping and payment methods.
Picture that you’re running an online store, and you want to offer your customers the option of picking up their orders locally. Well, by adding a shipping method, you can make it happen! Simply create a date picker prompt and set conditions to it based on your requirements. This way, your customers can choose a convenient date to swing by and snatch up their orders in person.
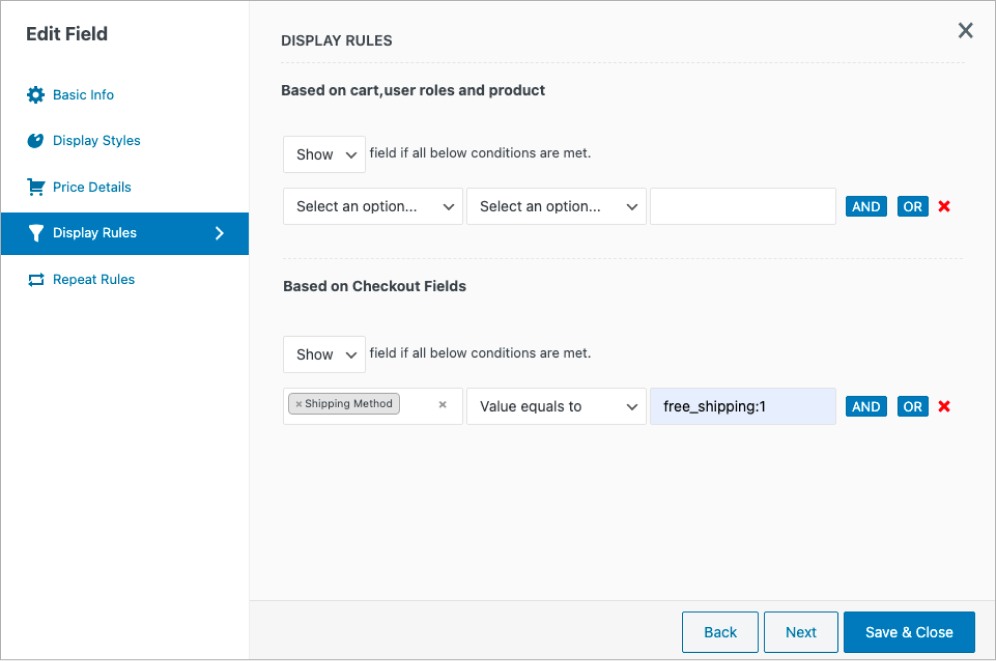
You can easily set up a prompt for delivery instructions at checkout for customers who choose cash on delivery as their payment method. Here, conditions based on the payment method can be set based on your preference. This makes the process smoother and more user-friendly.
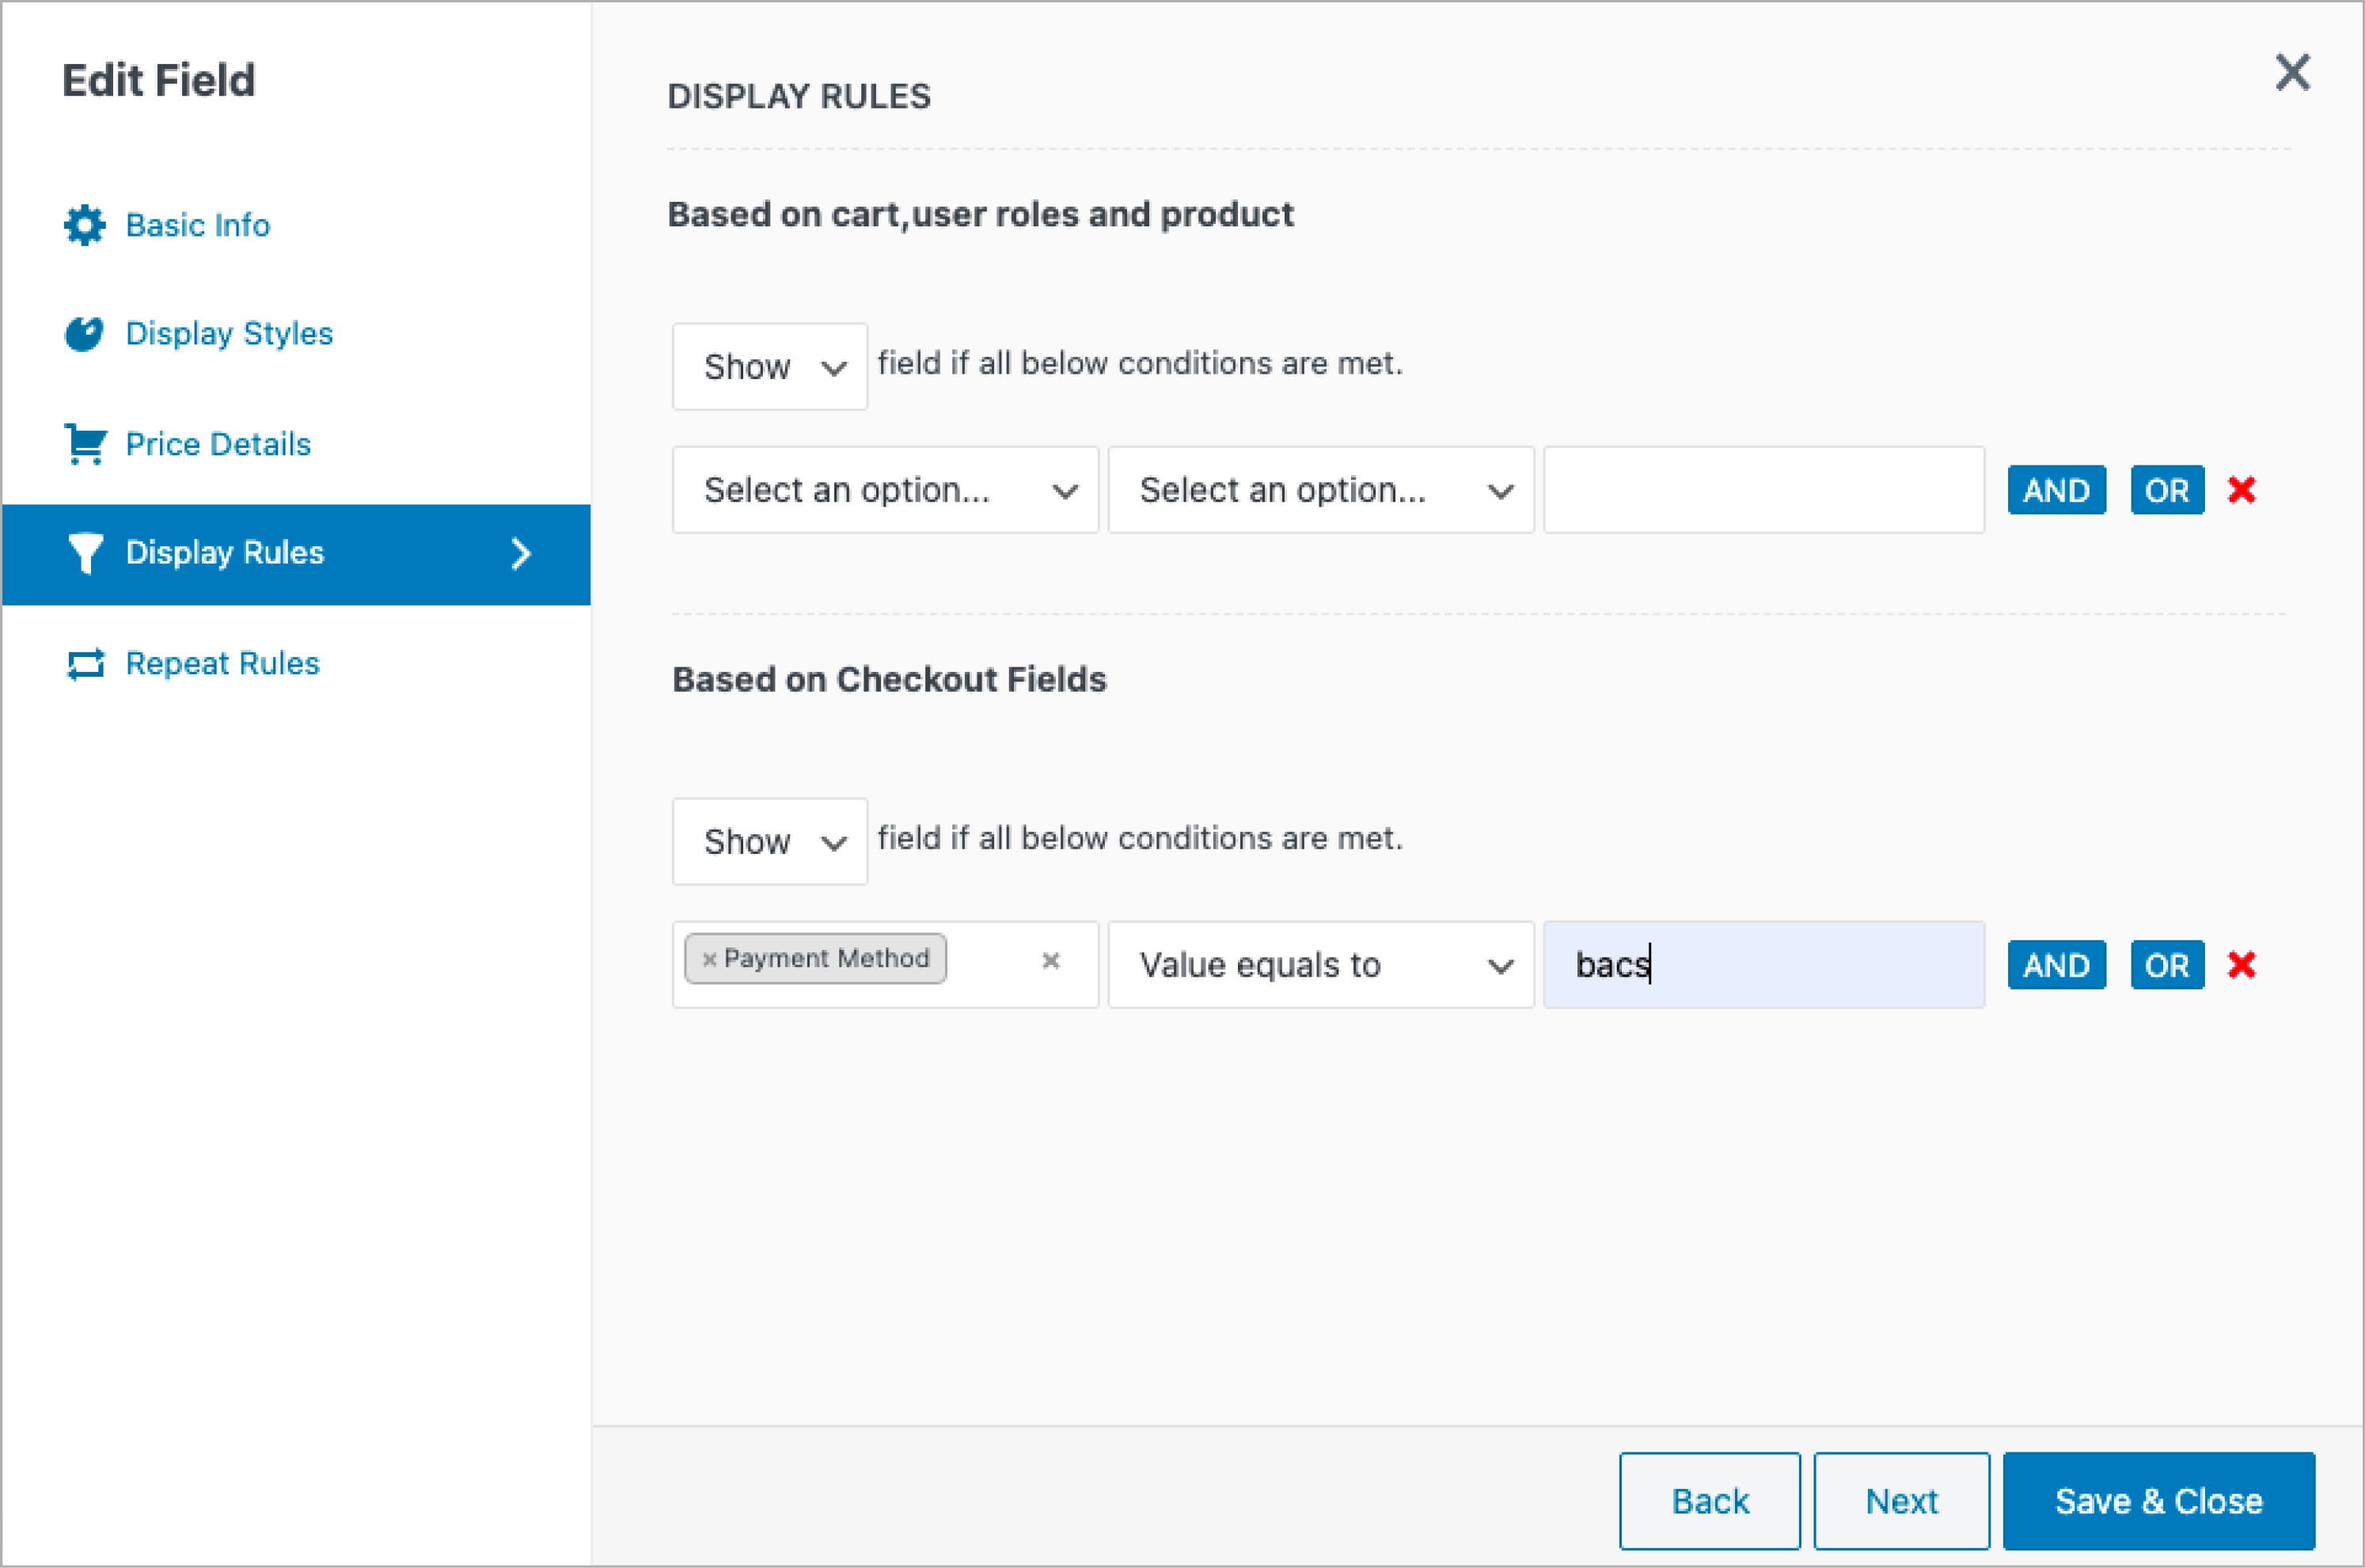
Here is a list of conditions to display fields based on the payment and shipping methods.
- Value equals to
- Value not equal to
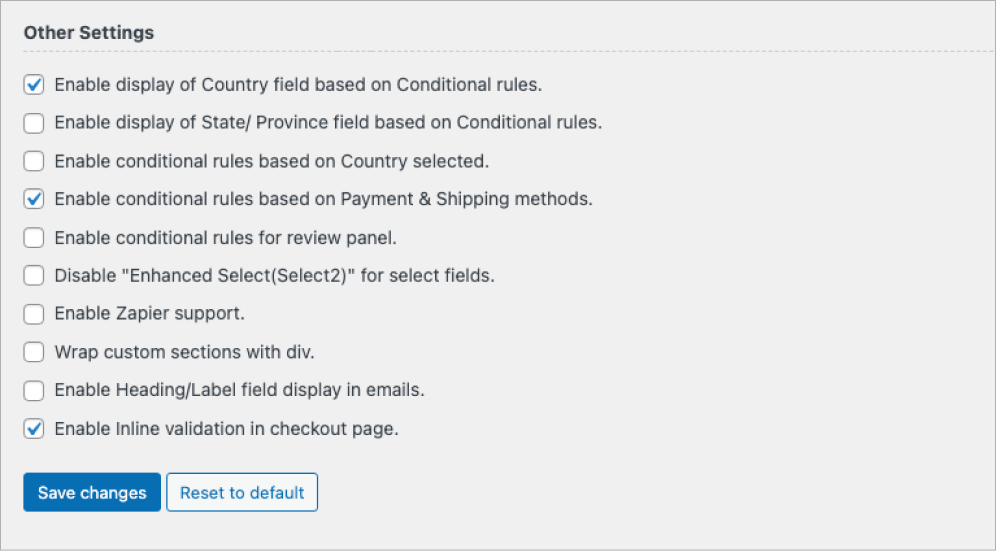
Before setting conditions based on payment & shipping methods, you have to enable it. For that:
- Open the Advanced Setting tab.
- Head to the Other Setting section
- Check the box “Enable conditional rules based on Payment & Shipping methods”.
Other popular Conditional Display fields you can go through as well
- Conditions Based On Product Tags
- Conditions Based On Product Types
- Conditions Based On Shipping Class
- Conditions Based On Other Field’s Value
- Conditions Based On Input Fields (Text, Hidden, Password, and Textarea)
- Based On The Checkbox
- Based On The Checkbox Group & Multi-Select
- Conditions Based On Date Picker
- Conditions For Country Field
- Conditions For The State Field
- Custom Conditions
Wrapping Up
In short, a checkout page is a crucial aspect of any WooCommerce store, and optimizing it for a flawless user experience has become quite relevant in today’s competitive landscape. With the introduction to conditional display fields on the WooCommerce page, businesses can create a seamless checkout process, simplifying and speeding up the customer’s experience. Transform your store’s checkout experience with Checkout Field Editor for WooCommerce an effortless solution to customize your checkout process exactly as you need it. Although the primary purpose of a checkout process is to gather information to process customer orders, the Conditionally displayed fields based on specific product conditions can make the checkout process more personalized and improve the customer experience.


 THANK YOU!