 Getting Started
 For Developers
 Compatible Plugin & Themes
The plugin allows you to add a new job post along with providing the corresponding details related to the job like job expiry, category, location, and much more.
To Add a New Job Post
- Go to Job Listings > Add New.
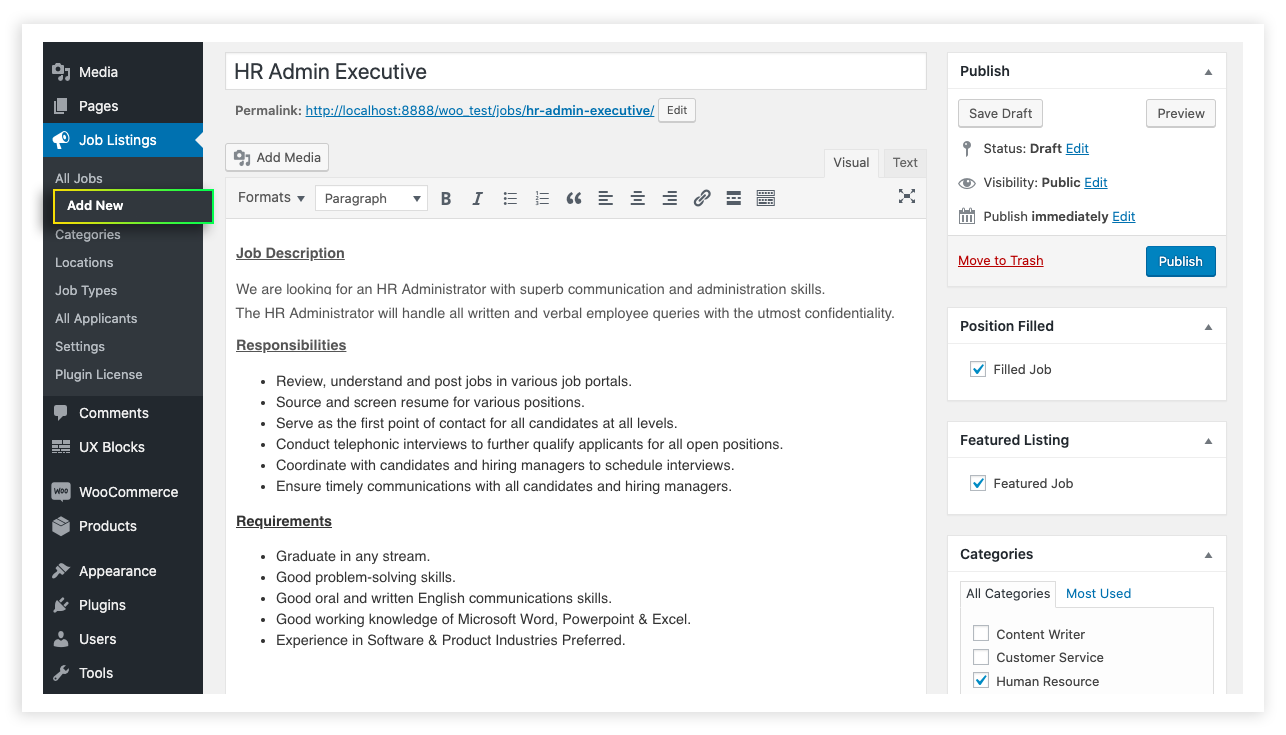
- By clicking on the Add New field, a new page appears. Here, you can add the job title and job description related to the job post.
- Below the job description, you are having the Job Data field to provide more details of the job.
Shortcode
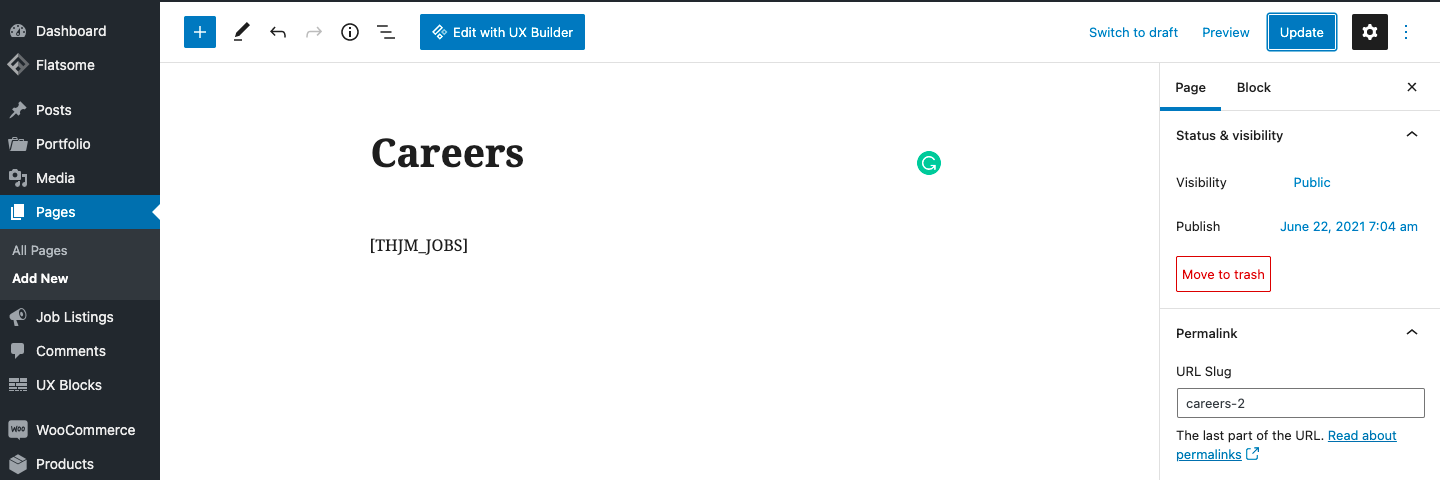
You can list the job page on your website from Job Listings > Settings > General.
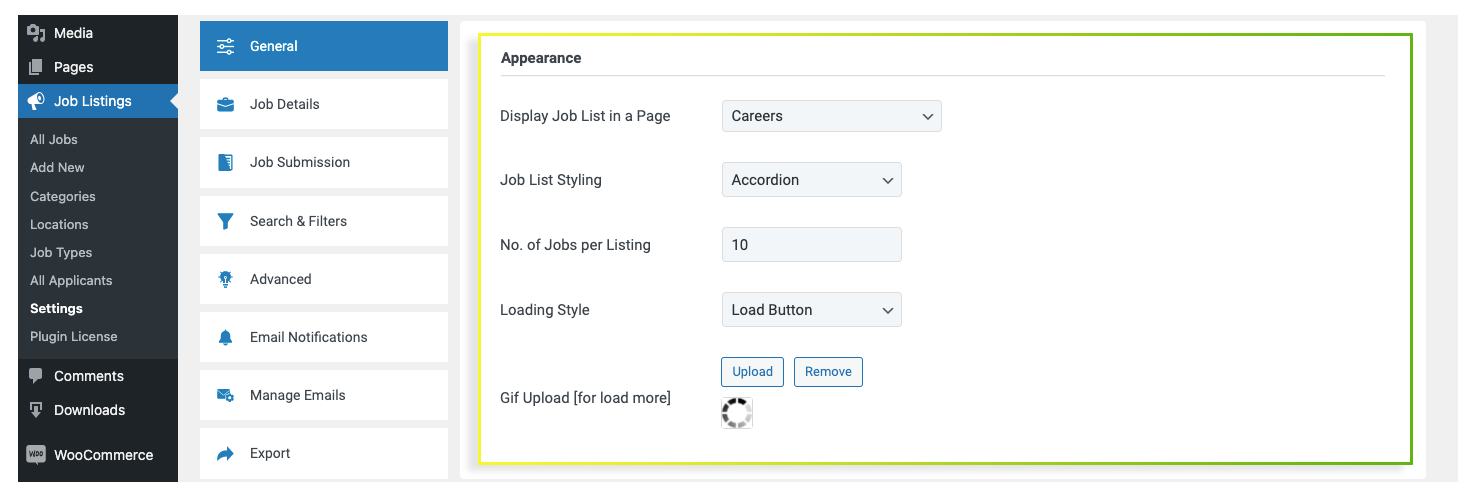
From here, click on the Display Job List in a Page dropdown and choose the page where your career page should be displayed. Also, you can create the job board by adding a shortcode on the respective page where you want to list the job details. Once the shortcode widget is added, edit the widget and add the shortcode [THJM_JOBS] in the space provided. Click Publish and preview the changes.
Add Job Feature
The Job feature option allows you to add additional features related to the job post. Features like experience, salary, etc can be added to the job post using the Job Features field. So that the applicants will be able to know more about the job.
To add a new job feature:
- Navigate to Job Listings> All Jobs> Select a Position> Job Data> Job Features.
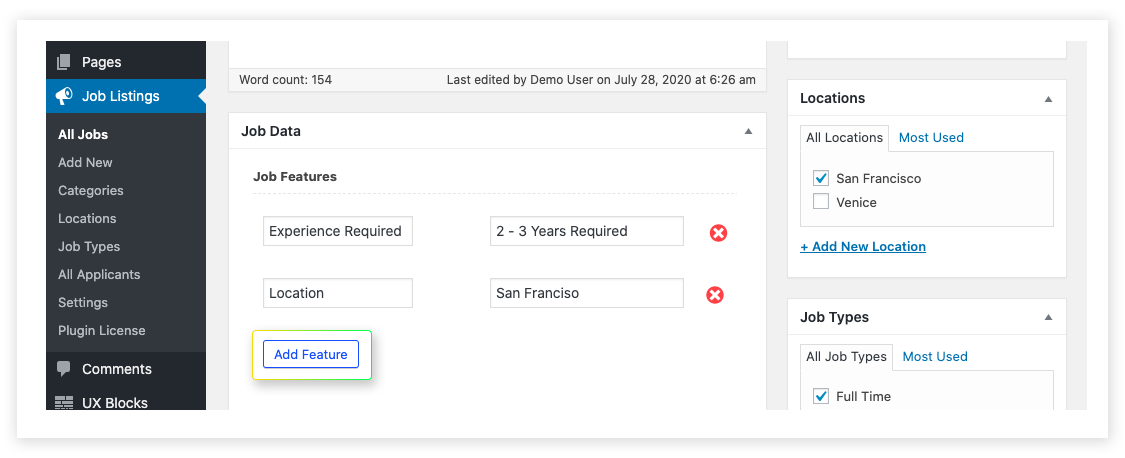
- Click on the Add Feature button, to add additional features related to the job post.
- Here, you can add the feature and details related to that particular feature.
- Note that any features added here will only be visible within this job post, and not across all jobs.
– Besides the fields provided in the Apply Now Form, you can add more fields to that. Selecting the Add New Field button allows you to create an additional field in the Apply Now Form.
Apply Now Form Fields
The Apply Now Form Field is used to add an extra field in the Apply Now form. Using this feature, the admin can collect more details about the applicant and check whether he/she is fit for the job.
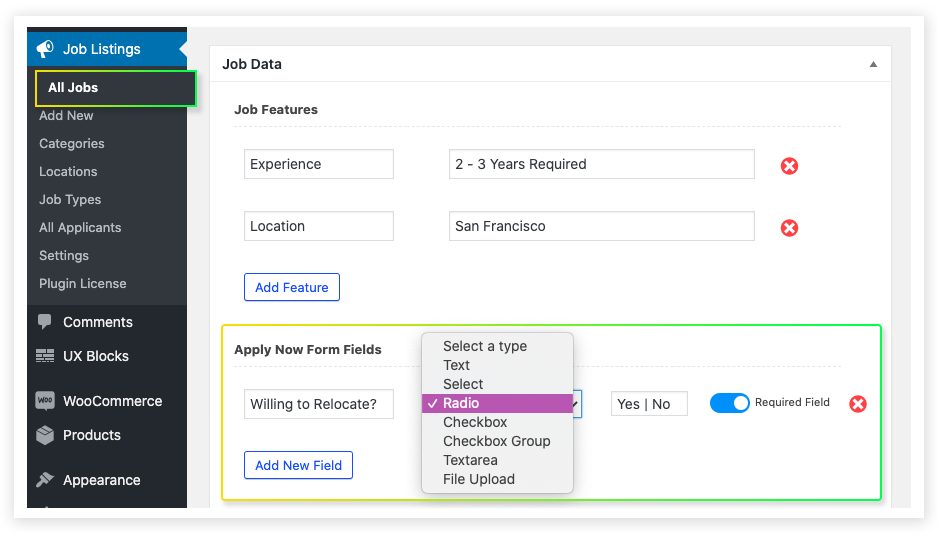
- To add additional fields in the apply now form, go to Job Listings> All Jobs> Select a Position> Job Data> Apply Now Form Fields.
- Click on the Add New Field button.
- Enter the display name, field type, and the text in the corresponding place. This WordPress careers plugin offers 7 different field types like text, select, radio, checkbox, checkbox group, textarea, and file upload. You can choose anyone among that as per your need.
- By enabling the required field option, you can set this field as required. Otherwise, it will be an optional field.
- Note that any fields added from here will only be visible within this job, and not across all jobs.(For global form fields see here)
Featured Listing
The Featured Listing option allows the admin to feature the selected job with a special badging. This badging highlights the job and makes it more visible to the applicants.
- To highlight the featured jobs, go to Job Listings> All Jobs> Select a Position> Job Data > Featured Listing.
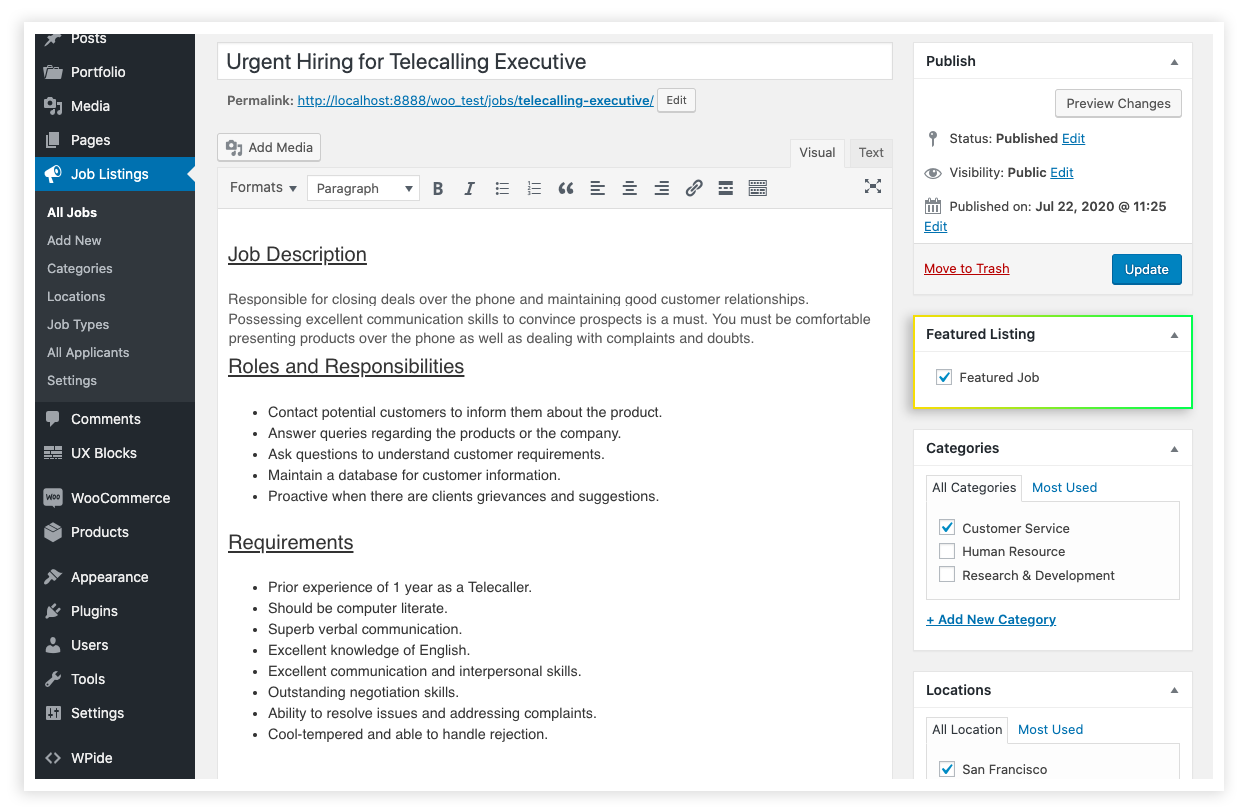
- Select Featured Job checkbox to feature the job post. So that it will be highlighted with a special badge.
Position Filled
This field helps the admin to mark the filled jobs. So that the applicants can analyze whether the job is filled or not.
- To mark the filled jobs, navigate to Job Listings> All Jobs> Select a Position> Job Data > Position Filled.
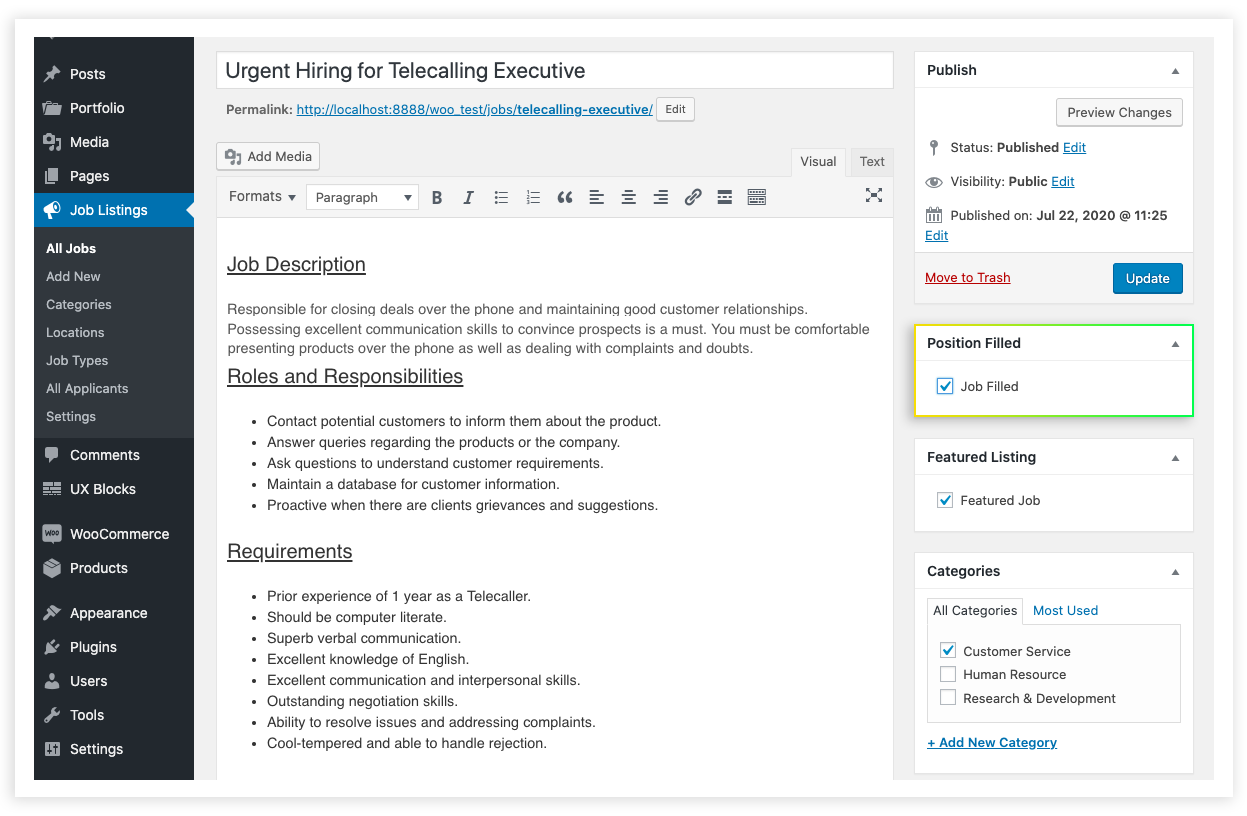
- Select the Filled Job checkbox to mark the filled job.
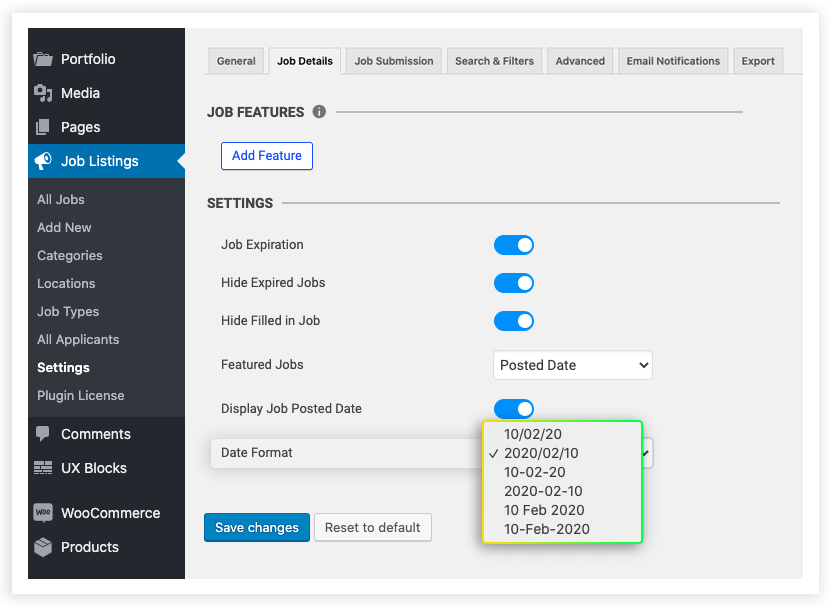
Job Expiry
- To add the job expiry, navigate to Job Listings> All Jobs> Select a Position> Job Data > Job Expiry.
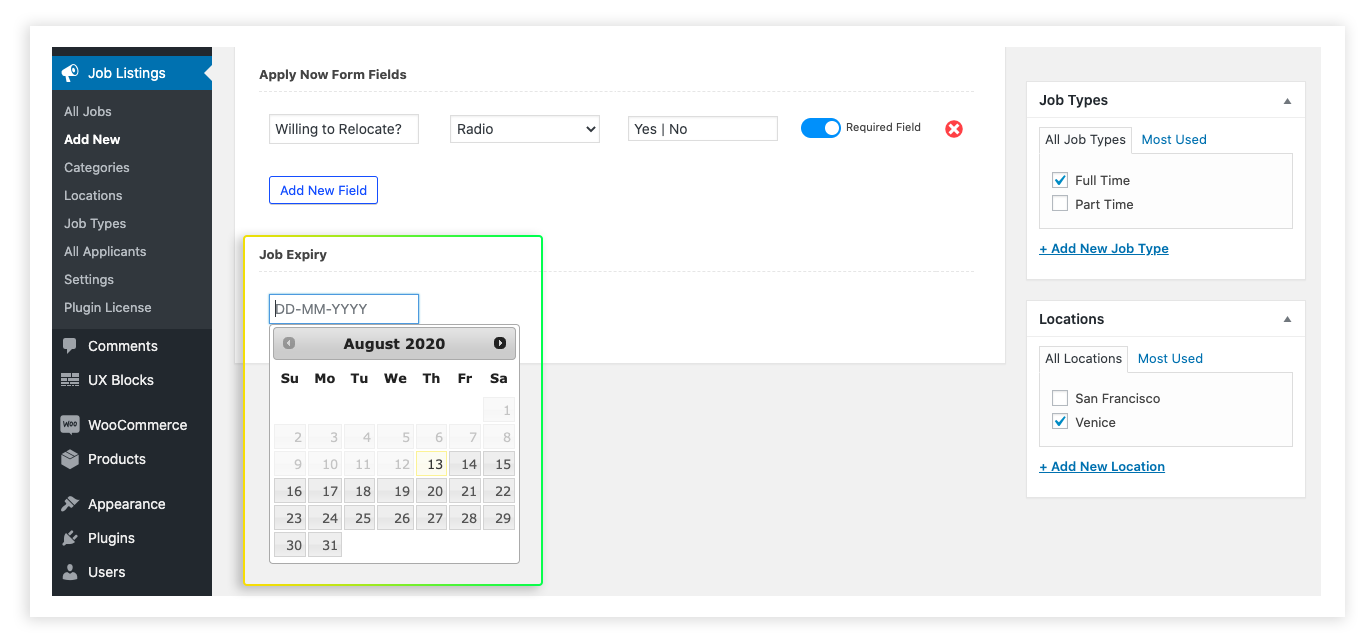
- Choose the Job Expiry date by clicking the Job Expiry field. If needed, you can change the date format from Job Listings > Settings > Job Details > Date Format.
Categories
To select the category, navigate to Job Listings> All Jobs> Select a Position> Category.
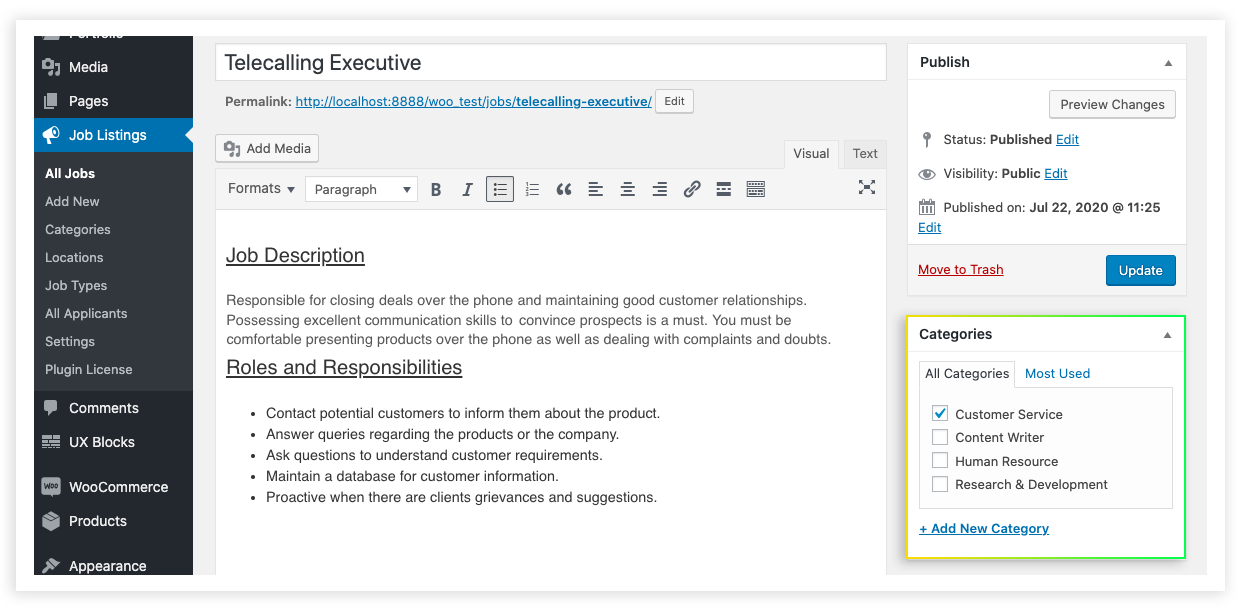
- Click on the +Add New Category to add a new category.
- If there is a defined category, then select the category from All Categories.
Locations
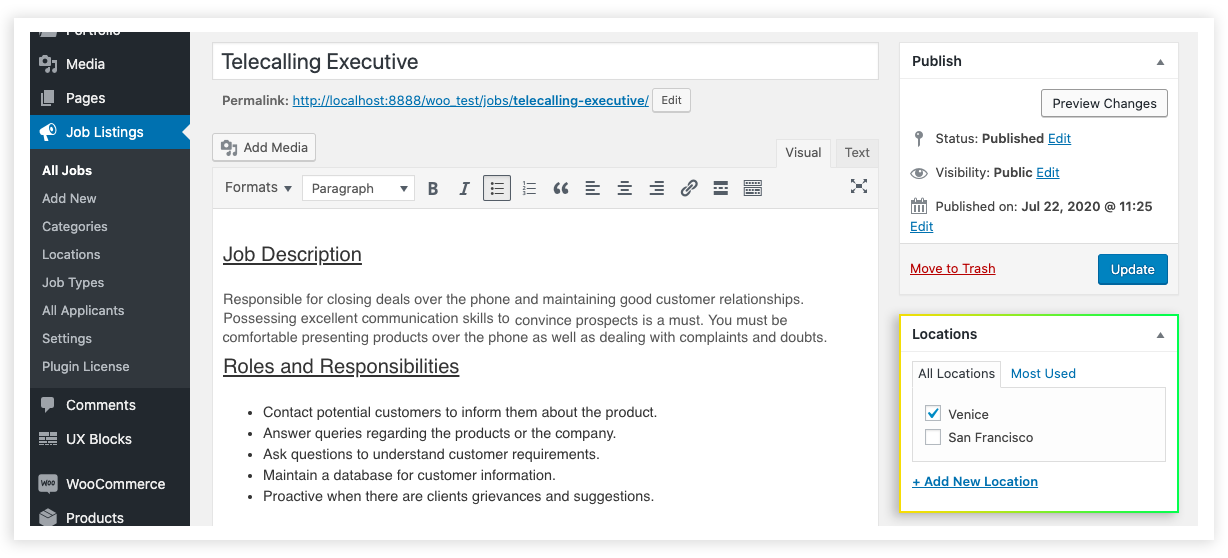
- To set the location of the job post, go to Job Listings> All Jobs> Select a Position> Locations.
- Select the specific location of the job from All Locations.
- If the location is not declared, click on the +Add New Location to add a new location.
Job Types
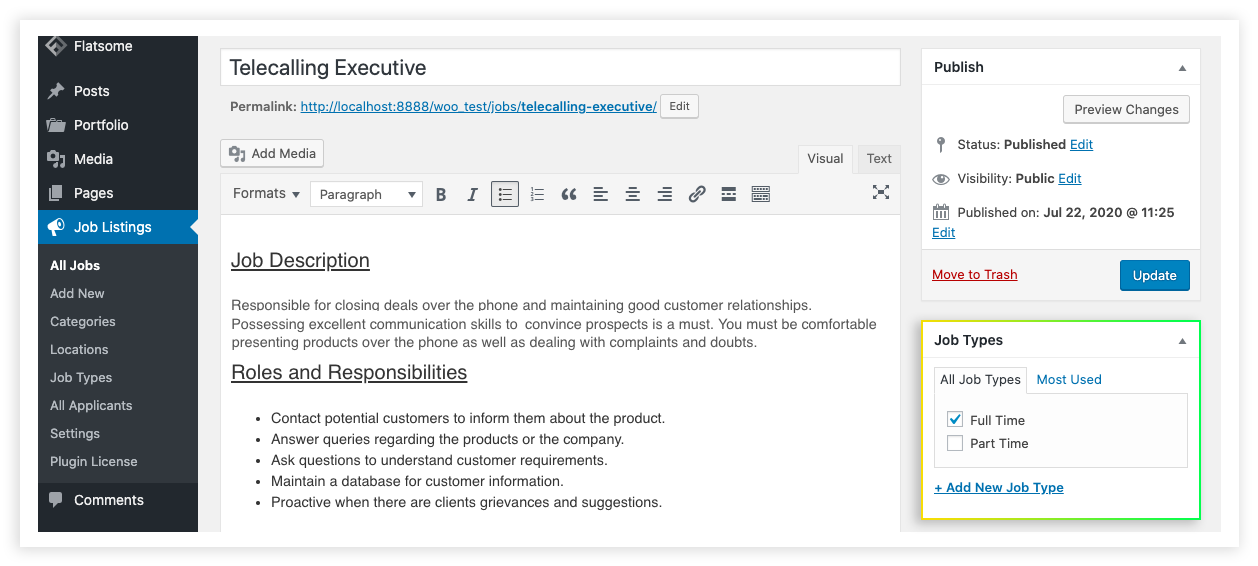
- To provide the type of job, navigate to Job Listings> All Jobs> Select a Position> Job Types.
- Click +Add New Job Type to add a new job type.
- If the job type is already defined, then select it from All Job types.
Once you have completed the job post related details, click on the Publish button for making it available for the applicants.