 Getting Started
 Compatible Plugins
The Email Customizer for WooCommerce plugin helps you create email templates with different elements like text, images, gifs, social icons, etc., that match your brand style.
To Create a New Email Template,
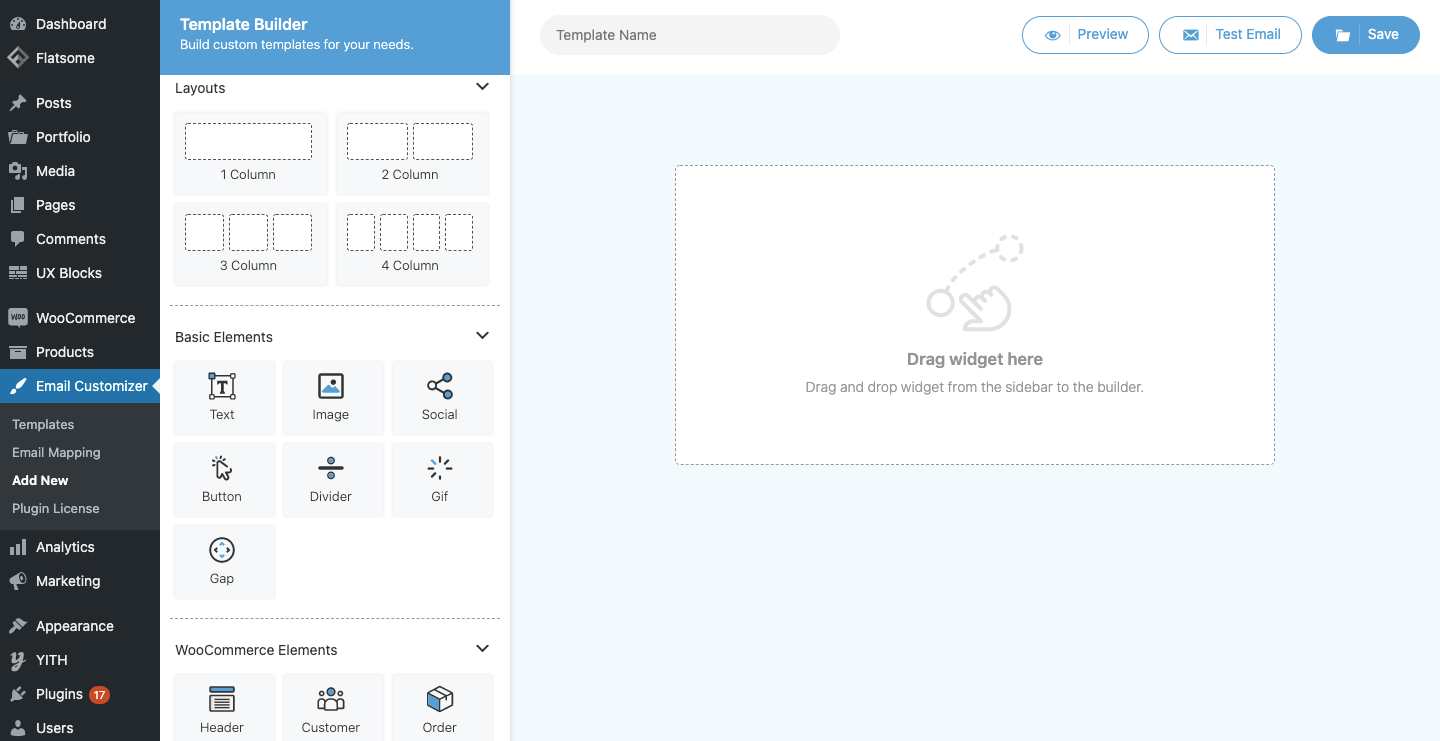
- Navigate to Email Customizer > Add New.
- The template builder gets loaded.
- You can also open the template builder from the Email Templates > Templates > Custom Templates > Add New.
- Once the template builder is loaded, choose an apt layout from the Layouts section.
- Inside the layout, you can add the required elements for your email template.
- Once the elements are added and the template is ready, provide a template name and click on the Save button to save the created template.
How to add Basic Elements to an Email Template?
To add the basic elements to your email template,
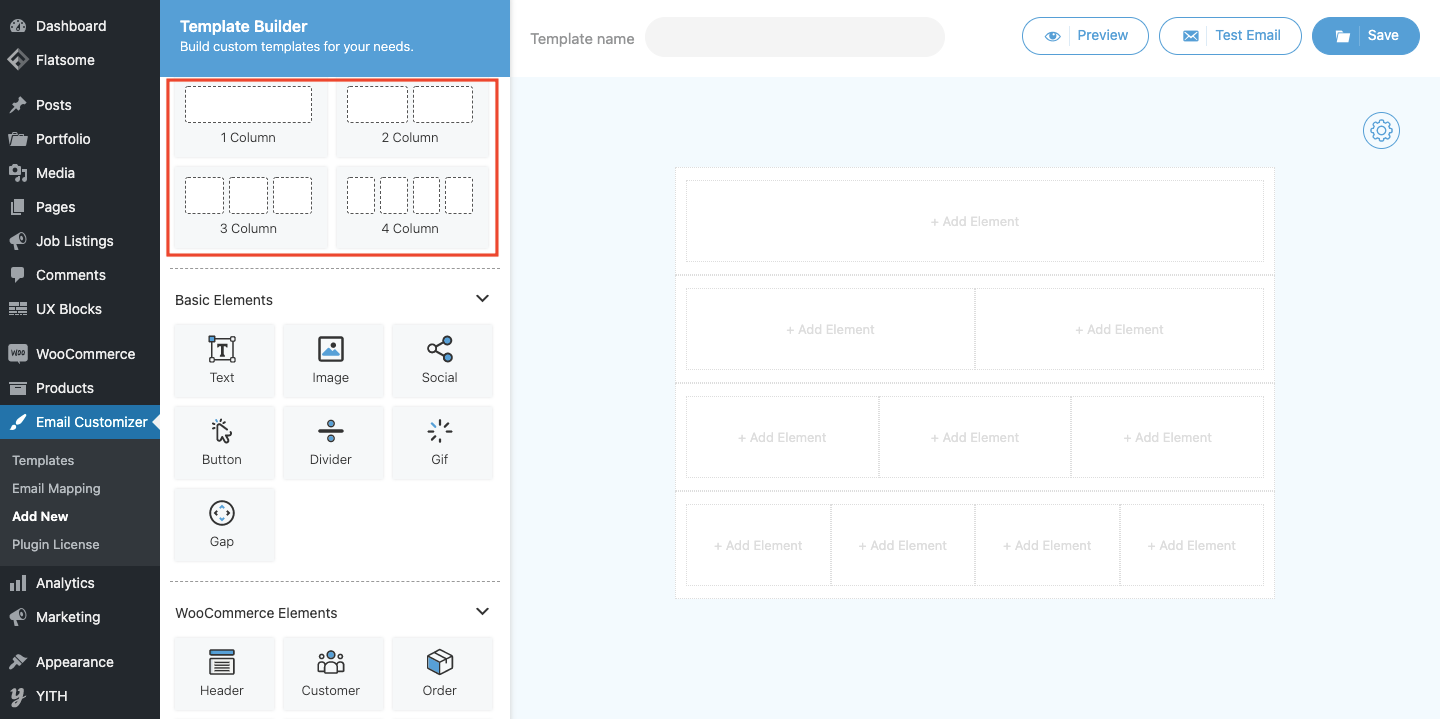
- Open the template builder and choose a specific layout type from the Layouts section.
- Once the Layout is added, navigate to the Basic Elements section to drag and drop the basic elements to your email template.
- There are seven different elements in the Basic Elements section (Text, Image, Social icons, Button, Divider, Gif, and Gap). Drag the required elements to your email template based on your needs.

- To edit the element properties, hover on that particular element in the template and click on the pencil icon. The option to edit the element properties gets loaded.
- To delete an element from the template, hover on that particular element and click on the delete icon. The element will be deleted.
- Based on the element you are choosing, the properties to edit may vary. Some of the properties that you can edit for the elements are defined below.
General Properties |
|
|
Border Properties |
|
| Border Width | Provide the required width for the element border. Enter the top, right, bottom, and left border width respectively.
By default, the lock option corresponding to the fields will be enabled. So, editing the value of a single side affects the rest sides too. Disable the lock button, if you need to provide the border width of each side individually. |
| Border Style | Choose the most accurate border style from the list of styles. |
| Border Color | Click on the Border Color textbox and choose an apt border color. |
|
Background Properties |
|
| Upload bg image | Click on the browse (link) and choose the image that you need to set as background. |
| Background Color | Click on the Background Color (color picker) and choose an apt background color. |
| Size | Enter the required size for the background image that you have set. |
| Position | Provide an apt position for the background image. |
| Repeat | Option to set how background images should be repeated. You can choose the specific repeat type from the corresponding dropdown. |
|
Additional Properties |
|
| Width | Enter the required width for the element. |
| Height | Enter the required height for the element. |
| Padding | Provide the required padding size for the element. Enter the top, right, bottom, and left padding sizes respectively.
By default, the lock option corresponding to the fields will be enabled. So, editing the value of a single side affects the rest sides too. Disable the lock button, if you need to enter the padding size individually. |
| Margin | Enter the required margin size for the top, right, bottom, and left margins.
Disable the lock button, if you need to enter the margin size individually. |
|
Text Element |
|
| Content | Provide the content for the text area in the template. |
|
Font Properties |
|
| Color | Choose an apt text color for the content. |
| Text align | Choose an apt text-align from the number of options. |
| Size | Enter the required text size. |
| Line Height | Enter the required line height. |
| Weight | Set the thickness of the font. |
| Family | Choose an apt font family from the list of styles. |
|
Image Element |
|
| Browse | Click on the browse (link) to upload an image in your email template. |
| Width | Provide the required width for the uploaded image. |
| Height | Provide the required height for the uploaded image. |
| Alignment | Select a suitable alignment for the image. |
| URL | Provide the URL, if you need to attach any link to the image. |
|
Social Element |
|
| Social sharing | There is a total of 11 platforms included for social sharing. Facebook Email Twitter Youtube Linkedin Pinterest Instagram Whatsapp Messenger Vimeo Web Share |
| Icon URL | You are provided the space for adding URLs for each social icon. So, add the corresponding URLs in the respective spaces. |
| Enable/disable | You can choose to hide or show the social share buttons by enabling/disabling the button given below each platform. Note: 4 apps – Whatsapp, Messenger, Vimeo & Webshare are disabled and they need to be enabled manually if required. |
|
Styling options |
There are a total of 11 styles for displaying all the social share buttons. |
|
Button Element |
|
| URL | Provide the button URL. Once the customer clicks on the button, they get navigated to this URL. |
| Content | Enter the button content to be displayed. |
| Title | Provide a suitable title for the button. |
|
Divider Element |
|
| Width | Enter the required width for the divider. |
| Divider Height | Enter the required height for the divider. |
| Divider Color | Choose a suitable color for the divider. |
| Divider Style | Select a suitable style for your divider from the dropdown. |
|
Gif Element |
|
| Browse | Click on the browse (link) to upload a gif to your email template. |
| Width | Enter the required width for the gif element in the template. |
| Height | Enter the required height for the gif element in the template. |
| Alignment | Pick a suitable alignment for the gif. |
|
Gap Element |
|
| Height | Provide the required height for the gap element in the template. |
How to add WooCommerce Elements in Email Template?
Like Basic elements, you can add the Woocommerce Elements to your email template. For that,
- Open the email template builder from Email Customizer > Add New.
- Click on the Layouts section and choose a layout for your template.
- Once the layout is chosen, click on the WooCommerce Elements section to drag and drop the required elements to your email template.
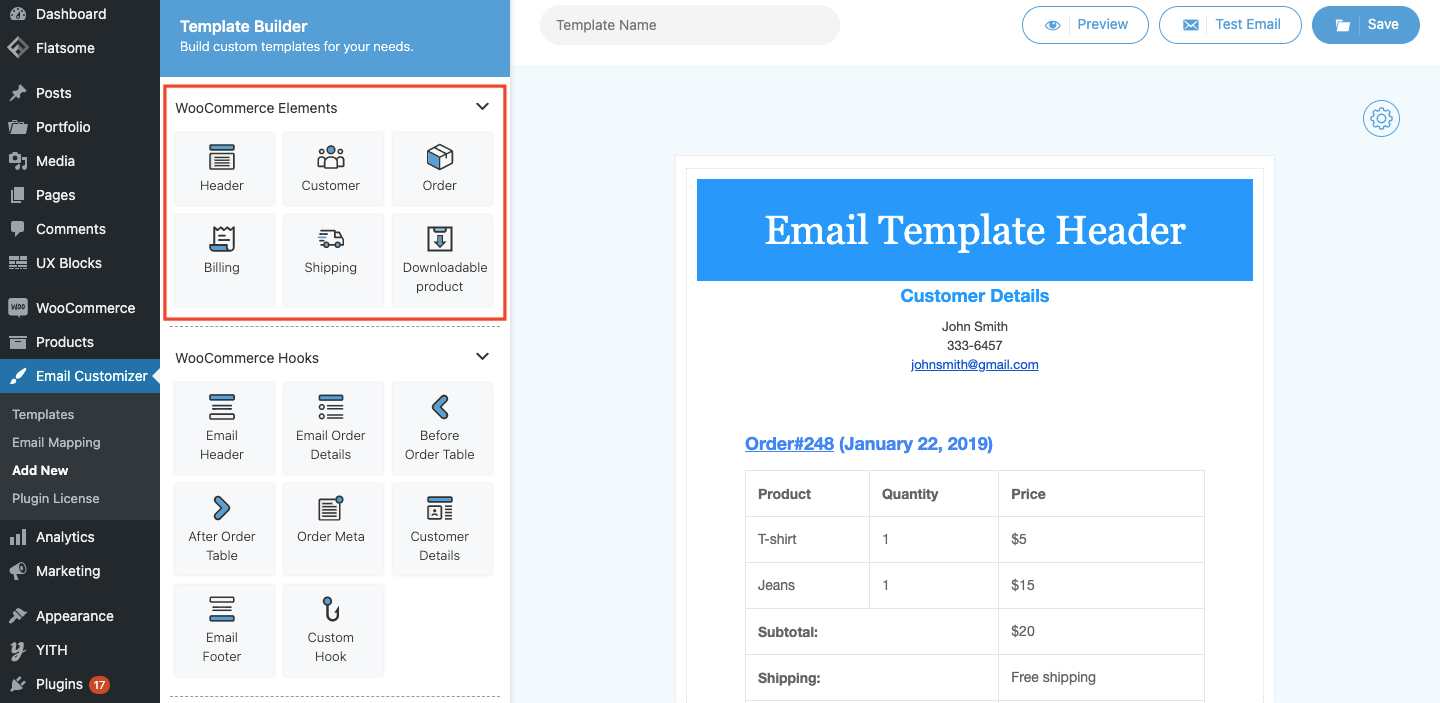
- To change the element position, hover over the element in the template and drag the element to the desired position by clicking on the corresponding icon.
- To edit the element properties, hover on that particular element in the template and click on the pencil icon. The option to edit the element properties gets loaded.
- To delete an element from your template, hover on that element and click on the delete icon. The element will be deleted.
- To know more about the element properties, see here.
How to edit product titles and add details to your Order Table?
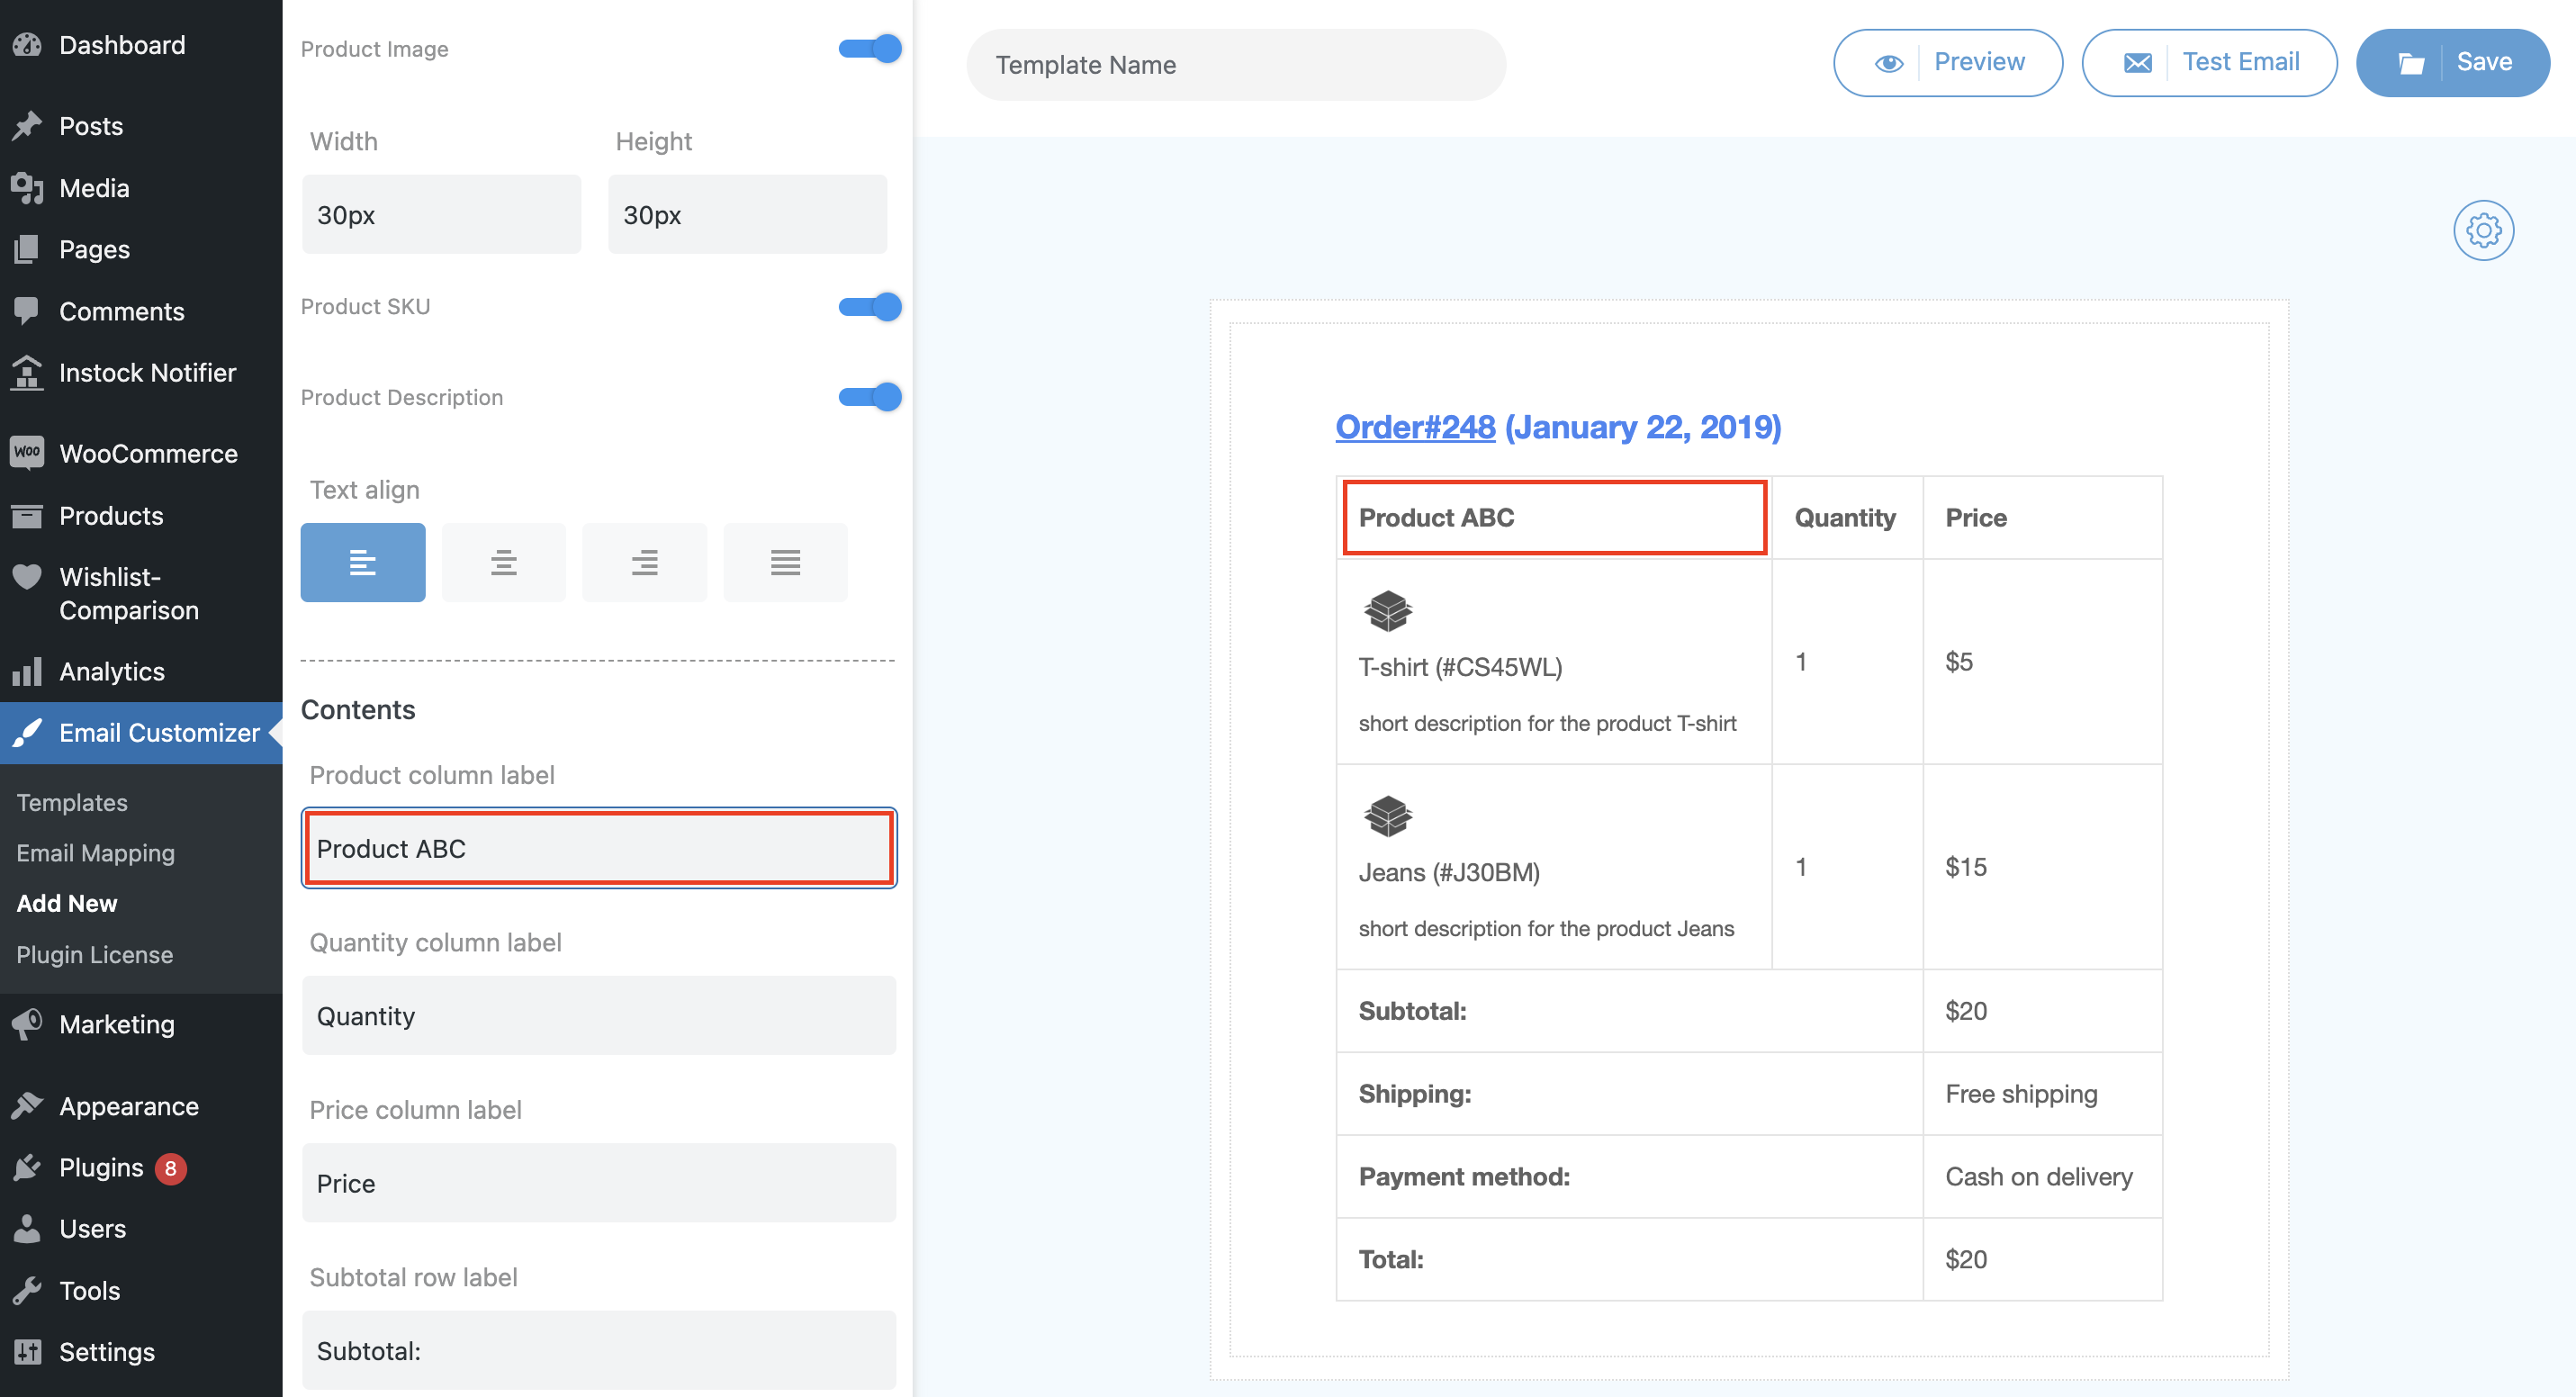
- Click on the pencil icon after adding the Order Table to your template.
- From the dashboard, you can add the product SKU, Product short description, and product image by enabling the display option from Content Properties under the Order Table. You can also adjust the size of the image to be displayed from here.
- Below that there is the content section in the dashboard below named that you will find in the Order Table.
- From here you can edit the titles in the table and add your personalized content as titles.
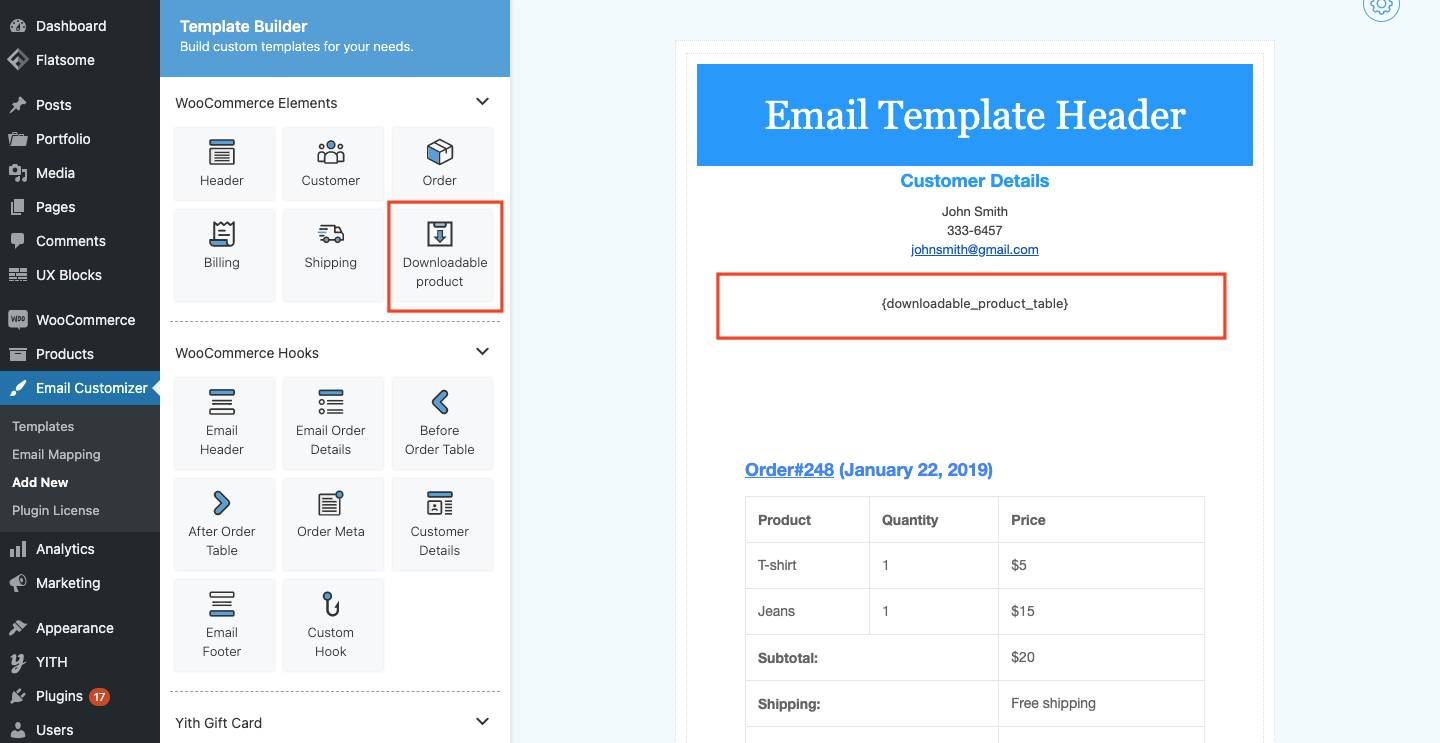
Downloadable Product
The Email Customizer For WooCommerce plugin lets you show the downloadable product data in your email template.
For inserting a downloadable product element:
Open the template builder > WooCommerce Elements.
Drag the Downloadable product to your email template. To delete the inserted element, hover on the element and click on the delete icon. The element will be deleted.
To set a product as downloadable:
Choose the desired product from the Products > All Products. Once the product is chosen, select the Downloadable checkbox to add the specific file and update the related fields.
Enter the Download limit and Download expiry in the corresponding text boxes. So, the customer gets a proper idea about the product downloads.