Display Custom Fields in Emails
Any field can be chosen to display in an email by enabling Display in Admin emails/Display in Customer emails checkboxes in field properties. The fields can be displayed either above or below the customer details. For changing the display position:

- Go to Checkout Form → Advanced Settings.
- From the Fields display position in the email, choose the position you require.
- Save the changes.
Display Custom Fields In Order Thank You Page
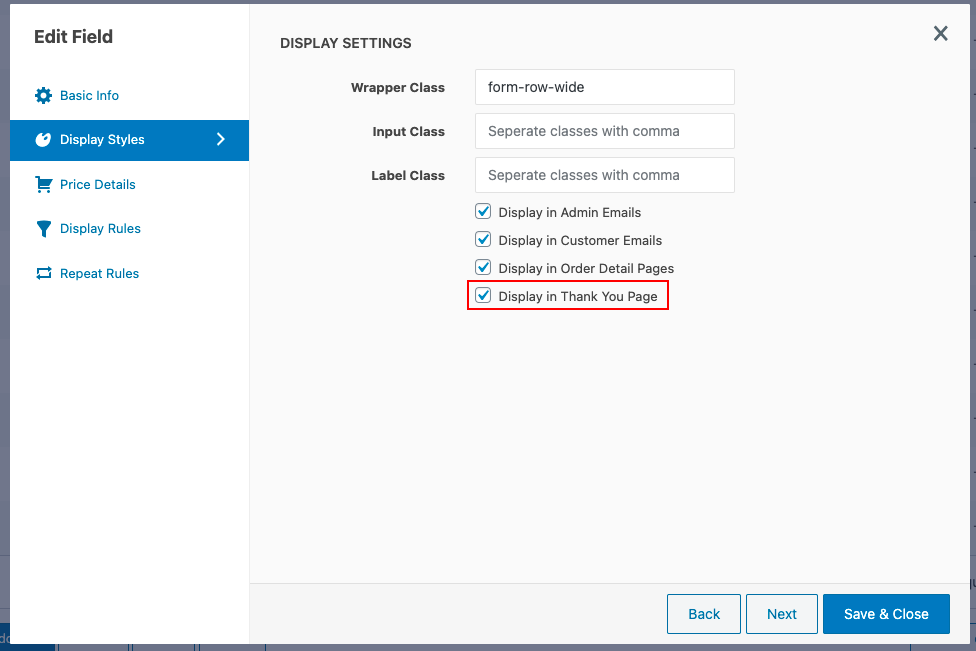
You can display the custom created fields on the Thank You page.
Follow the below steps to display custom fields on the Order Thank You page:

- Navigate to Checkout Form > Checkout Fields.
- Click Add/ Edit field to open the Add/Edit field pop-up.
- Go to Display Styles.
- Enable the option Display in Thank You Page.
- Save the changes made.
Display Custom Fields On My Account Page
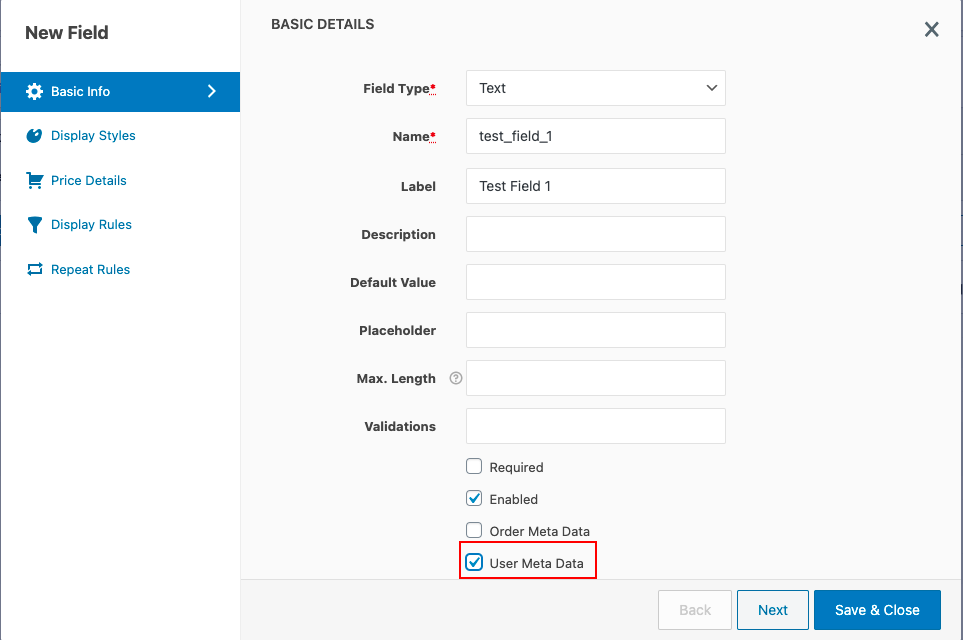
In order to display the Custom fields in the My Account page, enable the option User Meta Data. The custom fields of Billing and Shipping will be displayed on the My Account page → Addresses → Corresponding Address page(Billing or Shipping). The custom fields created in the Additional info section and in the custom sections will be displayed at the My Account → Account details tab. Steps to enable the display of the Custom fields at the My Account page:

- Navigate Dashboard → WooCommerce → Checkout Form.
- Click Add/ Edit field to open the Add/Edit field pop-up.
- Go to Basic Info.
- Enable the option User MetaData.
- Save the changes.
Display Fields In Order Table Column
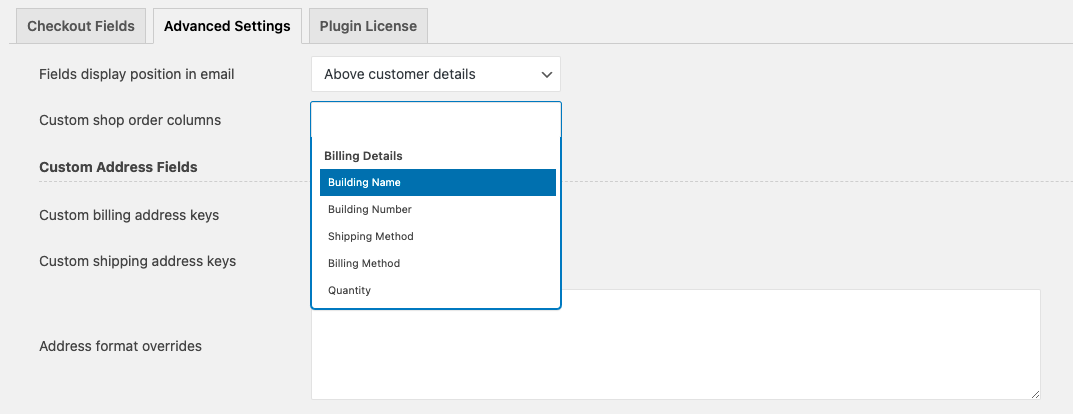
Any custom fields and their values can be chosen to display as a column in the Orders tab in the WooCommerce dashboard. For this,

- Go to Checkout Form → Advanced Settings.
- In the Custom shop order columns field, click and choose whichever fields you need to display as columns in Orders.
- Save the changes.
 Getting Started
 Advanced Settings
 For Developers
 Frequently Asked Questions
 Compatible Plugin & Themes
 How
How